Eye-Yi-Yi!
 We’re almost done with Spring Semester and in between studying for finals and doing my homework, I’m working on projects for upcoming books through PolyMarket Press, my burgeoning publishing empire.
I went back to college to learn the programs needed for publishing, and I’m now one Business Math class away from an Associate of Applied Science degree in Media Graphic Design (Print and Publication). I’ve taken a lot of art classes along the way too, which, though they don’t count towards the degree, have been wonderful learning experiences in ceramics, metal work, and watercolor as well as web design and graphic arts.
I’m signed up to finish this degree during summer semester–along with finishing several new printed books and E-books. Some are mine, and some are with other artists and authors. I’m excited to see the growth of skill and projects and the forming connections that strengthen both the work and the workers.
 I’m also getting back to working with polymer clay now that the weather is turning warm again. I’m documenting the progress of dolls for Making Faces, Molds & Forms.
That includes new forays into ball jointed figures and making set-in eyes as well as painting eyes on clay and on fabric.
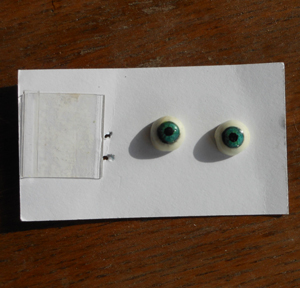
Here’s a look at a sketch for ball jointed dolls in several scales and a pair of eyes that are part of the 15 inch doll I’ve started. I’ve got the foil armature covered with a layer of paper mache, all ready to cover with polymer as soon as school is out and we are on break. It was easy to work to the right size with a sketch. Thats not something I usually do, but I wanted to give it a try along with with making the ball joints instead of a single pose sculpt.
The eyes are shown on the back of a business card, to give you the scale. They are around 1/2 inch in diameter. I’ll be making lots more too, as I’ve got dolls to make and tutorials to write and shoot.
They just HAPPEN to be sizes that go with the projects I’m putting together for Think Inside The Box-–which will feature many projects that transform boxes into beautiful miniatures in several scales and styles!
Here’s the armoire that is part of that doll’s suite. She gets an armoire, a bed, a bedside table, a rug and other decorative details, and a wall.
There will be variations on that in other sizes and styles; but this is a start!
-
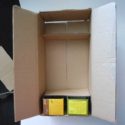
- a frozen food box with 2 tea boxes, with a priority mail box added at the base next
-

- two layers of paper mache and dowel rod
-

- ready to line the drawers with paper, add knobs to the doors, and some wire hangers
More Kumihimo and Metal Fun
 I’ve been having a lot of fun going through my beads and ribbons and fibers to make lots of kumihimo braids and turn them into necklaces.
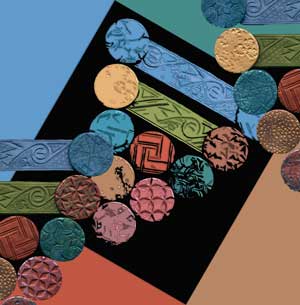
I’m using bronze and copper metal that I’ve etched to make the end caps, and I’ve etched lots of pendants in bronze, brass, copper and even a bit of silver here and there, including mehndi style hands.
There’s been lots of cutting and soldering, filing and sanding going on in the daytime and braiding on the kumihimo wheel at night.You can see some of the endcaps and hand pendants here.
I am making the jump rings from bronze wire, and they will connect pendant pieces to the necklaces once I solder them closed. And file them, and sand them, and patina them and buff them up on the raised spots to a nice shine!
I have another dozen or so of the starfish and shells to cut out, but at least the metal has all been etched, so that necklace is well on the way–a mermaid’s delight with lots of coral and pearls, alabaster and knotted rope.

My goal is 20 necklaces by the 1st week of May, as well as finishing up a collection of anodized titanium earrings and pendants, some of which will be on the kumihimo necklaces.
So much to do–but it comes along if I work on it every day.
Today, I took a few pics of what I did earlier this week and I’m going to do my math homework and then string up another set of bobbins for the next necklace, which will be purples and silver.
I’ve already shopped in my bead drawers and picked out what I need, just need to string up all 8 bobbins and I’ll be ready to go!
Beads and Braids

2012 was filled with lots of learning curves; the final arc of some and the beginnings of others, plus lots that are ongoing.
I’m blessed with creative family and friends, and together we got a lot accomplished and have all sorts of plans for things to do in 2013, including school, art, writing and publishing. Last year a group of us took a local class and learned bead crochet. Some good friends in Houston gifted me with a kumihimo disc and bobbins when I was there and assured me it was fast and easy, and they were right!
 I’d say that kumihimo with beads is at least four times faster than bead crochet, but both have different good points that mean I’ll be doing some of each in the future. I look forward to trying crochet lace using wire and beads.I like the look of my hand-dyed silk ribbons and beads in braids also. They look great with my little faces and hands, especially when combined with a bit of seed bead embroidery, a little beaded fringe…
I’m having a lot of fun trying different variations of fibers, ribbons, chain and cord and using some of the wonderful beads I’ve collected over the years with the idea of making some beautiful necklaces to display my work. You have to have samples if you want to sell components!
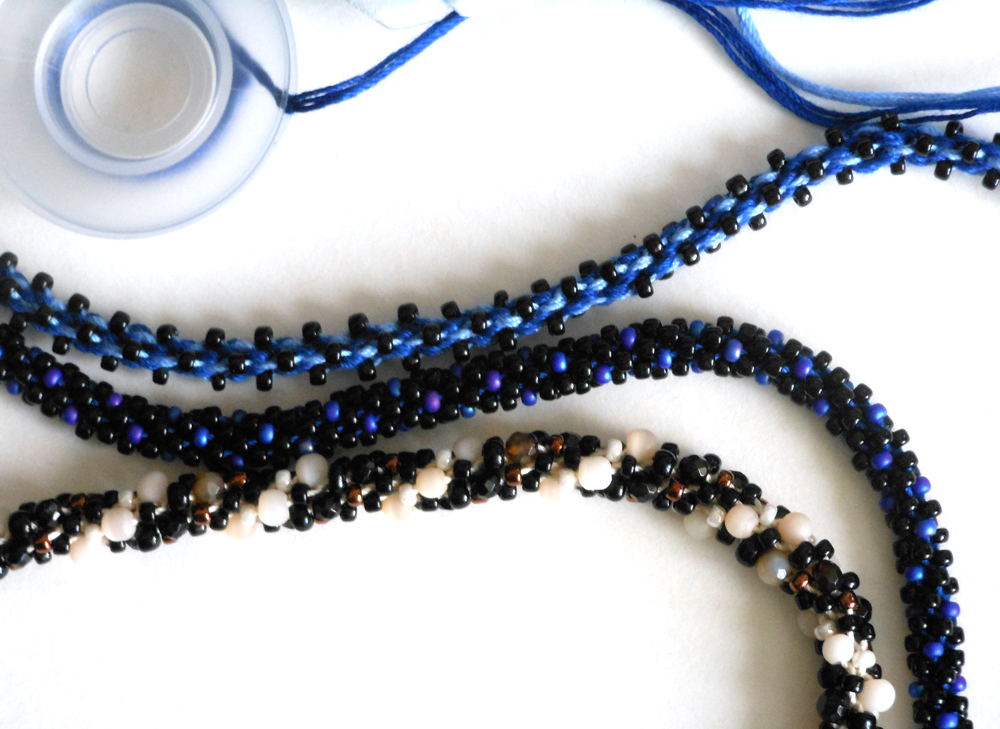
Crochet and kumihimo braids both make great beaded ropes for using with large focal beads and pendants—like the ones I make using polymer, ceramics, metal and my friend Mad Margie’s fused glass. The two blue and black cords shown here will go with one of her dichroic glass pendants. The black and cream spiral will probably go with a face pendant…or perhaps an etched metal hand. I have etched metal ends and clasps made from bronze and silver to use with them too. I love how things all come together, eventually.
I’ll be putting finished jewelry with dyed textiles made into wraps, and I’ll take more pics when it is done. I’ve even got plans for professional art photographer Ricardo Acevedo to do a shoot this year–but first, I have a lot of finishing up to do. I get to bring together so many different creative techniques and processes, with lots of color, pattern, and texture. What a great recipe for a happy new year!
Houston International Quilt Festival 2012

I’m home from Houston, after another wonderfully colorful and inspirational Quilt Festival. What fabulous things people can make with fabric and fibers of all kinds!
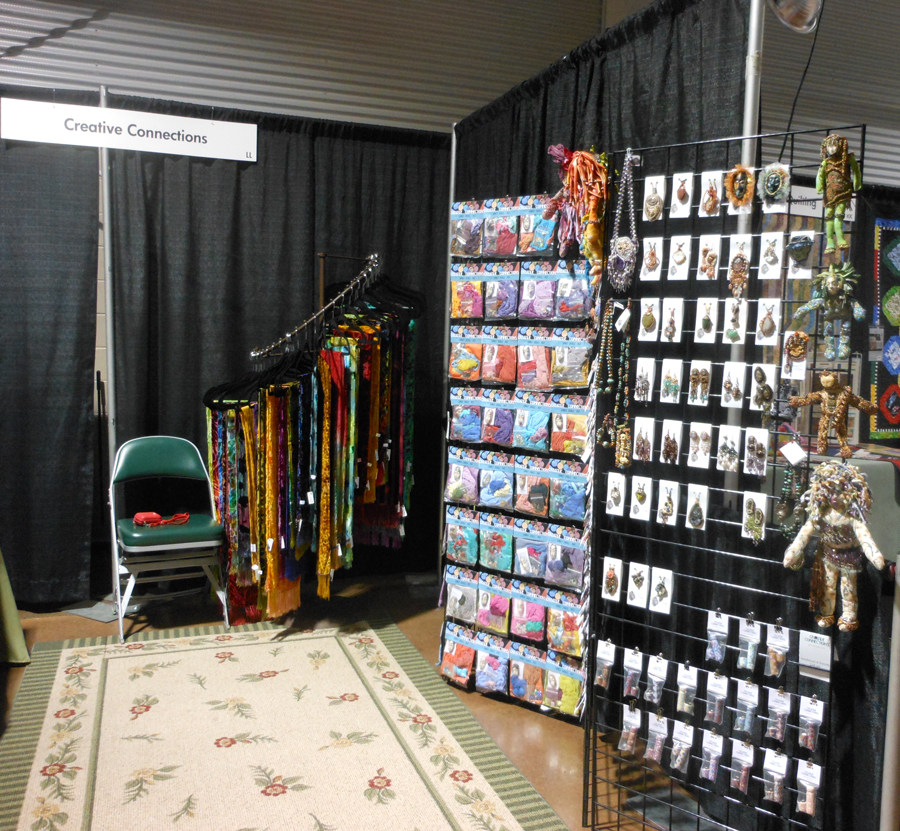
With an eye towards historical, vintage and cutting edge (literally; there are several booths selling scissors and sharp tools and pointy things of all sorts) textiles and fiber arts, there is so much to be seen at the George R Brown Convention Center that you just can not do it all in one day. It is as large as 9 football fields, with over 1000 vendors–and I was one!–plus amazing exhibits of quilts, textiles from around the world, art dolls and more.
I had a wonderful time and came home inspired, as always, with how to change my booth display ( more grids–they work really well for me, pare things down and keep back-stock), what to make for next time (more of the Painted Face Bags and more polymer clay Victorian Hands, more of my dyed fabric in wearable form that goes with more colorful jewelry!
But that’s next year…. now its time to finish up final projects at school and get little rest over the upcoming holidays. Maybe I’ll have time to learn how to learn to use the kumihimo braiding wheel my friends got for me at the show!
Rocky Mountain Quilt Festival 2012
Laura Humenik of Lands Glory Artisan Jewelry and I had a booth at the Rocky Mountain Quilt Festival this year. I saw lots of beautiful quilts while there, and the dolls from the Hoffman challenge too. While sales were slow, it was good to get out and try my new grid display and new ways of presenting things in the booth. It’s also a great way to see what is popular in this area and what I need to make more of before the next upcoming shows. All in all, we were glad for a chance to try and new venue and see how everything looked set up in this configuration! I really do like my new grid displays. This time I have them set up like a folding screen. Here are some pics from the show–click the image to see a larger version.