Jan 12, 2014
 I graduated from Front Range Community College with my Media Graphic Design degree, and I’m going to continue taking ceramics, jewelry, and other art class as I can afford them. We have some GREAT classes and instructors there, and I will stay on as a student or community member of the FRCC Art Club. We are seeking new officers there, as Josh and I are no longer full time students on this campus.
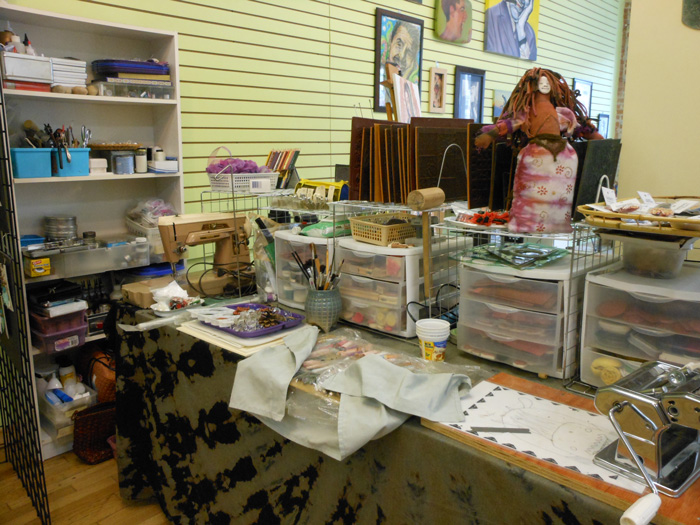
One of the things I’m doing in this new year is new art and instruction in a new studio space. Located at 364 Main Street in Longmont, the Kay Carol & Priscila | Gallery and Working Art Studios is home to 4 artists in residence, instructors, art groups and community organizations who meet there, and a gallery plus meeting/classroom/workshop space. I’m very fortunate to be there, and I have started a website there with a calendar and a page that lists upcoming classes and events.
I’ve already had fun with several Spirit Doll sessions, and here you see the new faces and molds I made during the polymer clay face sculpting class. I’m looking forward to using them with polymer, ceramic, bronze and silver in the upcoming months. They’ll be useful in the upcoming Miniature Mask Swap, and in the month long exhibit of masks and art from my PolyMarket Press books in June. That may sound like a long way off, but as I have so many things to make and write about for upcoming books as well as hundreds of masks to mount into large frames, fabric to paint, jewelry to finish and more, it seems like only a few weeks away. However–now I have a workspace in which to do it!
Please do come see me there during open gallery hours 10:40am-4pm Fridays and Saturdays. Or, book a class with a friend or a group. Individual instruction is available as well–we are dedicated to spreading the creativity around.
Jun 20, 2013
 I’ve made great progress on projects this Spring, and I’m celebrating the Summer Solstice working on more.
I’ve learned a lots recently–from odd count peyote stitch and right angle weave beading to making my first ball jointed doll in polymer clay.
Meet Aurora Rose! I really like how she turned out; not bad for the first try. Of course, I’ve made a few dolls of various sorts before…but I also know that each one gives you experience in new things, and she certainly did.
I rearranged my living room and laundry room to provide more work space and access to all my fabric and my sewing machine. After a good cleaning and oiling, it runs like a champ, and its been doing so since 1960. I just love my heavy old Singer, and wouldn’t trade it for the newer models.
I got patterns for her clothing from Matisse Fashions (Brenda is an incredible seamstress/designer) and found that I remembered how to sew pretty well but will no doubt improve with more practice this summer. Lots to do!
She’s show here in a variation of the pleated chemise and drawers patterns. I didn’t add the waistband, and left it a bit long to be a set of cool cotton pj’s made of fine cotton lawn and embroidered with peach roses and teal green leaves.
Dharma Trading Co. carries cotton lawn and many other wonderful fabrics for use in doll making and clothing too.
See more info and pictures of how Aurora Rose came together here.
May 6, 2013
 We’re almost done with Spring Semester and in between studying for finals and doing my homework, I’m working on projects for upcoming books through PolyMarket Press, my burgeoning publishing empire.
I went back to college to learn the programs needed for publishing, and I’m now one Business Math class away from an Associate of Applied Science degree in Media Graphic Design (Print and Publication). I’ve taken a lot of art classes along the way too, which, though they don’t count towards the degree, have been wonderful learning experiences in ceramics, metal work, and watercolor as well as web design and graphic arts.
I’m signed up to finish this degree during summer semester–along with finishing several new printed books and E-books. Some are mine, and some are with other artists and authors. I’m excited to see the growth of skill and projects and the forming connections that strengthen both the work and the workers.
 I’m also getting back to working with polymer clay now that the weather is turning warm again. I’m documenting the progress of dolls for Making Faces, Molds & Forms.
That includes new forays into ball jointed figures and making set-in eyes as well as painting eyes on clay and on fabric.
Here’s a look at a sketch for ball jointed dolls in several scales and a pair of eyes that are part of the 15 inch doll I’ve started. I’ve got the foil armature covered with a layer of paper mache, all ready to cover with polymer as soon as school is out and we are on break. It was easy to work to the right size with a sketch. Thats not something I usually do, but I wanted to give it a try along with with making the ball joints instead of a single pose sculpt.
The eyes are shown on the back of a business card, to give you the scale. They are around 1/2 inch in diameter. I’ll be making lots more too, as I’ve got dolls to make and tutorials to write and shoot.
They just HAPPEN to be sizes that go with the projects I’m putting together for Think Inside The Box-–which will feature many projects that transform boxes into beautiful miniatures in several scales and styles!
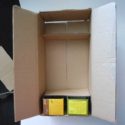
Here’s the armoire that is part of that doll’s suite. She gets an armoire, a bed, a bedside table, a rug and other decorative details, and a wall.
There will be variations on that in other sizes and styles; but this is a start!
-
-
a frozen food box with 2 tea boxes, with a priority mail box added at the base next
-

-
two layers of paper mache and dowel rod
-

-
ready to line the drawers with paper, add knobs to the doors, and some wire hangers
Aug 17, 2010
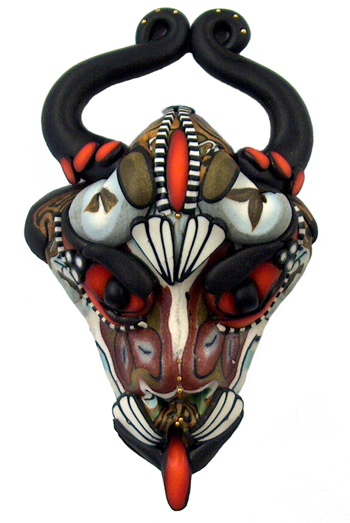 I’ve switched from the active production of masks, faces, and beads to taking pictures and editing, racing towards my deadline to put together “A Collection Of Polymer Clay Masks” and have it in print by Halloween. It can be done!!–but only if I put in some serious Photoshop hours. So that’s what I’m doing; going through miniature polymer clay masks I’ve made and collected since 1997.
In the process of participating in and hosting “swaps” for these among polymer clay artists around the world, I’ve amassed an amazing grouping of these little beauties–each measured to fit inside a 3 inch square.
After I photograph them, my husband will mount them all in framed pieces for display. We have one such piece with over 50 masks–now we’ll have several, and we’ll be doing a gallery showing along with the book when its all said and done. The book will also include photographs of full sized masks contributed by artists for this publication.
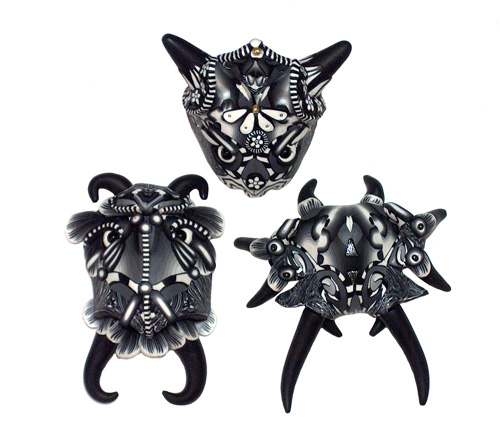
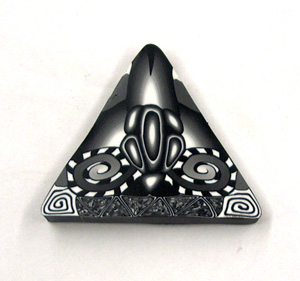 As I was going through my carefully wrapped boxes and bags of masks, and going through my file folders on the computer, I found images I took during a tutorial by Donna Kato and Shane Smith. They had been making mini-masks using scraps of canes, and didn’t have enough leftover bits at this point at our retreat, so they made a cane up special for it, and then Shane made some masks to show us how they were done. We each got a few inches of the cane to play with, and I got their permission to do a tutorial with the photos. I’ve got a “Making Faces and Figures” book planned out and in the works, but its not the one I’m working on now–it’ll be a companion to this one that will show how-to, and I that is NEXT years’ project. For now, here’s a look at the cane that started these masks, and the finished pieces by Shane. Thanks so much to Donna and Shane!
Dec 12, 2009
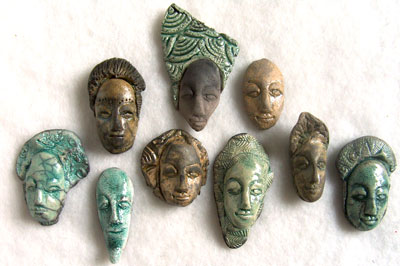
 These are some of the miniature faces I made in my ceramics class, raku glazed and fired. I like the fiery nature of taking these out of the kiln while still red hot and dumping them into the trash can with shredded paper, then coming back an hour later to see how they look!
I made a lot of different faces using some of my own silicon molds that I created using my polymer clay originals. Thats something else I really enjoy—the creative connections that different media allow.
 These first four faces are all made from the same mold, but look very different, partly because of the varying glazes. The fourth one has no glaze at all on the face, and the bare clay turns black when fired.
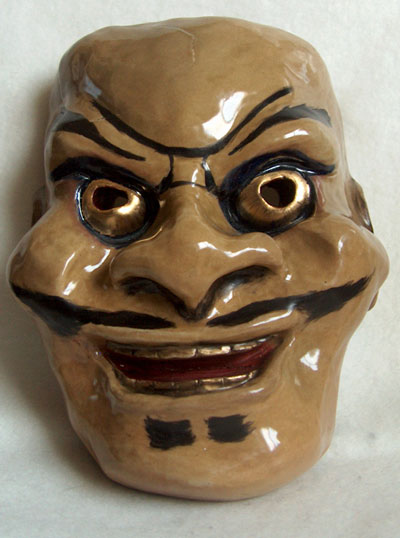
Here are two masks that are full sized replications of traditional Noh mask characters, the Maiden and the Fox God. The Maiden’s chin broke during the bisque firing, so I painted her with acrylics.
The Fox is glazed and details were added after firing, like the gold leaf around the eyes using a Krylon pen.
In addition to faces, I also got to try my hand at throwing on the wheel, and managed to create several cups, a teapot, three lidded vessels and two small vases. I had a great time in my ceramics class and look forward to taking ceramics2 next semester!!
Aug 1, 2009
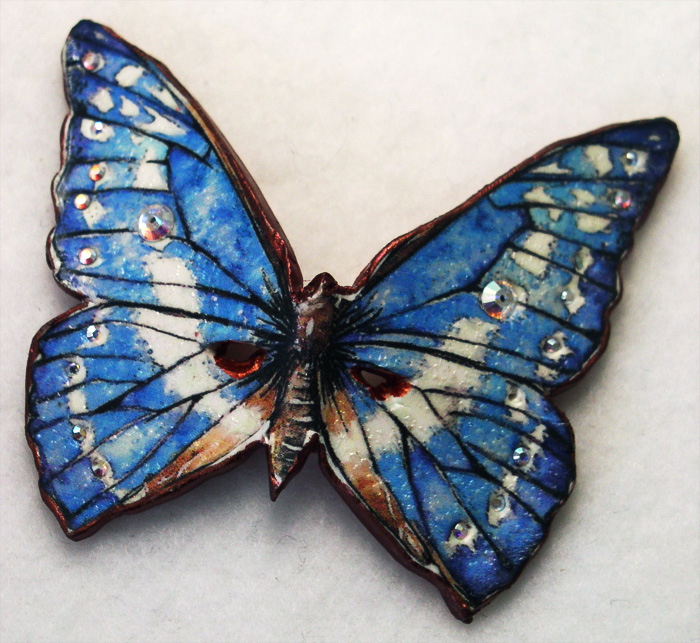 In the most recent polymer clay miniature mask swap (an annual event prized by all who participate) I not only traded my own masks for a collection of 100 wonderful miniatures made by others, I also received some great goodies as gifts!
Patty Barnes did an entire collection of vibrant butterfly masks and all ten were different.
 She’s using a transfer technique and embellishing with sequins and swarovski crystals. It was very hard to choose, by my efforts were rewarded with not just one, but an additional butterfly mask as a gift. It made it easier to let the others fly on to their new homes!
Rebecca Wells- Stout sent an additional mask as well, and I love the extruded red hair on this one! She’s beautifully fierce. Rebecca has used slices of canes and crystals to dress her up.
Rev. Byrd Tetzlaff sent along this colorful character that she calls “Charlie Chaplin on acid” and I can see exactly why she’d say that! I’m told the man had a great deal of energy and was a colorful character himself but not as much as this version, which I like very much!
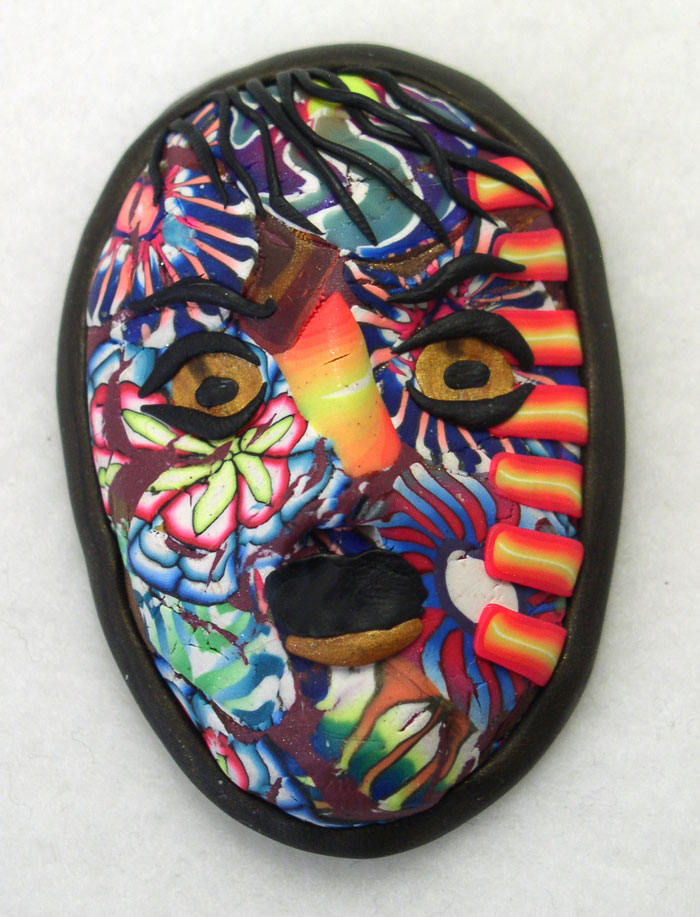 These are only a few of the hundreds of masks that I’ve collected from my years of making and swapping miniature polymer clay masks. Next up for Fall semester at college I’ve arranged an independent study course to combine my Adobe InDesign, Photoshop and Illustrator classes and skills into creating new books, and the mask book is one of the projects involved. So after having a delay of more than a year, I’ve got the tools and the skills and (hopefully) the time all coming together to allow me to work on this long awaited project!! Stay tuned for more developments as they happen.
Jun 22, 2009
 Click the pic to see a larger version.
These whimsical wonders are 10 more miniature polymer clay masks from the 2009 Internet Mask Swap. Created by Ellen Bellenot Rumsey, these little works of art are each small enough to fit in a three inch square. She’s used an amazing array of textures and colorful pearl-ex powders. The mica in the powders and in the gold polymer clay give it all incredible glowing lustre.
I’m taking a few hours away from my school work to catch up on taking pictures from the Mask Swap and from the Dyeing Days. These are two huge annual events that take around a week to put together and somehow managed to both happen within a month of each other this year, and along with going back to school full time. We got tremendous amounts done and both events went very well, but I havent had any time to chronicle and share the results.In fact, the massive amount of reading and computer time I put in for the 4 classes I’m taking leave my eyes feeling as though they look very much like the ones in these masks.
I’m going to play hooky from homework once in a while and get some pictures up, so look for more soon! IS it playing hooky to take pics and edit them in photoshop when your classes are in digital photography and photoshop2? hmmm, perhaps I should take an ethics class and see if my homework there answers the question there…
 I graduated from Front Range Community College with my Media Graphic Design degree, and I’m going to continue taking ceramics, jewelry, and other art class as I can afford them. We have some GREAT classes and instructors there, and I will stay on as a student or community member of the FRCC Art Club. We are seeking new officers there, as Josh and I are no longer full time students on this campus.
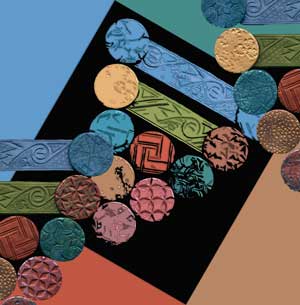


 These are some of the miniature faces I made in my ceramics class, raku glazed and fired. I like the fiery nature of taking these out of the kiln while still red hot and dumping them into the trash can with shredded paper, then coming back an hour later to see how they look!
 These first four faces are all made from the same mold, but look very different, partly because of the varying glazes. The fourth one has no glaze at all on the face, and the bare clay turns black when fired.


