May 20, 2017
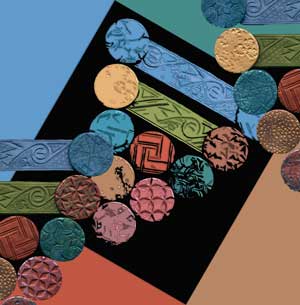
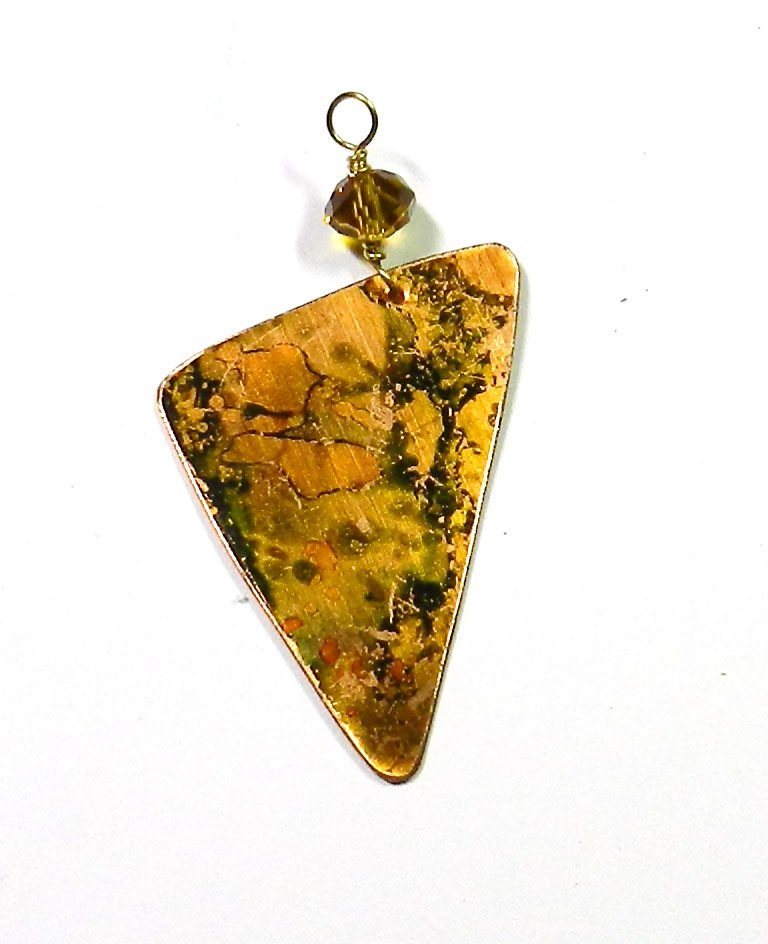
 The process of transformation can be fascinating–I love starting with a flat, shiny sheet of copper, brass, bronze or nickle silver and then using electricity, fire, hammers, rollers, and chemicals to change it completely. Each step along the way–patterns, textures, shapes and colors is part of a trail of discoveries. After etching, hammering, cutting, creating a patina, waxing or spraying, grinding, filing and sanding–I have developed a relationship with the metal!
Some pieces I make into earrings, pendants, and bracelets. Cuffs are great because they offer a larger “canvas” to show off the gorgeous colors that are possible with patinas. The processes involved are a mixture of precision and serendipity, and seeing what occurs is a gift that I get to unwrap each time. Sometimes surprising, always fun to explore; each piece is individual.
In addition to metal, wood, ceramics, polymer clay and textiles, I’m changing things around here at Creative Connections as well. I’ve been building up inventory all winter long, and now that the snows have melted and Spring is here, its time to get things out to market.
I am now selling finished jewelry and components for designers who want to use them in their own art. The Store section here at Creative Connections is just getting started, and will continue to grow, so do please check back again soon to see what is new!
Jan 12, 2014
 I graduated from Front Range Community College with my Media Graphic Design degree, and I’m going to continue taking ceramics, jewelry, and other art class as I can afford them. We have some GREAT classes and instructors there, and I will stay on as a student or community member of the FRCC Art Club. We are seeking new officers there, as Josh and I are no longer full time students on this campus.
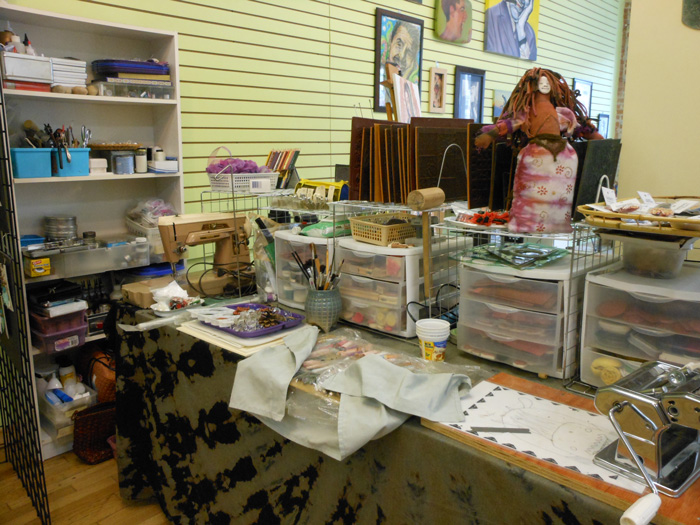
One of the things I’m doing in this new year is new art and instruction in a new studio space. Located at 364 Main Street in Longmont, the Kay Carol & Priscila | Gallery and Working Art Studios is home to 4 artists in residence, instructors, art groups and community organizations who meet there, and a gallery plus meeting/classroom/workshop space. I’m very fortunate to be there, and I have started a website there with a calendar and a page that lists upcoming classes and events.
I’ve already had fun with several Spirit Doll sessions, and here you see the new faces and molds I made during the polymer clay face sculpting class. I’m looking forward to using them with polymer, ceramic, bronze and silver in the upcoming months. They’ll be useful in the upcoming Miniature Mask Swap, and in the month long exhibit of masks and art from my PolyMarket Press books in June. That may sound like a long way off, but as I have so many things to make and write about for upcoming books as well as hundreds of masks to mount into large frames, fabric to paint, jewelry to finish and more, it seems like only a few weeks away. However–now I have a workspace in which to do it!
Please do come see me there during open gallery hours 10:40am-4pm Fridays and Saturdays. Or, book a class with a friend or a group. Individual instruction is available as well–we are dedicated to spreading the creativity around.
Dec 31, 2011
 Not only have I made a start on the pink and purple spirit doll, I’ve also had some great ideas recently about how to combine textiles, metal and clays to do bead enhanced spirit dolls with ceramic and metal bodies. I’m looking forward to getting back to school in the new year to make up examples of what I’ve been seeing in my imagination. A few things finally fell into place with the “how will I do that?” aspects and I look forward to realizing these very soon.
In the meantime, there’s lots to do with making up Spirit Doll Kit Samples and getting the bits and pieces all pulled together for making the new ladies and producing new finished work to get out to stores and galleries.
So much to do–and I do love doing it! Over the semester break I’ve had a chance to rest, see family and friends, read, and to delve into my art supplies to work on old and new projects both.
What a wonderful year of artistic and personal opportunities its been in so many ways…and I’m looking forward to more in 2012!
May we all appreciate and cherish the marvelous parts of our lives, past present and future…with lots more to come!

Dec 23, 2011
 I’m enjoying the break between semesters and taking some time to restock the shelves at my Etsy store. I’ve had a very busy and productive year in 2011, and now it’s time to share some of the results.
I’ve revamped the packaging and I’m putting together more Spirit Doll Kits with ceramic and polymer clay faces that go with dyed cotton doll bodies, fabrics and trims.
In addition, I’m making up the contents of each kind of kit for a sample or two, and taking pictures as I go.
 Here’s a picture of the contents of a Large Spirit Doll Kit. I’m going to spend a few days working on this doll, adding some beads and silk flowers from my stash of stuff, and do a bit of embroidery.
I’ve been wanting to do a little needlework and this is a perfect spot for some! I’ll be taking pictures as I work on the doll, and I’ll post an update after Christmas.
Large Spirit Doll Kits like this one have contents that include:
- one ceramic face, hand drawn and painted with under-glazes and clear glaze, affixed to
- one (premade) 12″ hand dyed cotton doll body,
- one 18″x 22″ (fat quarter) piece tie dyed cotton jersey
- assorted dyed fabrics, trims and embellishments

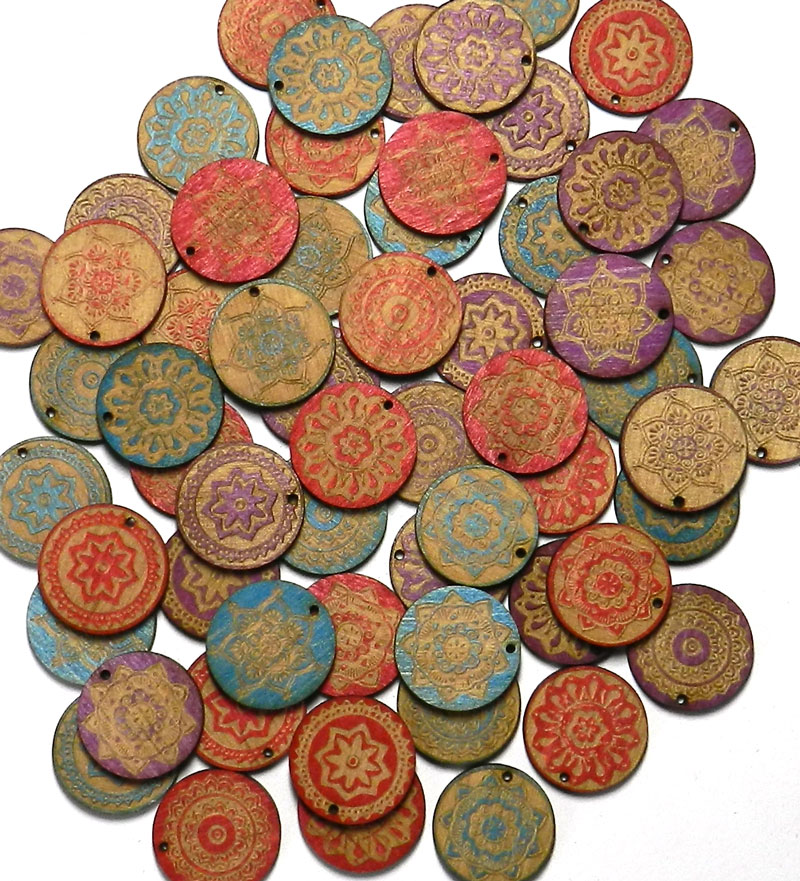
I also sell the ceramic faces by themselves.
I made a specially shaped cutter from a strip of aluminum, cut each face from a rolled ceramic sheet, then shaped each one with a curve.
After they dried, I sanded each one to get smooth edges and a good surface for drawing the faces.
After the pieces were bisque fired, I drew and colored them all in with painted under glazes and gave each a finishing coat of clear glaze before firing them all again!
The results are colorful “dolled up” ladies all ready to turn into dolls, or wearable art.
Aug 19, 2011
Not that I’ve exactly been lollygagging on the divan eating bonbons watching Oprah–in fact, I hear she’s not even on tv any more. Not that I would have had time to notice however, with a very busy summer! It has led up to a very busy Fall semester, coming right up starting on Monday. I’m looking forward to it, with great classes to take and to teach and lots more art to produce, plus the upcoming International Quilt Festival in Houston to continue preparing for, in November.
Here are three mermaids that I finished up in ceramics this summer. One broke, but she’s lovely anyway and will be displayed with some strategically placed fishnet to cover her cracks. I like them, and will make a couple more soon, including one as a fountain for a friend’s garden.
Apr 22, 2011
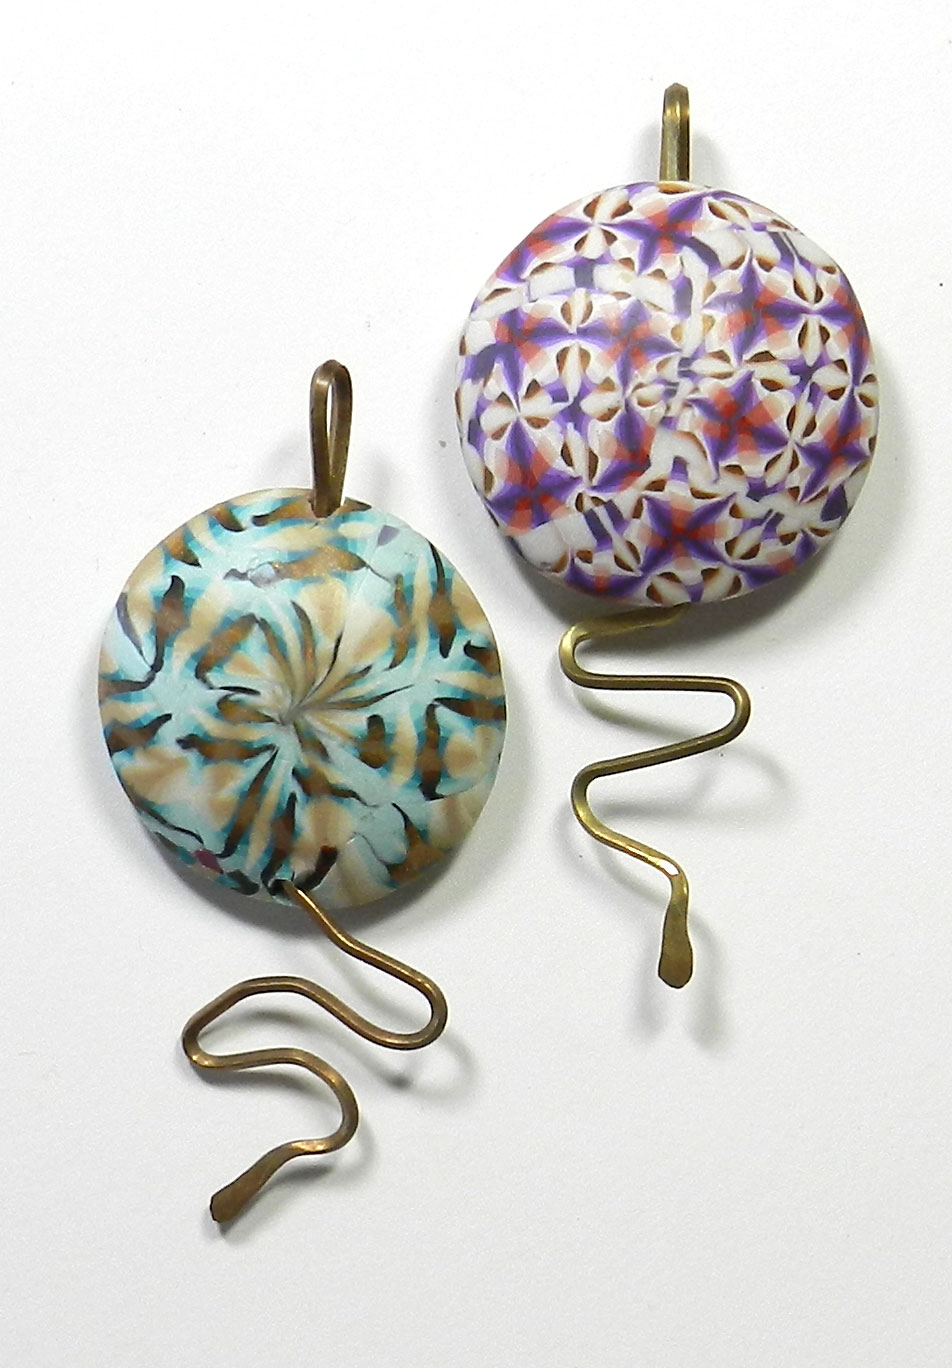
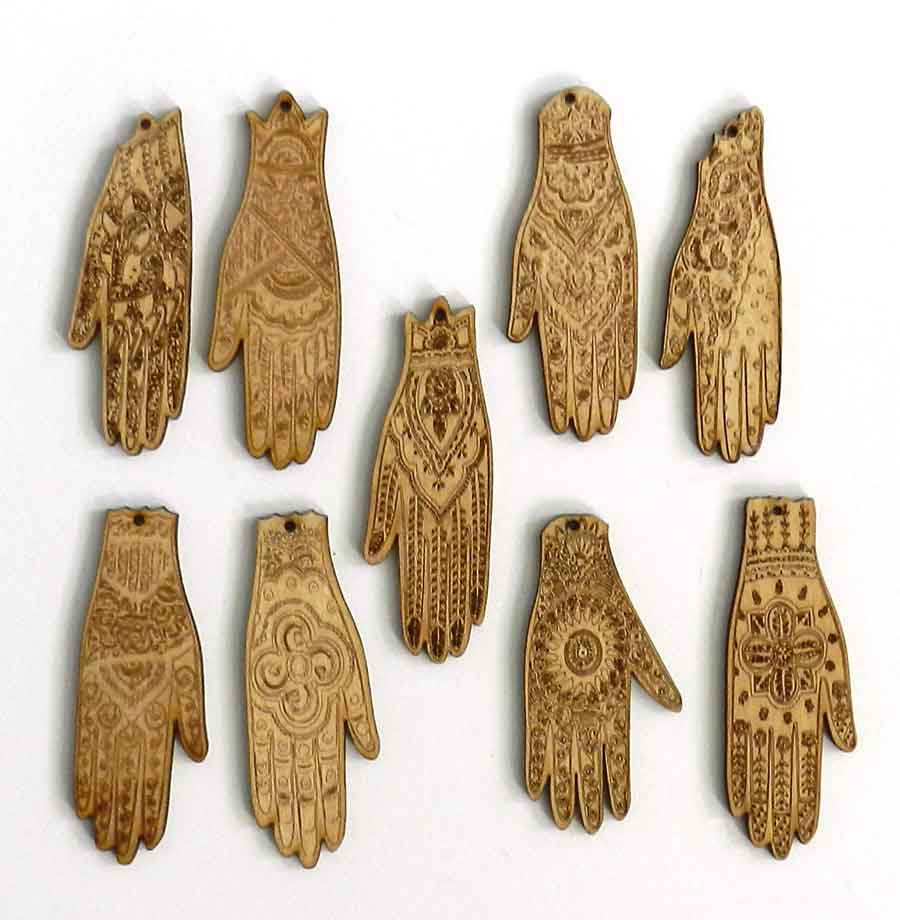
 I’ve been busy with all of my classes at Front Range Community College this Spring. That’s true of the classes that I’m taking now, the ones I’m preparing to take in the Fall, and the ones I’m listing to teach this summer through the Continuing Education department. We are still working out final dates as the Boulder County Campus in Longmont CO is closed on Sundays, so the classes listed as being on Sunday now will be moving to a different day, probably Friday. But that’s ok–online registration isn’t open yet anyway. I’ll update the dates and the links to register very soon, but for now you can take a look at what classes are coming up! You can also see polymer clay beads on wire pendants I made in our metal jewelry classroom and how I strung the hand bead that I made of ceramics and PMC (Precious Metal Clay) that was featured in the previous post–here it is now.

Jan 30, 2011
 In addition to teaching classes in polymer clay use through Front Range Community College’s Continuing Education Department, I’m also still taking classes there. I love learning, no matter which side of the flow I may be on at any given moment! This semester I’m taking advanced classes in Adobe Illustrator, Ceramics and Metal/Jewelry. I’m starting to cross the lines from studio to studio now– like using polymer clay originals to make plaster molds for use with ceramics that I then cover with glazes, acrylic paints, polymer clay, or even metal! Or like using PMC (Precious Metal Clay) made into a liquid slip to coat ceramic flowers or faces that I have made by hand forming or by using silicone molds that I made from polymer clay originals…you can see how the lines are beginning to blur!
The items shown here are made with ceramics and PMC silver, and then I use Liver Of Sulfur to give them a patina. You can see the difference between the silver finish that has not been given a patina and those pieces that have been treated here. I much prefer the antiqued effect and the colors that you can get when treating the silver with LOS. Both are pretty darn cool though, and by putting the PMC over ceramics I save a LOT of weight and still get the finish of real silver.

Jun 20, 2010
 Yesterday my friend Laura of LandS Glory Artisan Jewelry and I set up shop for the day at the Lyons Outdoor Market in the beautiful foothills of the Rocky Mountains here in Colorado. It was a gorgeous day, and we got to see some lovely art, listen to live music and do a few hours of beading on Spirit Dolls. Laura and I both enjoy seed bead embroidery and finding just the right bits and pieces to go into the dolls. There’s no pre-planned design; rather, these pieces start as a collection of bits and pieces and parts and then as they come together, other bits and pieces seem to show up and present themselves, demanding to be used. “As the spirit moves” is the way Laura and I both prefer to work, rather than using any sort of drawings plans or patterns (other than the basic doll body outline pattern that I drafted).
This project got started a few months ago, but is just now really starting to come together. I pulled a few items for this doll that included some green tie dye fabric (click here to see the slide show of textiles from our annual Dyeing Days, beads, a glass cabochon made by my fusing friend Mad Margie that I beaded, and I made a ceramic face and two ceramic buttons for her breast plate.
I cut,sewed and stuffed the body. My least favorite part is stuffing, and sometimes I just use pre-made cotton bodies that I dye, but only for smaller dolls. Its worth the turning and stuffing drudgery to get to use my own textiles… and since we are only talking about less than an hour, I somehow manage to get through it!<g> Then comes the fun part, hours of beading, adding dyed trims and other costume fun.
These dolls come together in several sessions for me, a few hours at a time. Usually as I’m working, I’ll find other pieces to integrate into the piece–like some beautiful teal dyed cheesecloth, or peacock feathers. (they’ll be part of her skirt and head dress, eventually—along with more beads!)
This time, I lost a piece. One of her busty-buttons went away somewhere in my workspace. I’d already sewed one on, so I looked and looked…nowhere to be found. I thought about making a new one to match. I thought about taking the one off and using something different. Then I realized, as I looked at her again and again, that she was just right the way she was, with only one. After all, sometimes these things happen. She’s beautiful anyway, and I choose to see her as just right, not as missing half a pair. How we look at things is just as important as how things look.
She has a sort of Amazonian Dance Hall Warrior style going on, and I love seeing her progress. I’ve got a lot still to do, with adding hair, shoes, sewing on her skirt, and sequins and beads for the other arm and leg. And of course MORE BEADS!! I’ll post another picture of her when she’s finished, and here’s how she’s looking so far.

Apr 9, 2010
 That’s a line from an old Cowsill’s song, an early Family Band that doesn’t get as much nostalagia air time as say, the Osmond or Jackson Family does now that everybody is all grown up. “She was the flower girl–well, I don’t know just why, she simply caught my eye….”
And here’s my own flower girl, a life-size ceramic mask glazed with cone-06 low fire glazes. I might have to do some more of these big masks as they are indeed fun, though pretty heavy compared to the miniature ceramic masks I make more often. And speaking of those, I am now arranging my summer schedule, and THIS year I’m taking the summer off from school to finish photos and editing for my new book “A Collection Of Polymer Clay Masks”. It is on-track for release this Fall. That’ll keep me busy, and I’ve also scheduled a trunk show and classes at Nomad Beads in Boulder where I’ll be selling miniature ceramic and polymer faces, beads, and more! Come see all the goodies on display Mother’s Day weekend, May 8-9 at Nomad Beads, 1909 9th in Boulder Colorado, and say hi; I’ll be there creating beaded Spirit Dolls and jewelry.