Apr 17, 2021
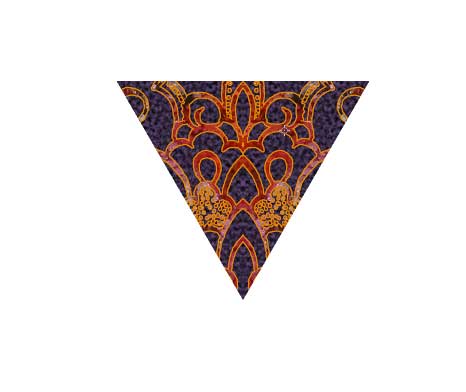
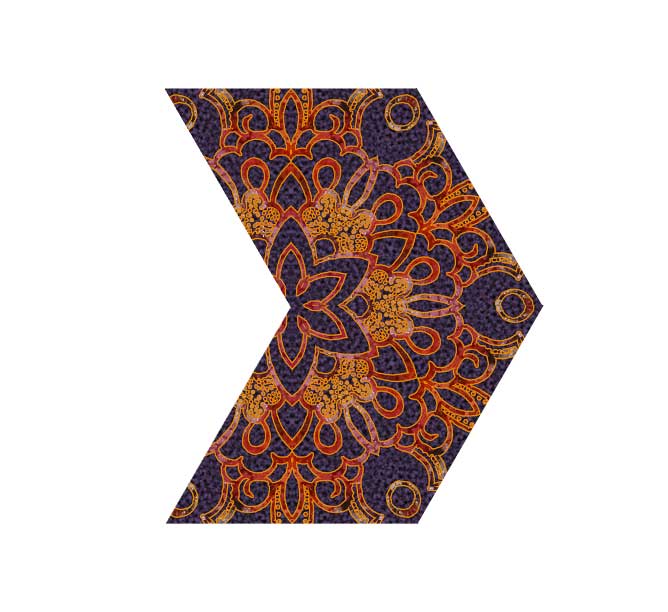
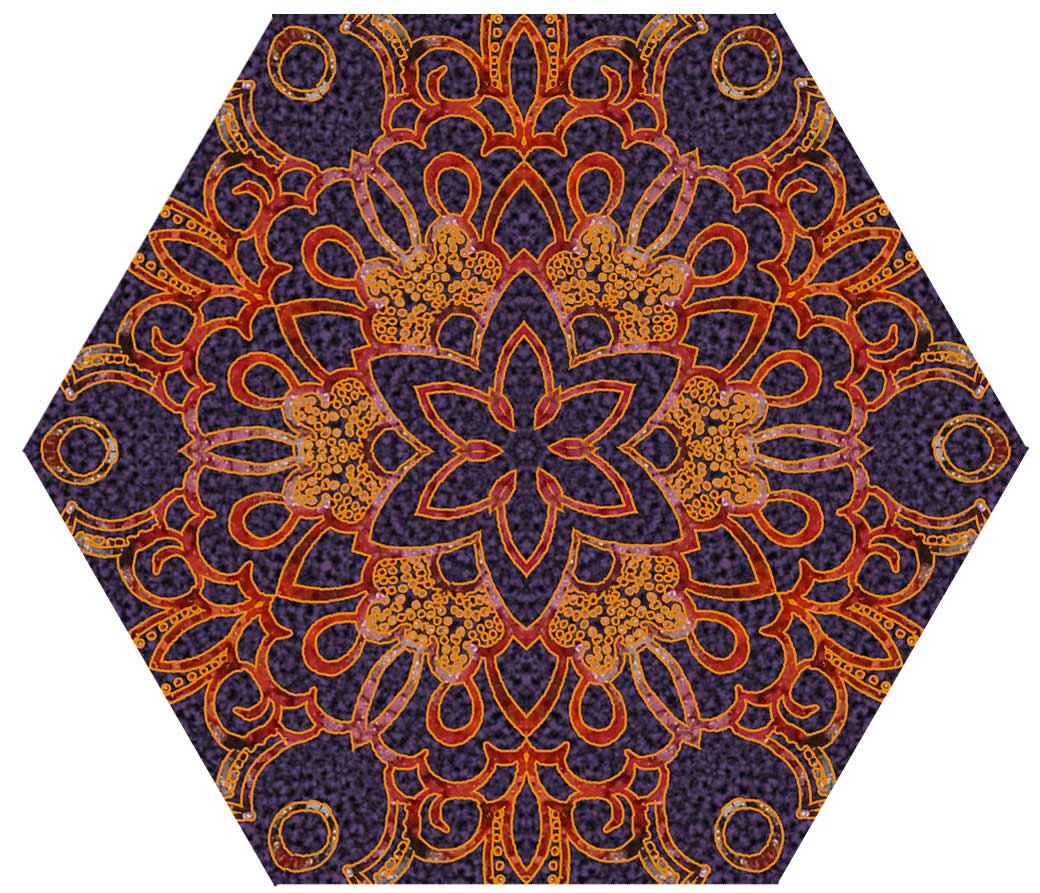
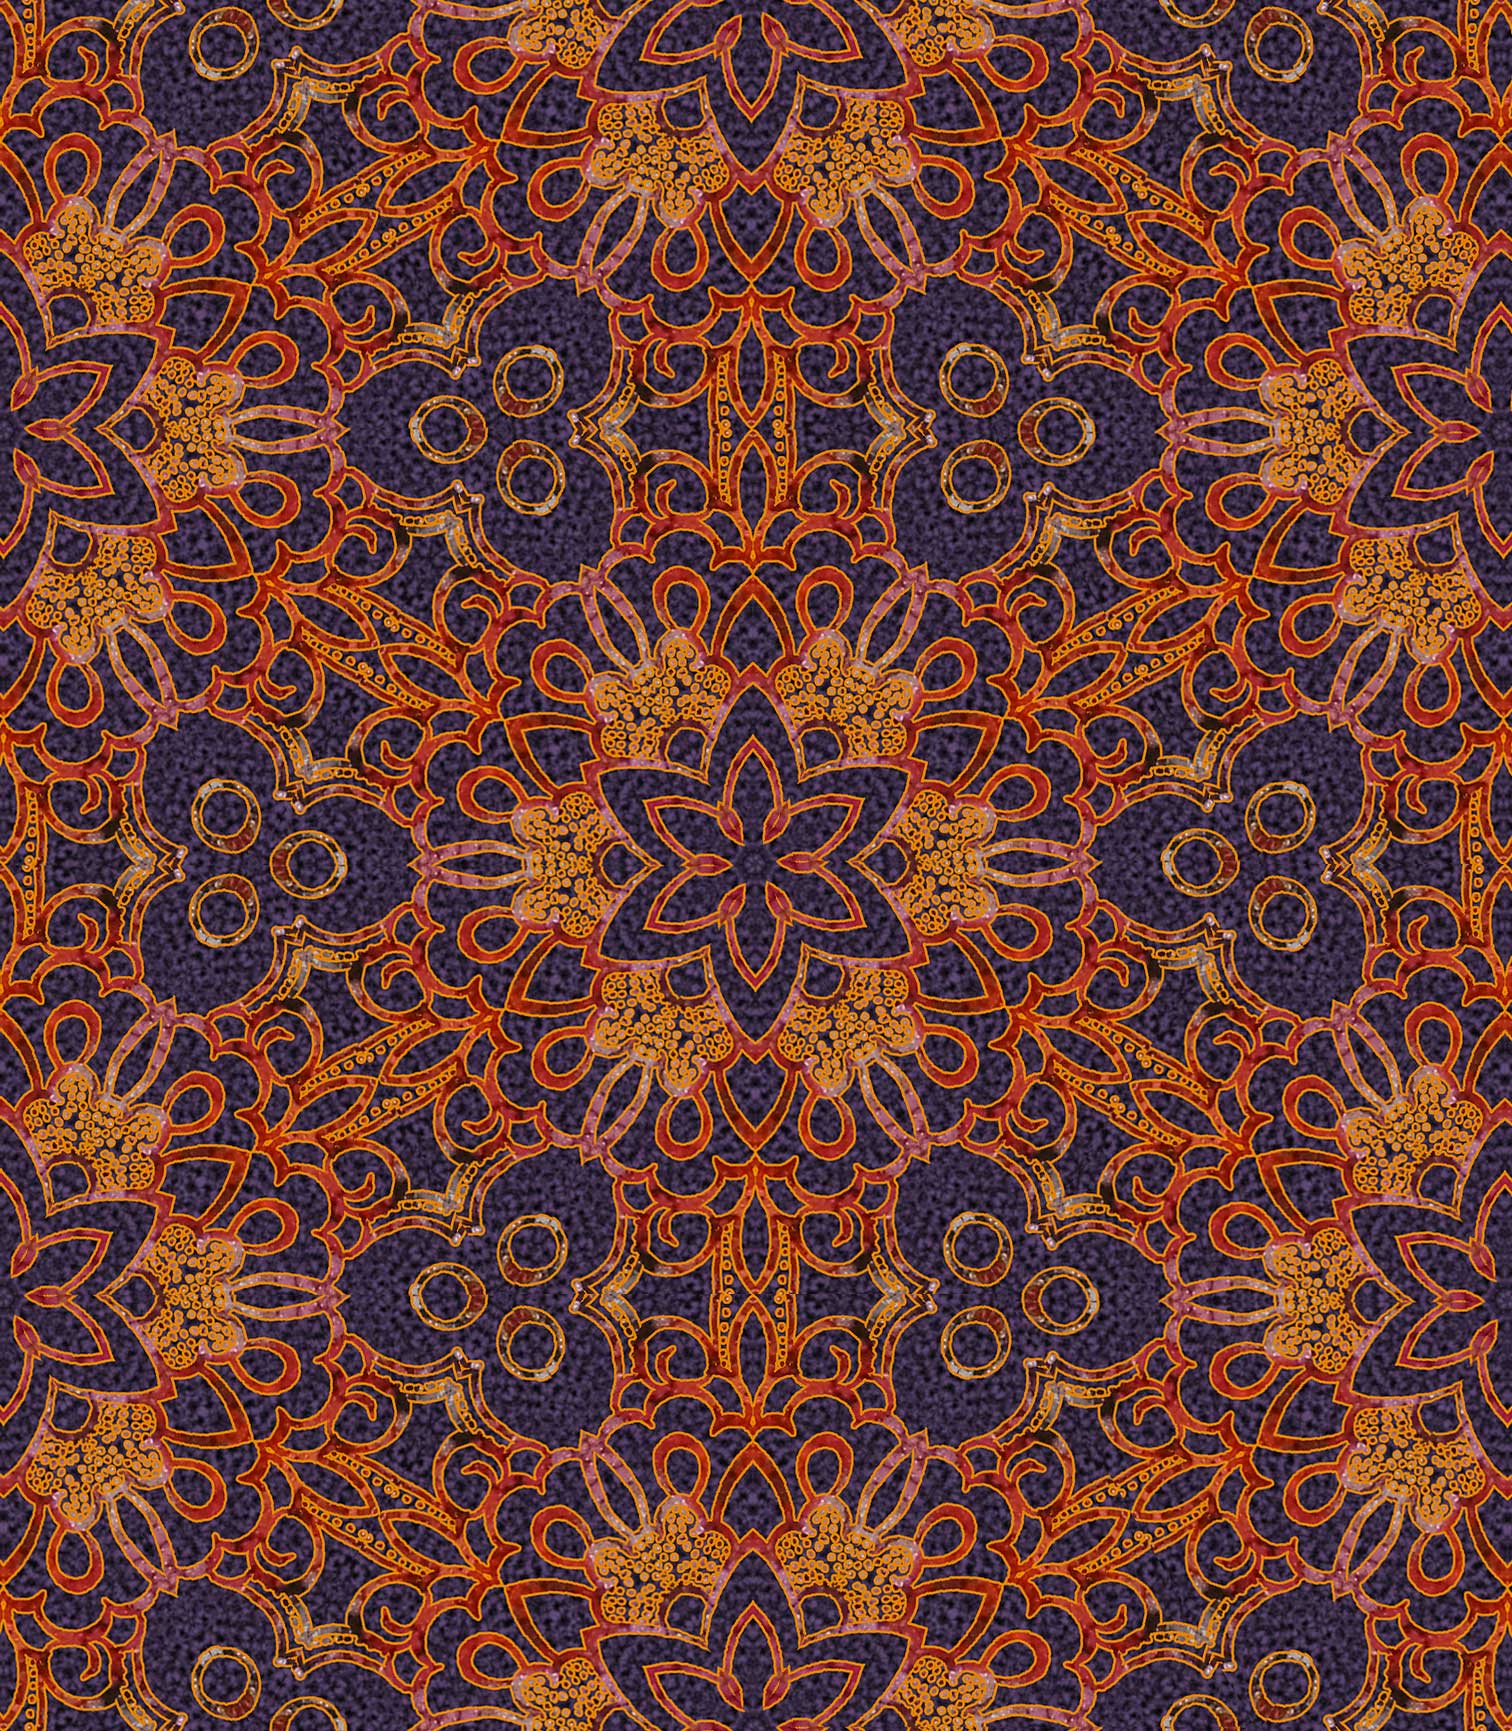
I love the vibrancy of alcohol inks on metal. I like to cut the resulting pieces up to make jewelry components and decorative objects. Before doing that, I photograph and scan each one as a whole image. Then I can digitally manipulate them. I like to use them in many ways, including creating mandalas.
I have an account at Pixels.com, a Print On Demand supplier for artists. I make my designs available on clothing and household decor items, and if others purchase them, I get a royalty. I can also buy my items and sell them elsewhere, but I do like letting Pixels do the fulfillment and shipping!
By using photo editing tools to make masks and layers, I can combine and recombine beautiful bits and pieces in many different ways. I create a triangle, then duplicate it–and keep duplicating.
Oct 22, 2020
Since I last posted here, I’ve been spending some time and effort turning textiles and beads I already have into new dolls and wearable art, and exploring new techniques along the way as I go. For months I spent an hour or so most weekdays embellishing dolls with beads, silk ribbons, dyed textiles…I also did some sewing using versions I altered of Patti Culea’s wonderful doll patterns from her books. I had used parts of her patterns before–she designed wonderful hands and feet for her dolls–but I had never made a doll just as it was in her designs.I jump around from instructions on my own curve, but you can miss things that way too. So I made one of my 2020 projects to get out my stash of dyed cotton jersey and try the patterns as given, and THEN mess with them more…
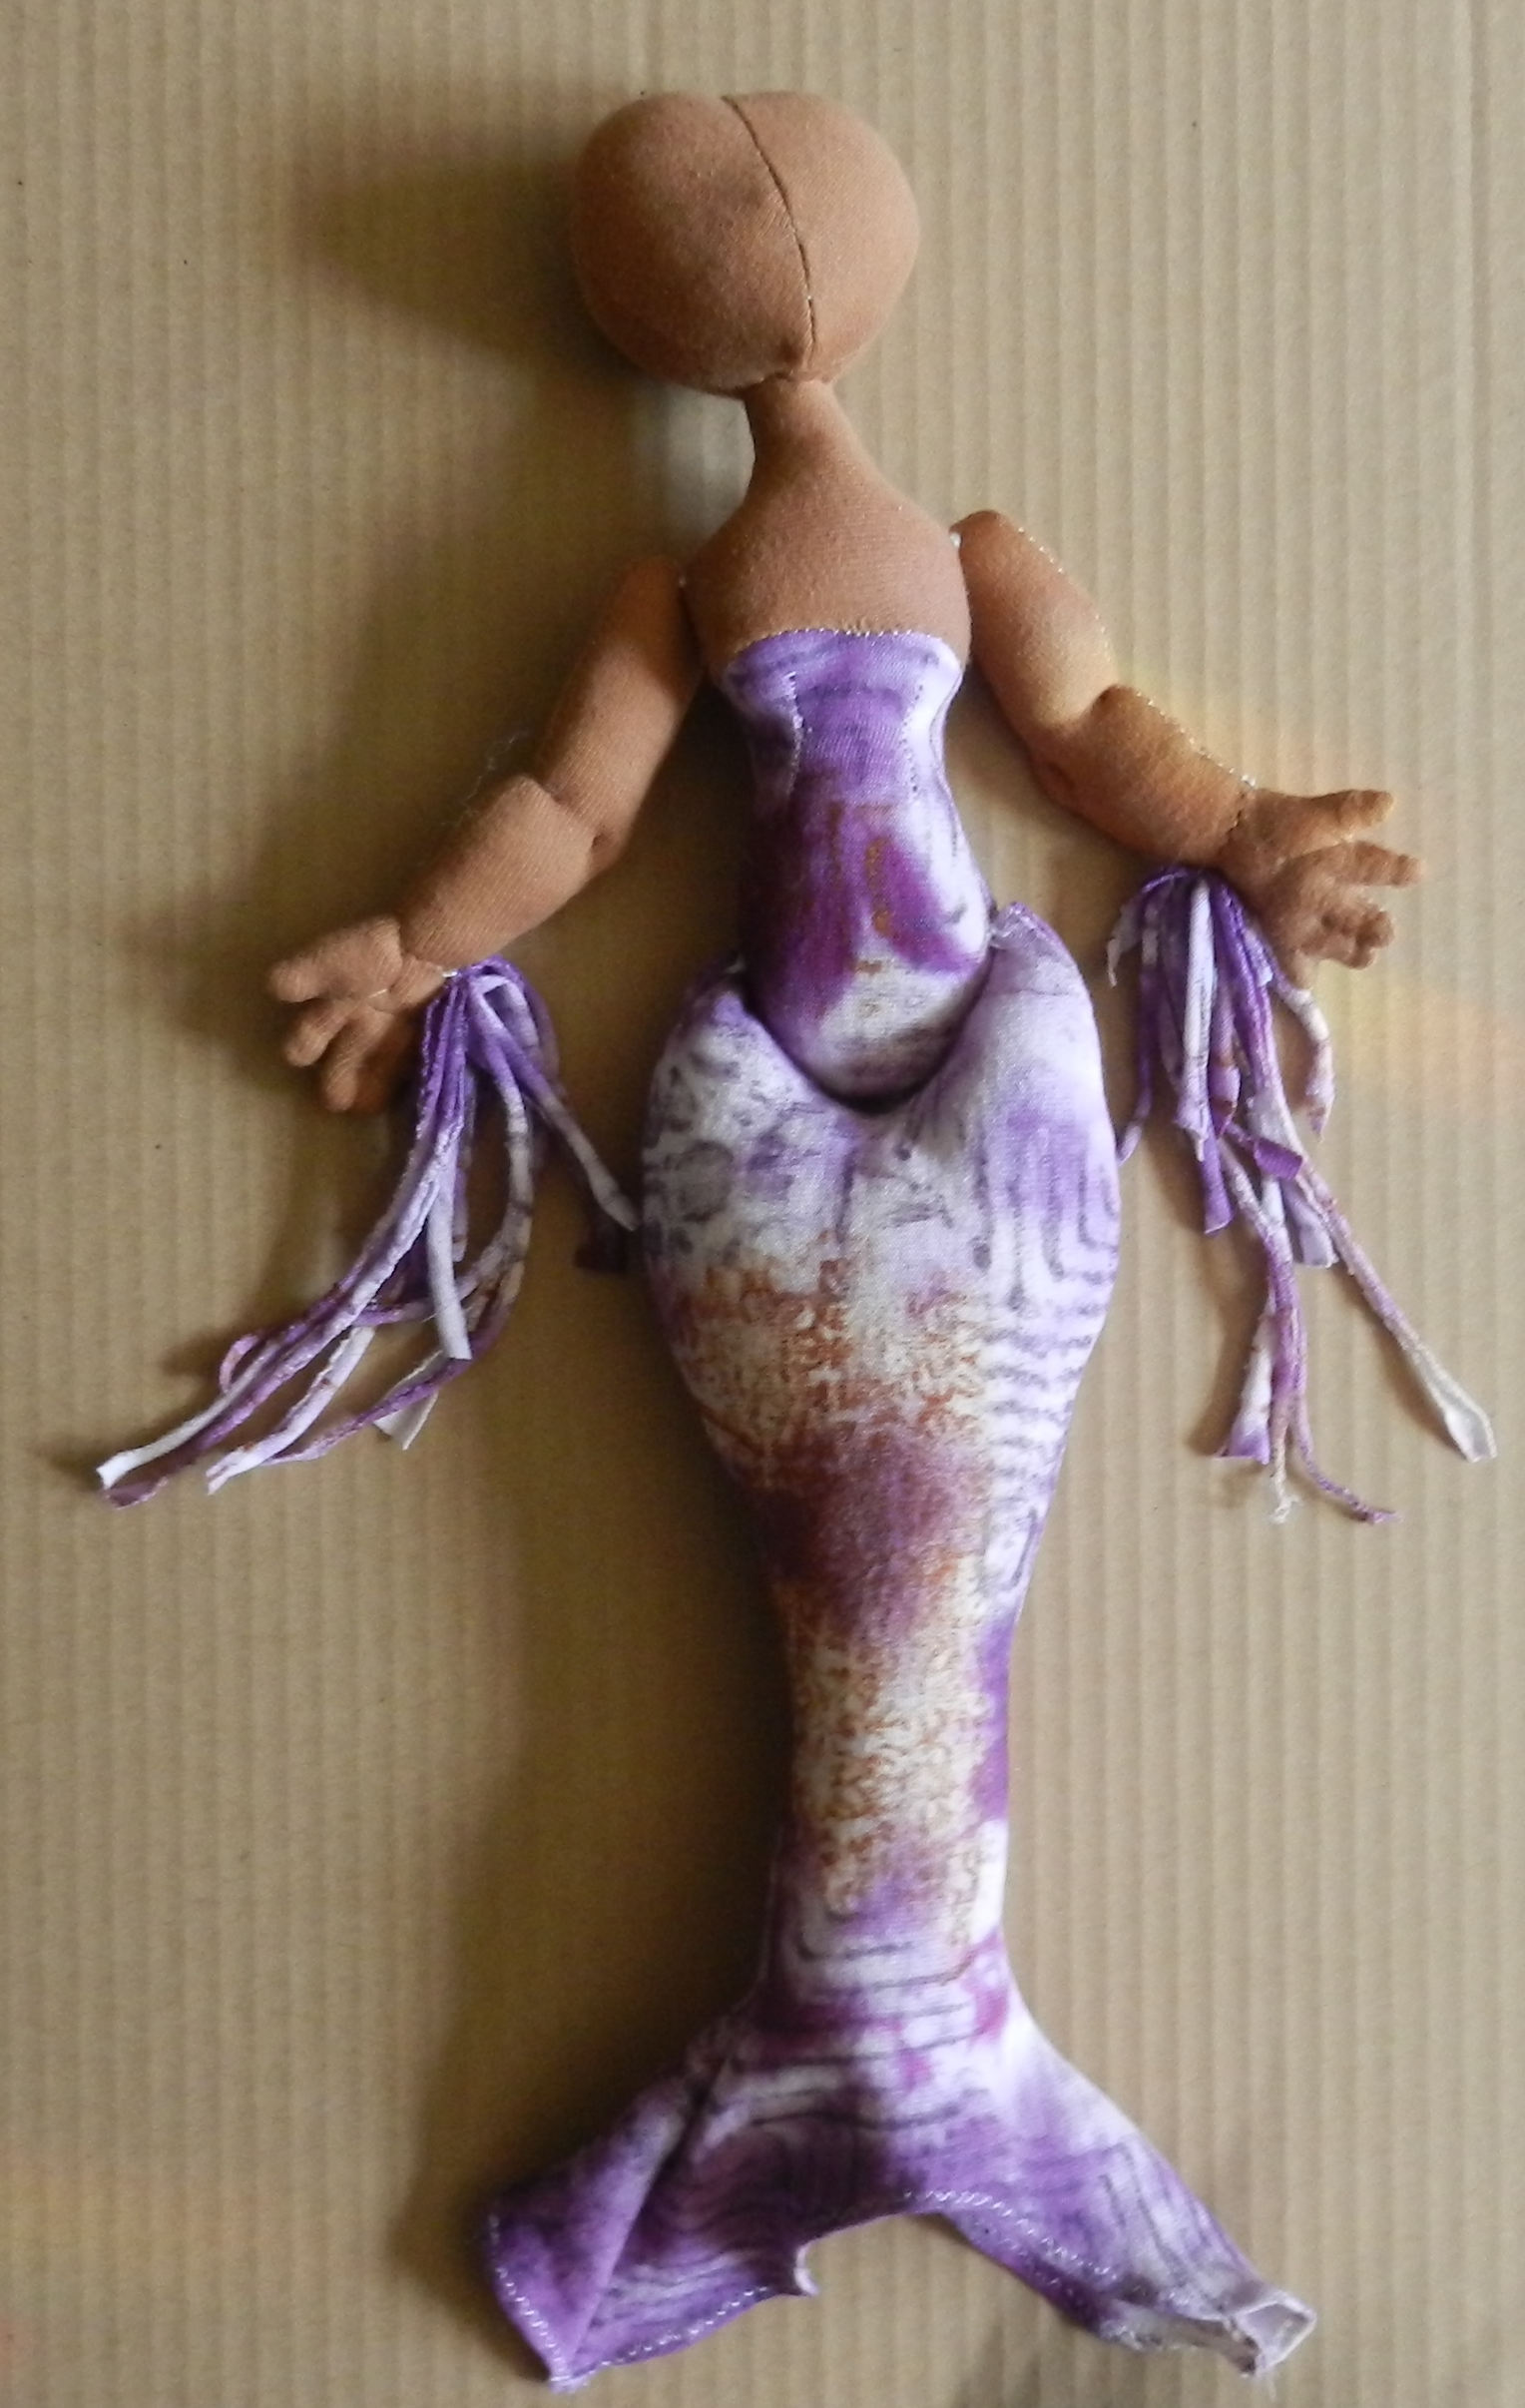
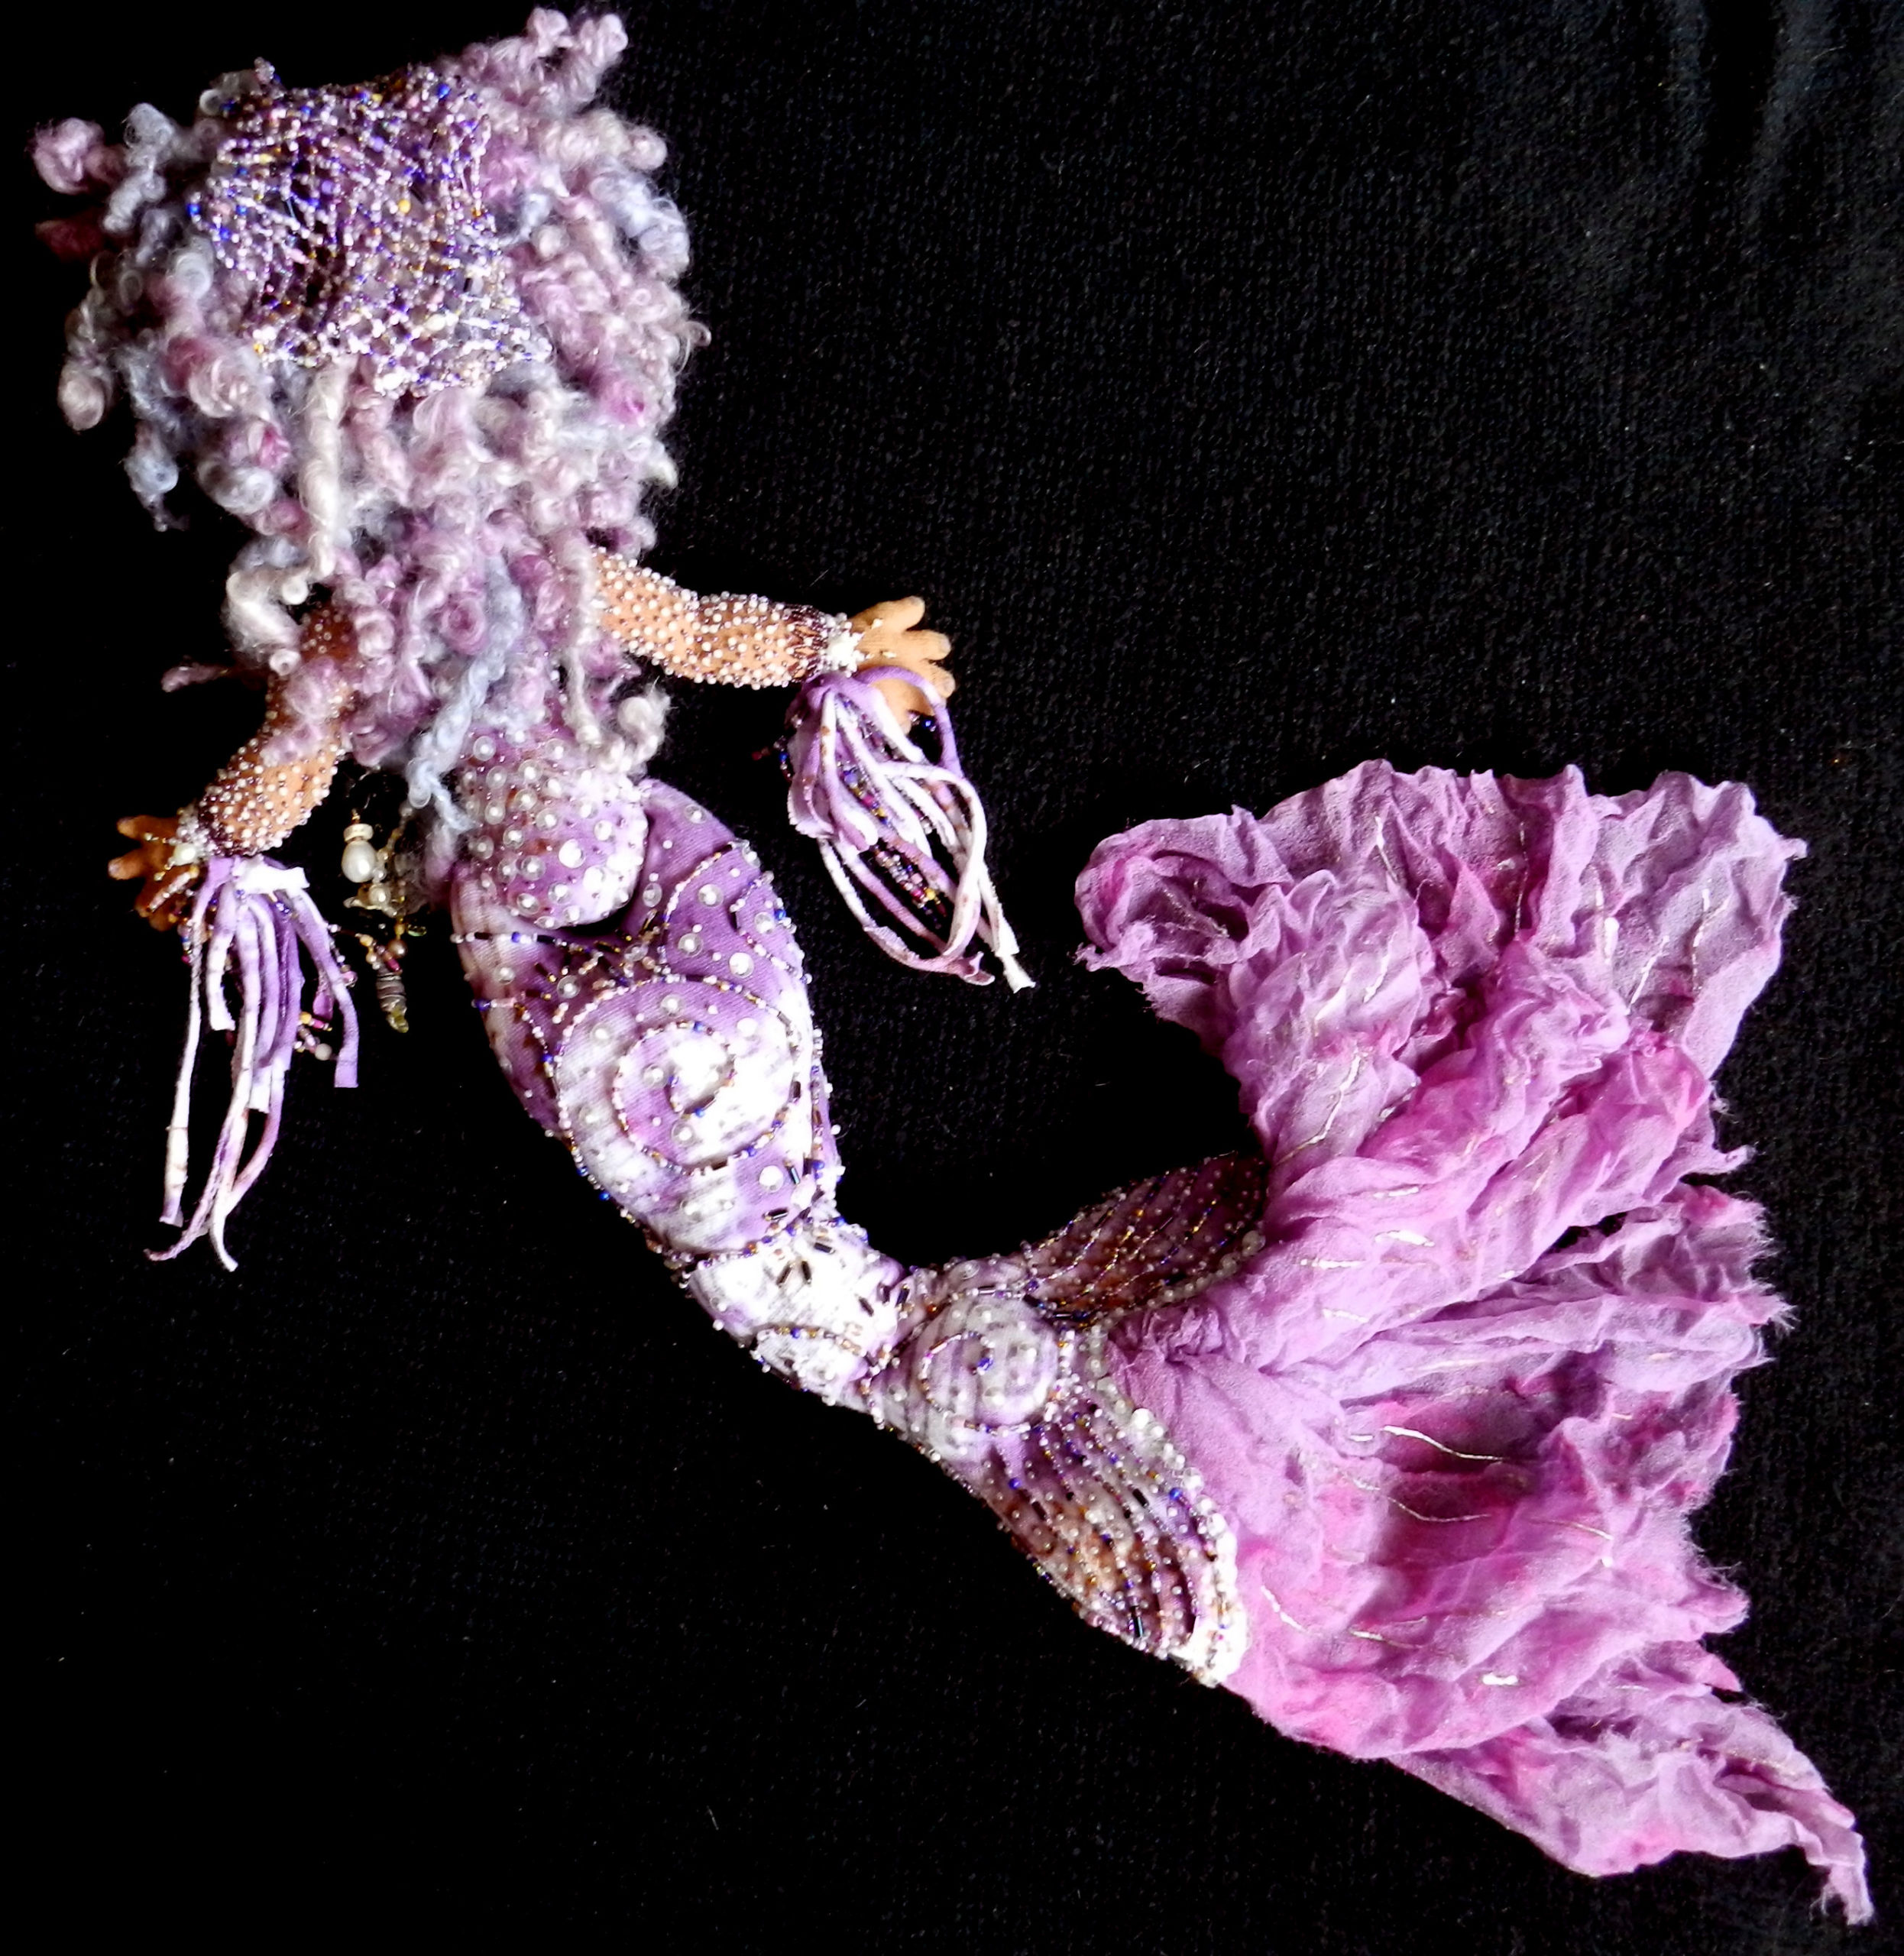
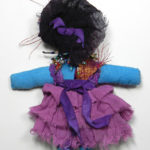
I played with scale and body shape and ended up with 3 dolls that need to have some clothes made for them (coming later this year!) and one that had a mermaid tail instead of legs, with moveable hips and shoulder joints. I used Procion coldwater fiber reactive dyes with some over painting using Shiva Oil paint sticks to give the body and tail fabric some color. Then it was stuffed with polyester fiberfill and wire to create a bendable bottom armature. Dyed silk gauze gives her tail a flowing purple flourish. Her face and nails were painted with acrylics, and I sewed on many sessions-worth of beads and sequins to her body, arms, and tail flukes.
I made her some polymer clay seashells, starfish and black coral, and fashioned her some necklaces, earrings, and hair decorations. Several of these still need to be glued into place in her hair, Her hair is where it all started so it is fitting that that is where she finishes up. Several years ago I was given a skein of beautiful hand dyed and mixed fibers that I knew instantly I wanted to use on a special doll. This one makes great use of it, and I have enough left to wig up a blue fairy as well! But that’s another project. I quite enjoyed this mermaid and would like to make more, but smaller, as the beading took a long while. She is 18″ from head to flukes, and more added for her piled up hair and gauzy tail! I’d like to get the pattern tweaked to about half that. After all, I have lots more fabric, sequins, and beads, and this seems like a good time for more fairies, mermaids, dolls and divas. I’m happier doing some beautiful distractions along with the realities.
mermaid-lower-body-detail
Nov 19, 2019
 Art Dolls are particularly fun projects for me because I love costuming and dress up, as long as I get to remain in comfy clothes and shoes–so with dolls I can indulge. Making art dolls can be a way of expressing and working though strong feelings, of pleasurably and creatively spending time by yourself or with like minded friends. Some dolls I make from cloth, paper or clay from my own patterns, but I also enjoy staring with a pre-made cloth body and dressing it up. I like the portability of these small projects. You can do a lot in a few hours or continue to add more and develop their style.
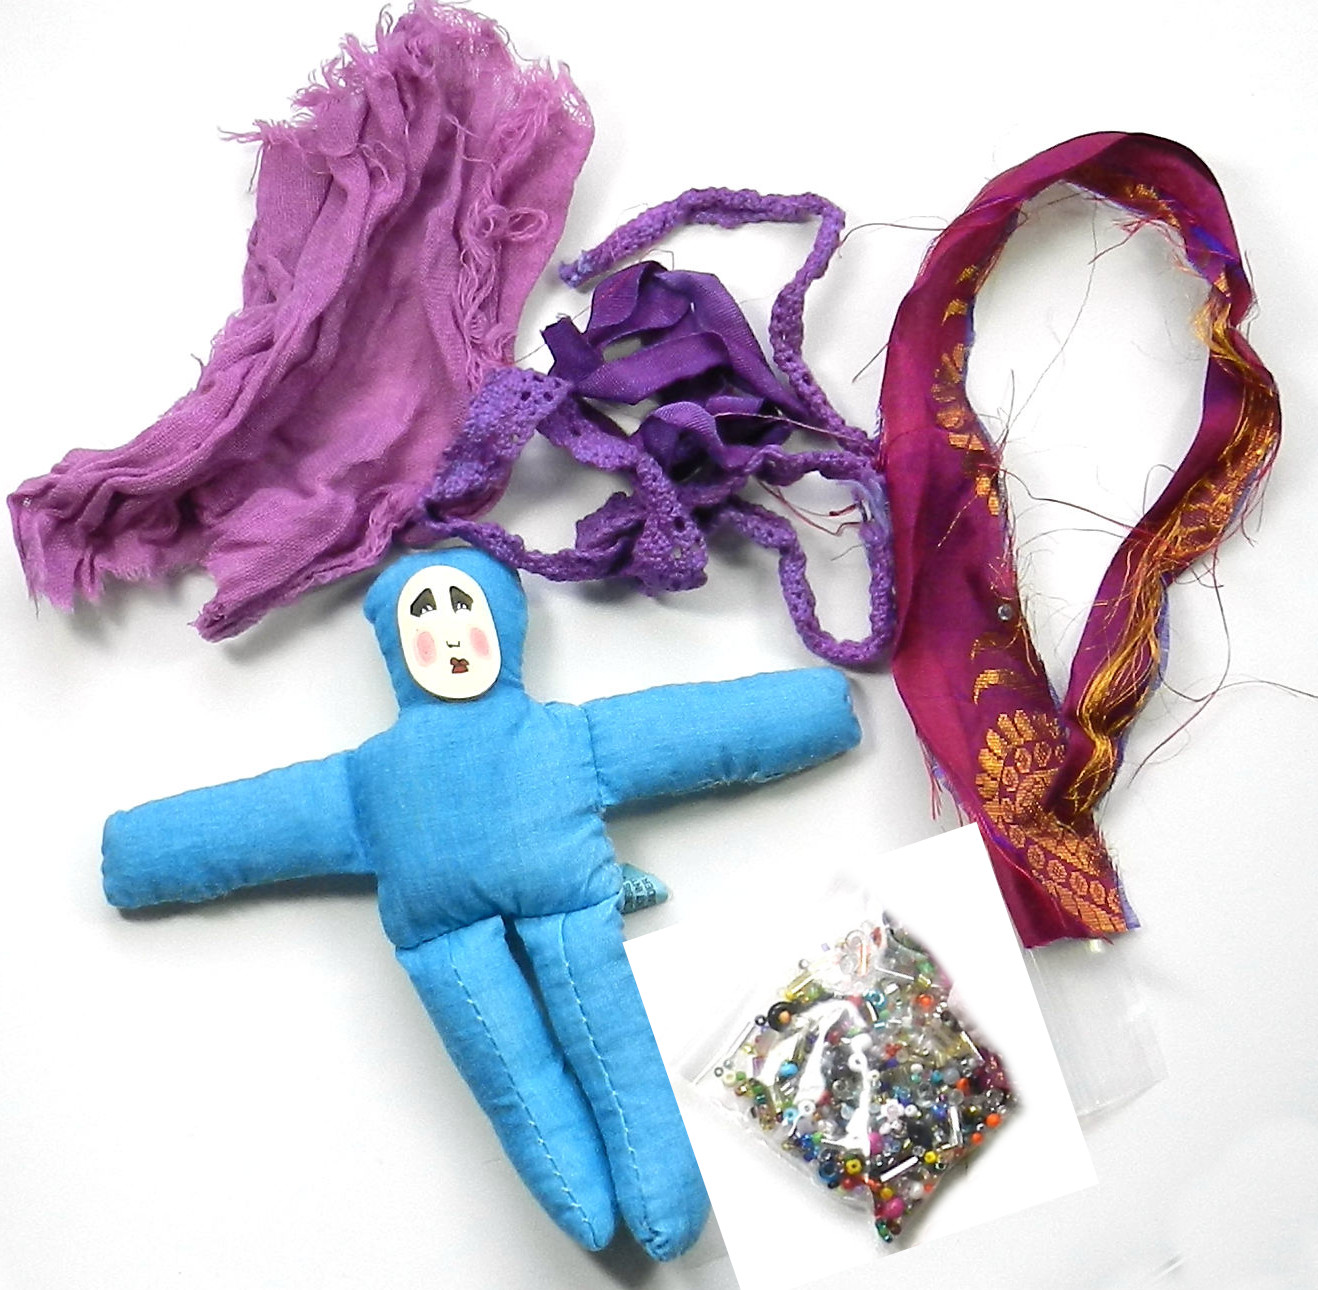
I’ve spent many years dyeing natural fibers with Procion MX Series cold water dyes, and built up a lovely cache of cottons, silks, and rayon. So, I put together kits with fabric, lace, ribbons and 3,5,and 8 inch cotton dolls. Then to some I added goodies like sequins, beads, Angelina fibers, dyed feathers, polymer clay or ceramic faces and vintage silk sari trim ribbon. I had a wonderfully colorful time adding ingredients to each kit, and now it is time to share the fun, so art doll kits are going up for sale in my shop here. I’ll be adding more all month!
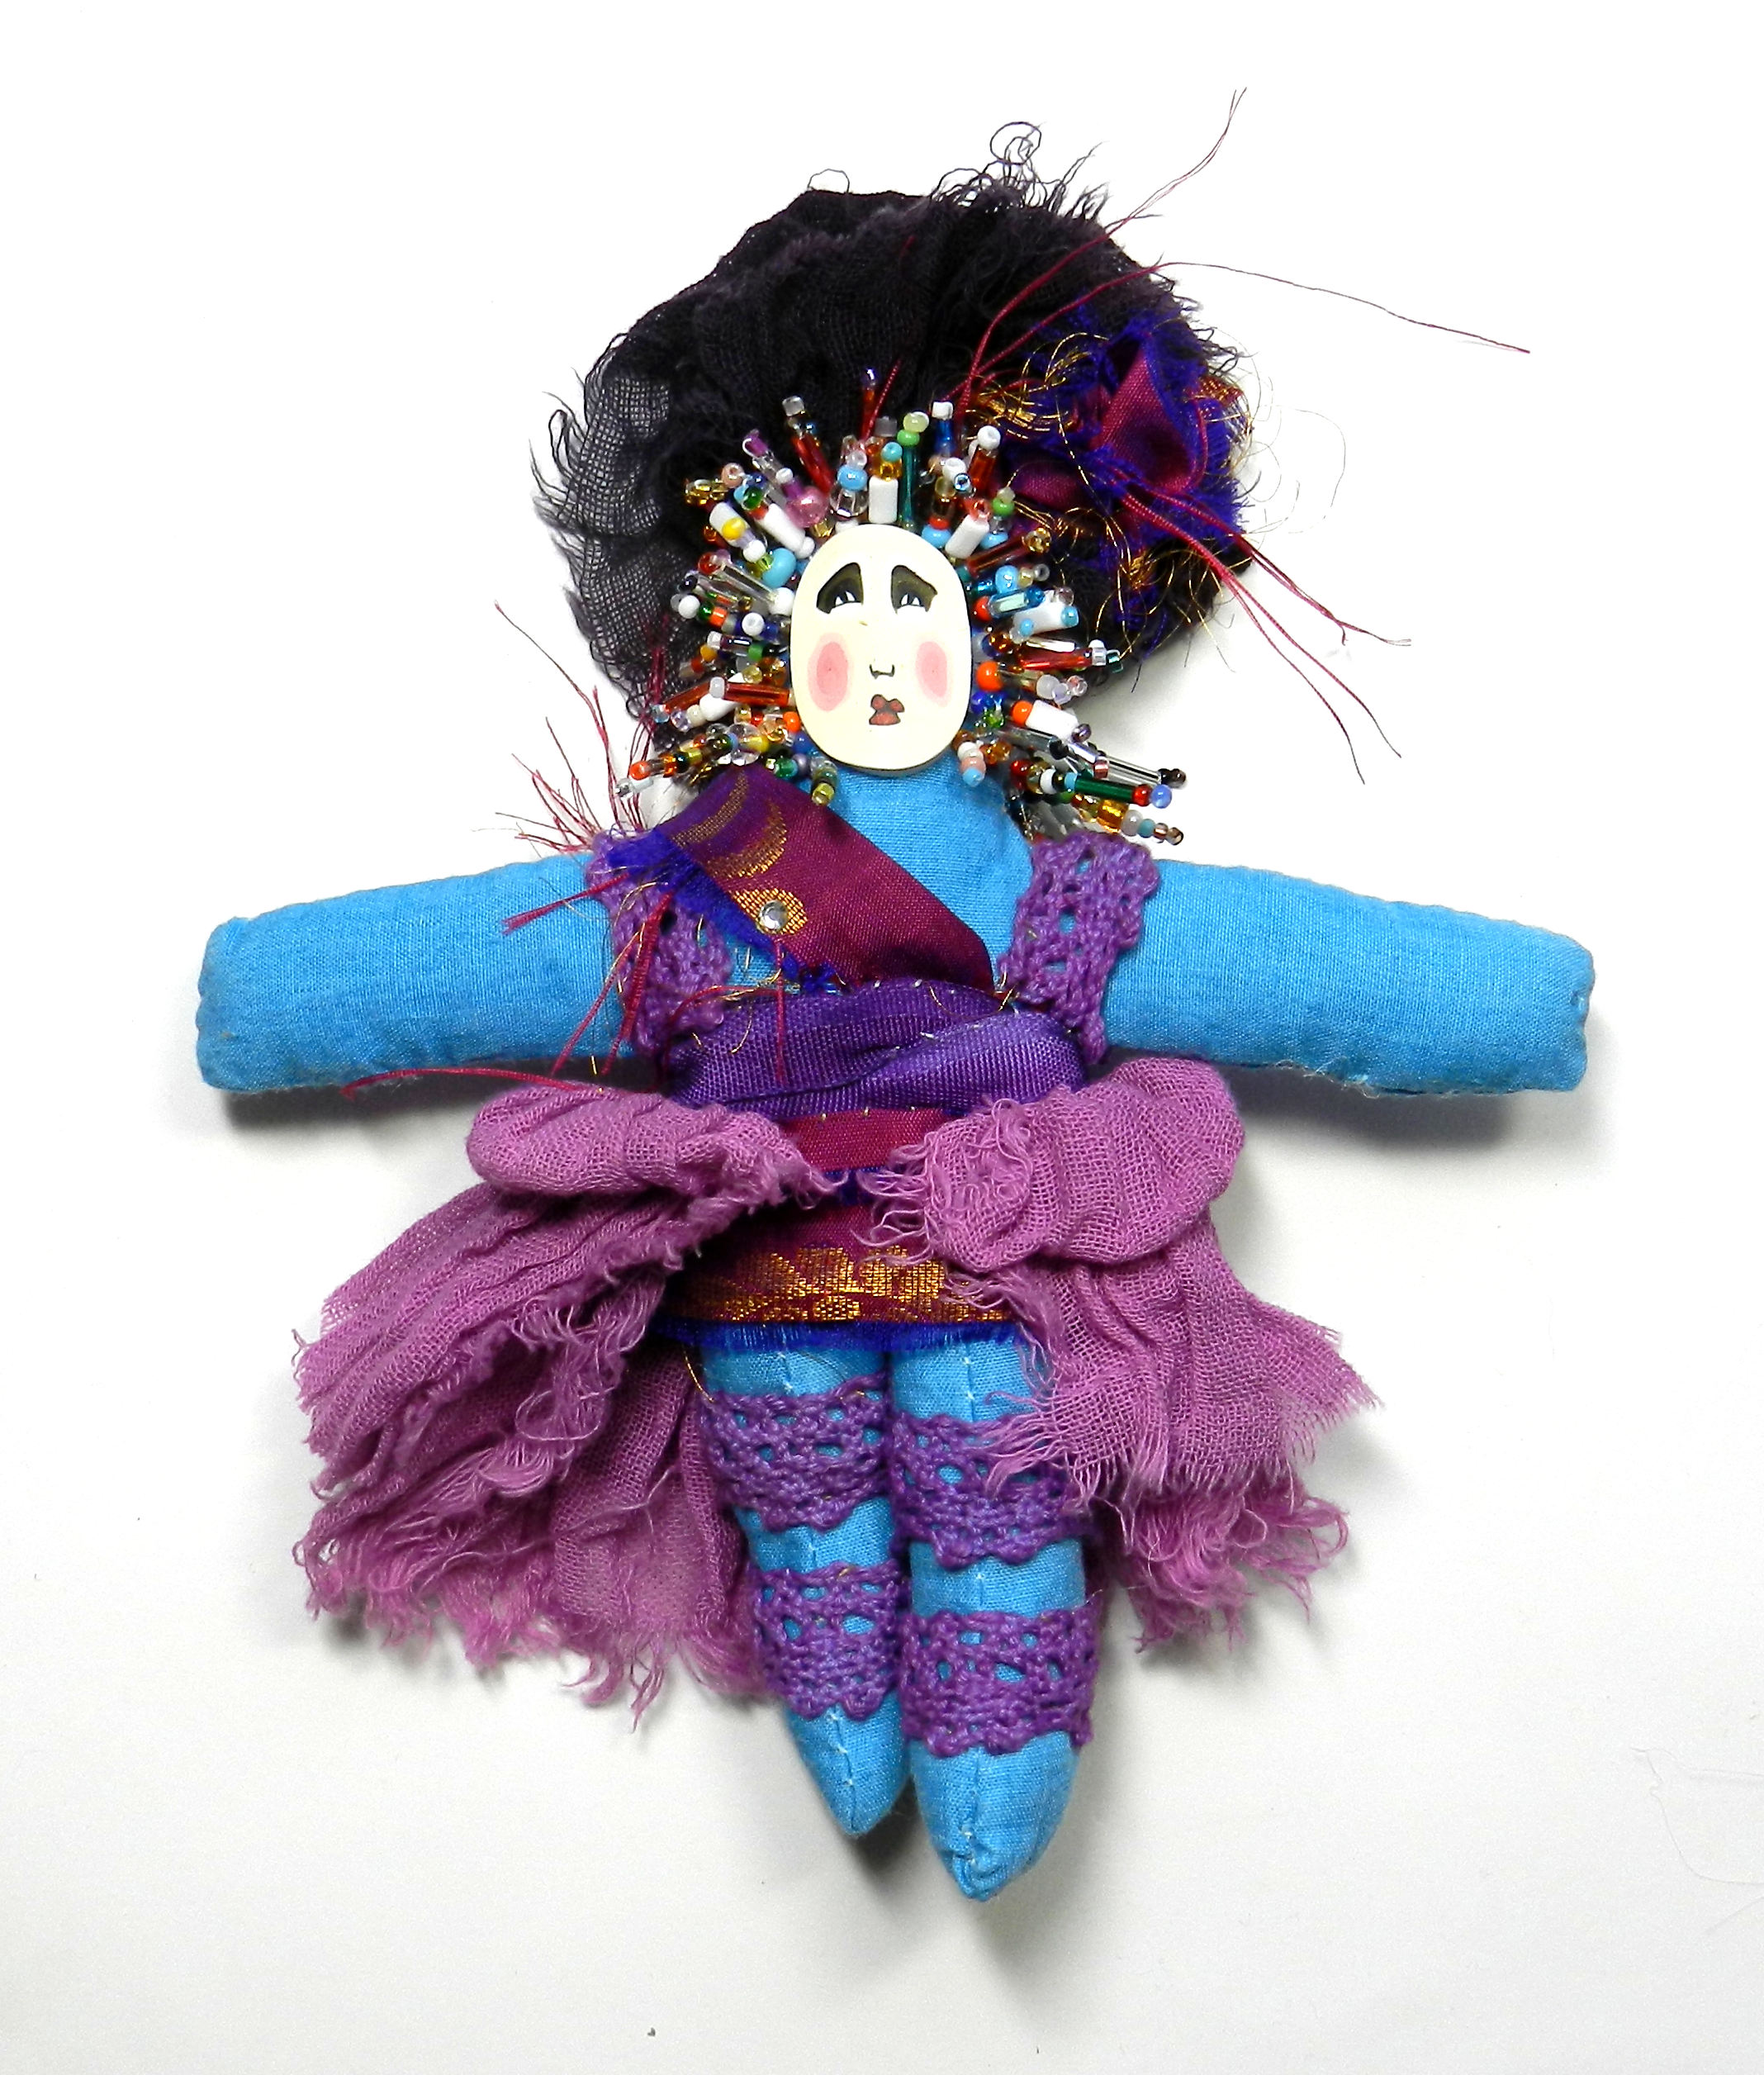
Shown here is an art doll made from a 5″ art doll kit. I used scissors, a needle and thread, and some E-6000 to affix the polymer clay face to the body. I put a small heavy box on her as a weight as the glue dried to get a good bond. I used everything in the kit except a dozen beads or so. She looked great, but I wanted more..so I added some size 11 gold glass seed beads and size 15 glass purple beads. Much better! She still needs a bit of glitter, some feathers, some paper flowers…but I will come back to her another day. That’s my favorite way to play with dolls! In the meantime, I get to make up samples from the 3 and 8 inch doll kits next. Stay tuned!
-

-
3 and 5 inch dolls
-

-
5 inch doll kit
-

-
front
-
-
back
-

-
with more-front
-

-
with more-back
Feb 20, 2019
We’ve been busy at my house all winter long, learning new things, writing, making music, making art…and while I’m ready for the Spring thaws and starting a garden, there is still a bit of winter left here in Wyoming. So we distract ourselves from the cold with old movies, fresh hot homemade donuts and lots of creative pursuits. I’ll be making the results available in upcoming 24 hour events in the One Sweet Bead Market Facebook group February 25 and March 25. While it is still cold outside, Come Get ‘Em While They’re Hot!
Aug 30, 2018
 I have been researching different POD companies this year. Pixels is one of many I’ve tried, and it is one of three that I’ve chosen to keep up. I like many things about Pixels, including the ability to edit all items with a single design on that at once, the ability to put an interface through an ipage right onto my website storefront, the ability to create printable catalog pages…I’m still exploring all the options. The shop that you put together on their site is very attractive, easy to work with, and so is the product design setup. The are the company that does all the printing for Fine Art America, used by many galleries and artists.
One of the few things not in its favor is that It does not play with woocommerce, a popular marketing platform used with websites, particularly wordpress based websites. It interfaces beautifully with Shopify using one of the free apps available with an account–but Shopify comes with a monthly price tag over $25, and that is money I’d rather spend on art supplies. WordPress, Woocommerce and Pixels are free to use. Pixels has a store aspect for me right on their site, and I can import it to my store front. Pixels supplies code for widgets that can be placed to have small or large slideshows of designs available. Shoppers are taken to the Pixels site and can purchase and checkout there. They do not check out using my woocommerce interface, so there could be times that items are found through both platforms, and they would need to be purchased in separate transactions. That’s not so hard!
Here’s a link to the breakdown on ecommerce platforms from the Printful site.
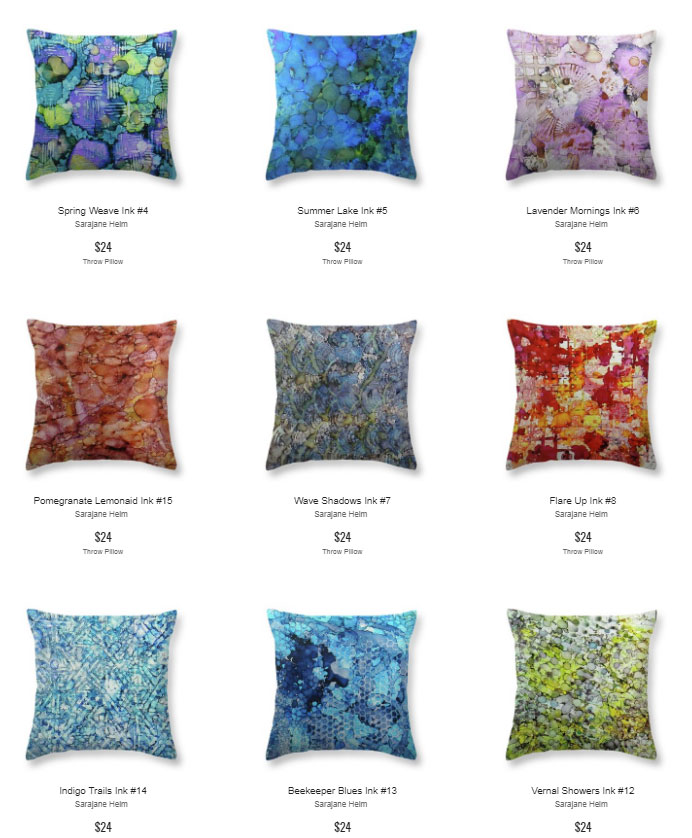
I never could start small with a project, so I put together 24 ink on metal designs and applied them to the products here. Pixels offers Mugs, Weekender Totes, Pouches, Portable Battery Chargers, Fleece Blankets, Spiral Notebooks, Yoga Mats, Round Beach Towels, T-Shirts, Phone Cases, Tote Bags, Shower Curtains, Duvet Covers, Throw Pillows, Greeting Cards, and Prints. With each design on each product, that is already a lot of options. In the spirit of investigation, I am also using two other POD companies called Art To Where and Printful and these both integrate with woocommerce. For them, I have built a storefront page right here. They feature and additional 16 kinds of clothing and accessories with the printed artwork. I’m still working on applying the designs to the items, but it is coming right along!!
Read more about the POD companies I am researching and ways that I am selling here.
I like them all quite a bit, and have several more collections of digitized photos, drawings, and shibori fabrics. Then I look forward to playing with the designs in Adobe Illustrator and coming up with even more.
Aug 3, 2017
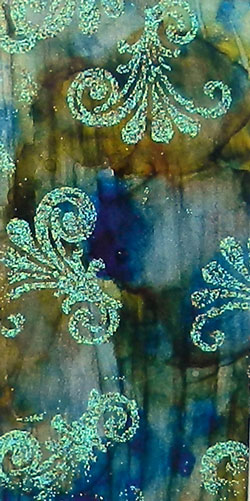 I love the vivid colors and fun effects that are obtainable with alcohol inks on metal. For my first art experiments in my new home state of Wyoming, I got all my inks and my embossing powders out for several days of summertime fun! I’ve wanted to see how the inks and powders held up to cutting and filing for some time, but life in Colorado and then moving kept nudging project days to the side. But here in my new studio spaces (I have several now–indoor, outdoor, and a shed, all with power and lights!!) I’m finding it much easier to get some art time.
 My experiments started with cutting up some 30 gauge aluminum and getting it cleaned up and ready for the inks. After having lots of fun with color, all the pieces were carefully heated to help further set the inks permanently, and then sprayed with two coats of polyurethane.
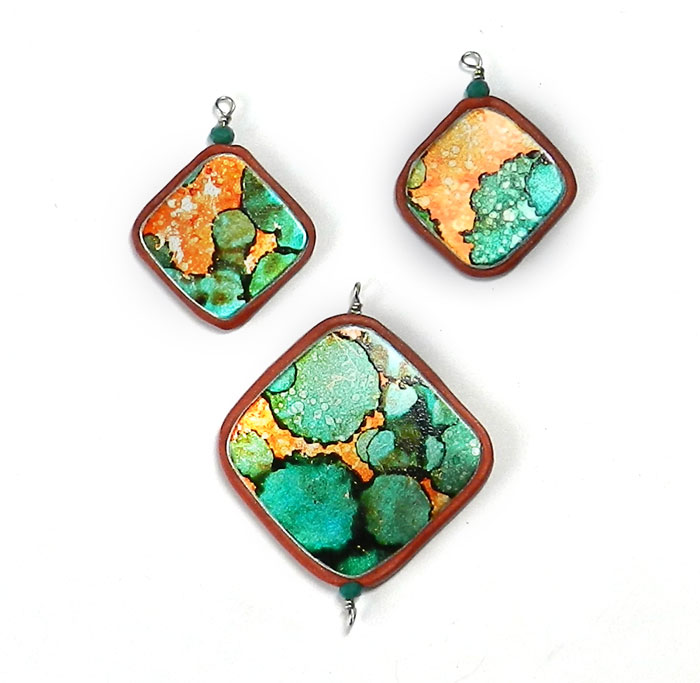
After that, I cut up the pieces, making 2″x4″ rectangle pieces for my embossing experiments, and 4″x4″ squares, and a larger piece that will get played with later and cut up to make decorative parts for boxes, mobiles, and jewelry. Some for now, some for another time! I want to do some that incorporate other elements too, like metal leaf.
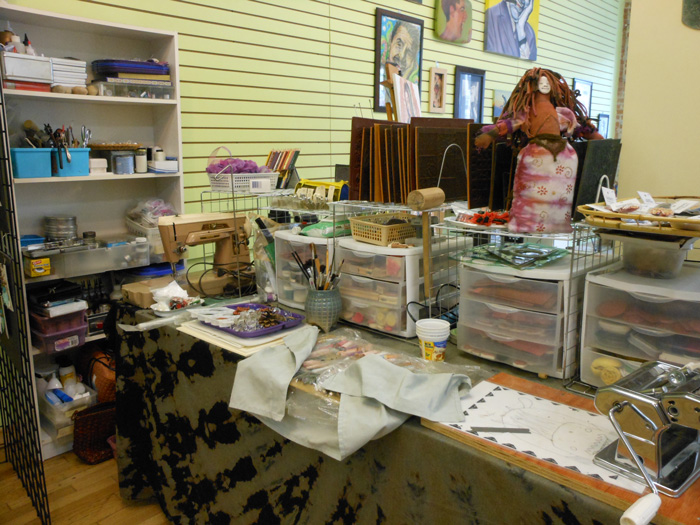
In the course of our recent move, I got to see all my art supplies, and now they are out where I can see them all the time, motivating me to actually use them. While accumulating tools and supplies is a lot of fun itself, I’ve pared down to the ones I want to use, and it is very satisfying to use them. I love seeing how the different things go together.
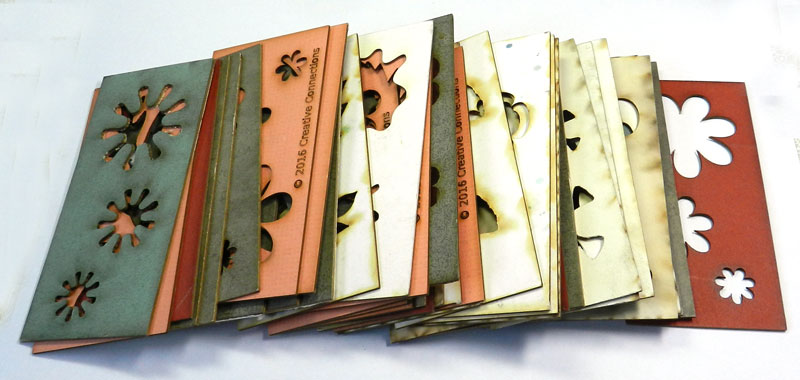
Once I have the prepared metal pieces, I like to cut them up further and make things like jewelry components or inserts for decorative boxes. For jewelry use, I use a large metal shear to cut straight across, disc cutters to make circles, and metal shears to cut more complex shapes. In order to easily duplicate shapes, I made myself some laser cut templates of shapes that I like. I used a Open Source program called Inkscape to create my shapes and then used them with the laser cutter at Tinkermill, the makerspace in Longmont Colorado. Makerspaces are great hubs of creativity, and I hope to see more of them established.
Here are the templates I cut, with all sorts of shapes, flowers, leaves, and more. I use them in metal, paper and textile work a lot. The set on the right is particularly useful for making earring pairs and pendants or pins. Now I have a lot of different pieces and can try a variety of different things. I love the freedom to experiment and play with colors and textures. Sometimes I go too far, but I always learn things that inform more pleasing work later.
I cut out shapes and then smooth the edges with a habilis 00 file, some sanding, and then I can pierce holes with the Euro Tool punch, glue pieces to leather or other backings, or embed the pieces in polymer clay to be cured. (Pieces with embossing powder cannot be heat cured–embossing must be done after the baking step.)
The next step for me is to make some finished jewelry, and I’ll be doing that this week; from where I am sitting now I can see just the right beads to make these all up. Check back soon to see how they look when finished, and please do view the results of my ink and embossing experiments as well as other work.
Jan 15, 2017
 There were are many challenges to be met in 2016, and the results of some remain to be seen. The challenge that my beady friends and I undertook turned out really wonderfully. Our group has been beading together for a while, and we share our discoveries of new stitches, new suppliers, and the occasional project.
The parameters of this one when it started last year were that we use the two pieces of fabric and the packet of beads we were given. Anything else could be added..and it needed to end up as a piece of wearable art.
Last week we got together and three of us showed what we had made. We’ve still got several members’ work to be unveiled, and I am looking forward to seeing what they did!
Jan 12, 2016
It sure is snowy outside, but I’m growing a fresh crop of flowers (metal), several new classes to put on the calendar, and a brand new membership at Tinkermill in Longmont. Also an educational nonprofit, Tinkermill.org is a creative maker space, filled with all sorts of interesting people with skills–and tools–and space to use them. My family joined, and are eagerly awaiting orientation so as to get to work on projects that are too big for the kitchen table, or require tools I’ve not yet acquired!
Something that really iced the cake for me is the classroom space that is available there. I will be offering classes in the upcoming months both in Gahanna, Ohio and in Longmont, Colorado in the upcoming weeks, so sign up for the newsletter if you’d like to be notified when they are on the schedule. Media will include digital, metal, polymer clay, and textiles.
Jul 12, 2015
 The long sunny days and warm weather makes it easy to get a lot of things to grow. Creative Connections is having a BIG growth-spurt–this year, we have blossomed into a Non Profit Corporation!
Having filed the paperwork in Colorado to become a 501(c)(3) educational non profit corporation and trade marked the name, there is now much more to be done, and I’m gathering the people to help me do it. There are still more forms to be filed, meetings to be held, and money to raise, but now we can work together to make arts more accessible for everyone and develop funded programs. We’re currently seeking a low cost or grant-subsidized location for classes and a gallery gift shop where artists can sell their work.
I’ve given this website a total makeover, and it has gone from representing my own personal art to showcasing a much bigger collective effort. It’s just getting started, and has lots of room to grow.
Sign up for our newsletter and hear the latest on classes, events, and how it is all coming together! Scan the QR code shown here if you want to be fancy, or join through the sidebar signup form.
Jan 12, 2014
 I graduated from Front Range Community College with my Media Graphic Design degree, and I’m going to continue taking ceramics, jewelry, and other art class as I can afford them. We have some GREAT classes and instructors there, and I will stay on as a student or community member of the FRCC Art Club. We are seeking new officers there, as Josh and I are no longer full time students on this campus.
One of the things I’m doing in this new year is new art and instruction in a new studio space. Located at 364 Main Street in Longmont, the Kay Carol & Priscila | Gallery and Working Art Studios is home to 4 artists in residence, instructors, art groups and community organizations who meet there, and a gallery plus meeting/classroom/workshop space. I’m very fortunate to be there, and I have started a website there with a calendar and a page that lists upcoming classes and events.
I’ve already had fun with several Spirit Doll sessions, and here you see the new faces and molds I made during the polymer clay face sculpting class. I’m looking forward to using them with polymer, ceramic, bronze and silver in the upcoming months. They’ll be useful in the upcoming Miniature Mask Swap, and in the month long exhibit of masks and art from my PolyMarket Press books in June. That may sound like a long way off, but as I have so many things to make and write about for upcoming books as well as hundreds of masks to mount into large frames, fabric to paint, jewelry to finish and more, it seems like only a few weeks away. However–now I have a workspace in which to do it!
Please do come see me there during open gallery hours 10:40am-4pm Fridays and Saturdays. Or, book a class with a friend or a group. Individual instruction is available as well–we are dedicated to spreading the creativity around.
May 6, 2013
 We’re almost done with Spring Semester and in between studying for finals and doing my homework, I’m working on projects for upcoming books through PolyMarket Press, my burgeoning publishing empire.
I went back to college to learn the programs needed for publishing, and I’m now one Business Math class away from an Associate of Applied Science degree in Media Graphic Design (Print and Publication). I’ve taken a lot of art classes along the way too, which, though they don’t count towards the degree, have been wonderful learning experiences in ceramics, metal work, and watercolor as well as web design and graphic arts.
I’m signed up to finish this degree during summer semester–along with finishing several new printed books and E-books. Some are mine, and some are with other artists and authors. I’m excited to see the growth of skill and projects and the forming connections that strengthen both the work and the workers.
 I’m also getting back to working with polymer clay now that the weather is turning warm again. I’m documenting the progress of dolls for Making Faces, Molds & Forms.
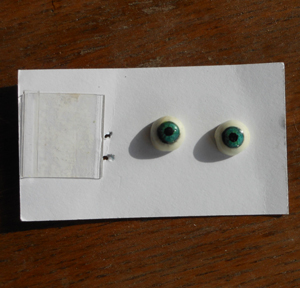
That includes new forays into ball jointed figures and making set-in eyes as well as painting eyes on clay and on fabric.
Here’s a look at a sketch for ball jointed dolls in several scales and a pair of eyes that are part of the 15 inch doll I’ve started. I’ve got the foil armature covered with a layer of paper mache, all ready to cover with polymer as soon as school is out and we are on break. It was easy to work to the right size with a sketch. Thats not something I usually do, but I wanted to give it a try along with with making the ball joints instead of a single pose sculpt.
The eyes are shown on the back of a business card, to give you the scale. They are around 1/2 inch in diameter. I’ll be making lots more too, as I’ve got dolls to make and tutorials to write and shoot.
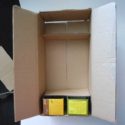
They just HAPPEN to be sizes that go with the projects I’m putting together for Think Inside The Box-–which will feature many projects that transform boxes into beautiful miniatures in several scales and styles!
Here’s the armoire that is part of that doll’s suite. She gets an armoire, a bed, a bedside table, a rug and other decorative details, and a wall.
There will be variations on that in other sizes and styles; but this is a start!
-
-
a frozen food box with 2 tea boxes, with a priority mail box added at the base next
-

-
two layers of paper mache and dowel rod
-

-
ready to line the drawers with paper, add knobs to the doors, and some wire hangers
Dec 23, 2011
 I’m enjoying the break between semesters and taking some time to restock the shelves at my Etsy store. I’ve had a very busy and productive year in 2011, and now it’s time to share some of the results.
I’ve revamped the packaging and I’m putting together more Spirit Doll Kits with ceramic and polymer clay faces that go with dyed cotton doll bodies, fabrics and trims.
In addition, I’m making up the contents of each kind of kit for a sample or two, and taking pictures as I go.
 Here’s a picture of the contents of a Large Spirit Doll Kit. I’m going to spend a few days working on this doll, adding some beads and silk flowers from my stash of stuff, and do a bit of embroidery.
I’ve been wanting to do a little needlework and this is a perfect spot for some! I’ll be taking pictures as I work on the doll, and I’ll post an update after Christmas.
Large Spirit Doll Kits like this one have contents that include:
- one ceramic face, hand drawn and painted with under-glazes and clear glaze, affixed to
- one (premade) 12″ hand dyed cotton doll body,
- one 18″x 22″ (fat quarter) piece tie dyed cotton jersey
- assorted dyed fabrics, trims and embellishments

I also sell the ceramic faces by themselves.
I made a specially shaped cutter from a strip of aluminum, cut each face from a rolled ceramic sheet, then shaped each one with a curve.
After they dried, I sanded each one to get smooth edges and a good surface for drawing the faces.
After the pieces were bisque fired, I drew and colored them all in with painted under glazes and gave each a finishing coat of clear glaze before firing them all again!
The results are colorful “dolled up” ladies all ready to turn into dolls, or wearable art.
Oct 11, 2011
 This semester at Front Range Community College is an extremely busy one! The FRCC Art Club is off to a great start with our Art Concrete | Sidewalk Chalk Event, and we are gearing up for the Student Art Sale in November, which will happen AFTER I get back from the Houston International Quilt Festival at the beginning of November. That’s right after the big Halloween Party (THE social event of the season on my calendar!) and of course in between and all around the preparations is ongoing homework. And lots of it!!
My Jewelry/Metal III class continues to offer all sorts of challenges that go beyond mere trying not to hammer my thumb. Here are oics of my first homework project for this class–fold formed copper pieces. One set has polymer clay accents and was patinaed with ammonia. The other set’s color comes from the fire used to anneal the metal prior to hammering. I do like making jewelry!!

Jan 30, 2011
 In addition to teaching classes in polymer clay use through Front Range Community College’s Continuing Education Department, I’m also still taking classes there. I love learning, no matter which side of the flow I may be on at any given moment! This semester I’m taking advanced classes in Adobe Illustrator, Ceramics and Metal/Jewelry. I’m starting to cross the lines from studio to studio now– like using polymer clay originals to make plaster molds for use with ceramics that I then cover with glazes, acrylic paints, polymer clay, or even metal! Or like using PMC (Precious Metal Clay) made into a liquid slip to coat ceramic flowers or faces that I have made by hand forming or by using silicone molds that I made from polymer clay originals…you can see how the lines are beginning to blur!
The items shown here are made with ceramics and PMC silver, and then I use Liver Of Sulfur to give them a patina. You can see the difference between the silver finish that has not been given a patina and those pieces that have been treated here. I much prefer the antiqued effect and the colors that you can get when treating the silver with LOS. Both are pretty darn cool though, and by putting the PMC over ceramics I save a LOT of weight and still get the finish of real silver.

Jan 1, 2011
 Happy New Year to all!
Last year was certainly busy–so chock full of Things To Do that I see I haven’t had time to blog since August.
I continued taking classes at Front Range Community College, and as part of that I learned more about ceramics, metal work and jewelry, WordPress and Drupal and other Open Source Code solutions, and finished the layout of my new book in Adobe InDesign. (The new title from Polymarket Press is “A Collection Of Polymer Clay Masks” and it is available now! Click here to order an autographed copy)
There are some GREAT classes to be had at community colleges, and I’m getting a lot of value out of the ones I take as a student.
Beginning in 2011, I’ll also be teaching 4 classes in polymer clay there through the FRCC Continuing Education program. Click here to see the listings.
I’m also excited to be an instructor at the fourth annual Cabin Fever Clay Festival in Laurel, MD. This year’s line up includes many wonderful instructors, and they are also honoring Judith Skinner for her contribution of the Skinner Blend and her work throughout the years. Having written “Adapting Quilt Patterns To Polymer Clay“ with her, I know first hand what a very talented and lovely person she is, and I’m very happy to see her recognized in this way. She’ll be teaching a class about ways to use the Skinner Blend, and I’ll be Making Faces! Teaching a class in sculpting faces, that is, and in making molds. We’ll even be shrinking our faces from the molds to make smaller versions–learn how at the CFCF this February 18-23. Click here for the Registration Form.
Jun 20, 2010
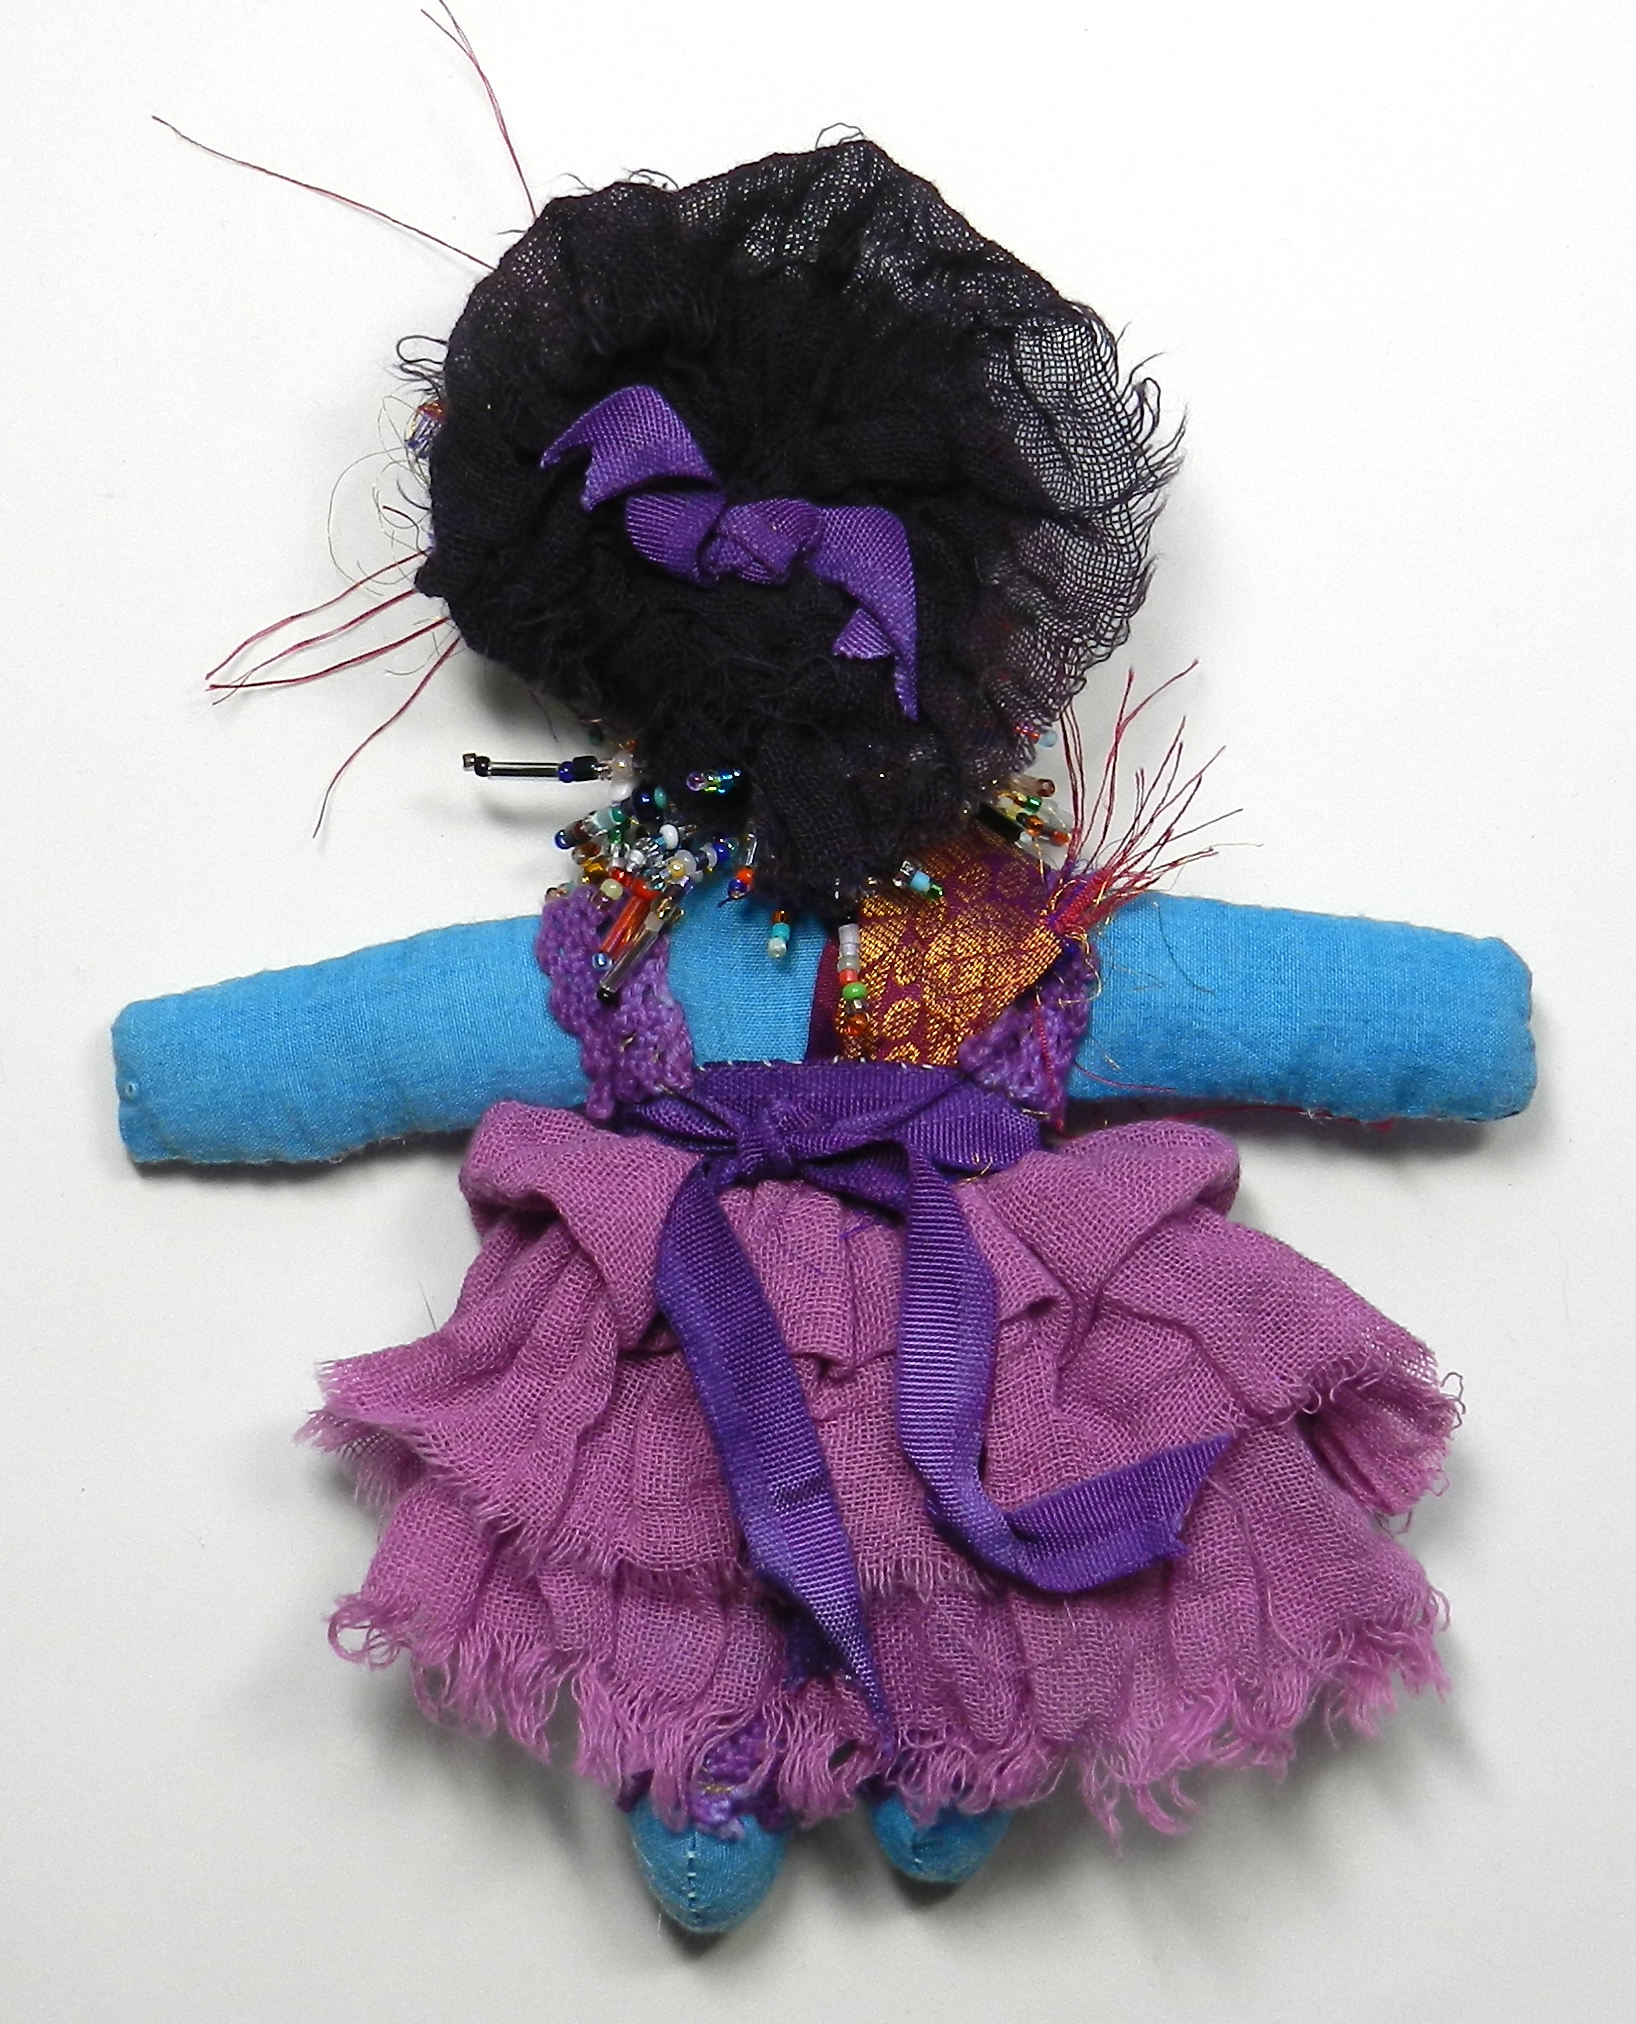
 Yesterday my friend Laura of LandS Glory Artisan Jewelry and I set up shop for the day at the Lyons Outdoor Market in the beautiful foothills of the Rocky Mountains here in Colorado. It was a gorgeous day, and we got to see some lovely art, listen to live music and do a few hours of beading on Spirit Dolls. Laura and I both enjoy seed bead embroidery and finding just the right bits and pieces to go into the dolls. There’s no pre-planned design; rather, these pieces start as a collection of bits and pieces and parts and then as they come together, other bits and pieces seem to show up and present themselves, demanding to be used. “As the spirit moves” is the way Laura and I both prefer to work, rather than using any sort of drawings plans or patterns (other than the basic doll body outline pattern that I drafted).
This project got started a few months ago, but is just now really starting to come together. I pulled a few items for this doll that included some green tie dye fabric (click here to see the slide show of textiles from our annual Dyeing Days, beads, a glass cabochon made by my fusing friend Mad Margie that I beaded, and I made a ceramic face and two ceramic buttons for her breast plate.
I cut,sewed and stuffed the body. My least favorite part is stuffing, and sometimes I just use pre-made cotton bodies that I dye, but only for smaller dolls. Its worth the turning and stuffing drudgery to get to use my own textiles… and since we are only talking about less than an hour, I somehow manage to get through it!<g> Then comes the fun part, hours of beading, adding dyed trims and other costume fun.
These dolls come together in several sessions for me, a few hours at a time. Usually as I’m working, I’ll find other pieces to integrate into the piece–like some beautiful teal dyed cheesecloth, or peacock feathers. (they’ll be part of her skirt and head dress, eventually—along with more beads!)
This time, I lost a piece. One of her busty-buttons went away somewhere in my workspace. I’d already sewed one on, so I looked and looked…nowhere to be found. I thought about making a new one to match. I thought about taking the one off and using something different. Then I realized, as I looked at her again and again, that she was just right the way she was, with only one. After all, sometimes these things happen. She’s beautiful anyway, and I choose to see her as just right, not as missing half a pair. How we look at things is just as important as how things look.
She has a sort of Amazonian Dance Hall Warrior style going on, and I love seeing her progress. I’ve got a lot still to do, with adding hair, shoes, sewing on her skirt, and sequins and beads for the other arm and leg. And of course MORE BEADS!! I’ll post another picture of her when she’s finished, and here’s how she’s looking so far.

May 21, 2010
 I’m busy busy busy getting ready for an incredibly creative summer season. We’re gearing up for our annual Dyeing Days that will be occurring from Memorial Day through the first week of June, and then I’ll be at the Lyons Outdoor Market Saturday June 5th and the following Saturdays in June! I’m making lots of new merchandise and packing things up using the new brand “Creative Connections” just like here at the blog. I like it much better than using my own personal name, which has never totally satisfied me when I looked at the cards and tags. So, I designed new ones and had them printed up at VistaPrint.com and designed bigger bag header tags and price cards and so on using InDesign and PhotoShop. Then I spent a couple of days making sure I remembered the things I learned in DreamWeaver class last semester and built some new webpages. My PolyClay Gallery site is massive–too big for its britches in some ways–and this gives me a set of pages that I can point people to just for business of all sorts. And so I introduce to you now–Creative Connections!
June 5, 12, 19, 26 2010
Saturdays 10AM-4PM
Lyons Outdoor Market 446 Main St Lyons, Colorado
Laura Humenik LandS Glory Artisan Jewelry and Sarajane Helm Creative Connections will be at the Lyons Colorado Outdoor Market on the Saturdays in June. Art, music, food and fun in the foothills of the Rocky Mountains! Bring your friends, and come see us there. We’ll have hand dyed clothing and accessories, ceramic, polymer clay, metal clay and glass components and finished jewelry, and more!
May 2, 2010

Since it is Spring, I’m not only finishing up my final projects for school, I’m doing a little spring cleaning both at home and on the business side of things. I’ve used my own name “Sarajane’s” for a long time because I do a lot of different things that don’t fit neatly under one title. I make costumes and dolls, stories and graphics and books, websites, dolls, ceramics, textiles, polymer clay…my interests wander around a lot, but they come back together on many points. But I never really liked how it looked on the display cards, and I’ve tried LOTS of variations. “What to do,” I wondered to myself yet again, trying on some new looks for business cards much like a new hair style or bathing suit for the Upcoming Season. What would cover the digital, polymer, textile, ceramic aspects of where my creative stuff connects? It didn’t really hit me (sometimes these things take a while) until I was looking for an image to use as a favicon.ico file for my websites, and I looked at the one I use for the header of the Creative Connections blog. Polymer clay, textiles, digital manipulation..duh, Dorothy, there is no place like home. So today I played around a bit and designed a new business card and hang tags for the items I’ll be selling. It’s fun to try on new looks!
I have been studying programs like Adobe Photoshop, Illustrator, InDesign and DreamWeaver at Front Range Community College. Plus I’ve taken courses in ceramics, digital photography and creative writing! It’s great to use my hands and my brain both, and to learn new ways of doing art. Four semesters of soaking it up and learning as much as I can possibly hold, and now its time for a couple of months putting all that I have learned in my classes to good use. I’ve got a big schedule for my “summer vacation” that includes finishing the photography and editing of my upcoming book “A Collection Of Polymer Clay Masks”. It’s under way and going to be in print by October of this year. I have booked the majority of the summer just for this.
I’m also going to be be an instructor at Tougaloo College’s Summer Art Colony for a week in July. The annual Dyeing Days are coming right up the first week of June when we’ll be getting Very Colorful, and I’ll be making lots of beautiful new things and packaging them up for sale. That’s my backwards count-down of what I will be doing for the next few months, along with liberal applications of gardening and the occasional hike into the mountains. It’s important to get outside and remember what a beautiful place the foothills of the Rocky Mountains is, particularly in Spring.

Apr 9, 2010
 That’s a line from an old Cowsill’s song, an early Family Band that doesn’t get as much nostalagia air time as say, the Osmond or Jackson Family does now that everybody is all grown up. “She was the flower girl–well, I don’t know just why, she simply caught my eye….”
And here’s my own flower girl, a life-size ceramic mask glazed with cone-06 low fire glazes. I might have to do some more of these big masks as they are indeed fun, though pretty heavy compared to the miniature ceramic masks I make more often. And speaking of those, I am now arranging my summer schedule, and THIS year I’m taking the summer off from school to finish photos and editing for my new book “A Collection Of Polymer Clay Masks”. It is on-track for release this Fall. That’ll keep me busy, and I’ve also scheduled a trunk show and classes at Nomad Beads in Boulder where I’ll be selling miniature ceramic and polymer faces, beads, and more! Come see all the goodies on display Mother’s Day weekend, May 8-9 at Nomad Beads, 1909 9th in Boulder Colorado, and say hi; I’ll be there creating beaded Spirit Dolls and jewelry.
Feb 14, 2010
 I’ve been working with ceramic clays lately in addition to all that I do using polymer clays, and there are also precious metal clays in bronze and silver, and now there is even glass clay, made using frit. I enjoy working with them all, and will continue to show off what can be done with them at my website Sarajane’s Polyclay Gallery.
I’ve been re-doing the pages there and just finished the brand new page on making millefiore canes using polymer clay.
I LOVE making canes, and this is a technique where polymer clay has all sorts of advantages over other kinds of clays. Not all polymer clay artists use caning as a technique–some sculpt, paint, texturize and do all sorts of things without ever create these little packets of pattern.
Other artists do nothing BUT make canes and sell them to others to use. Many artists use their own canes to create fabulous jewelry, sculpture, objets d’art, and even illustrations for books and magazines.
Here’s a horse covered with millefiore canes made by Judy Summers. Jewelry artist Klew made the gorgeous necklace and pendants using her cane slices applied to other shaped pieces of polymer clay. Carolyn Potter’s curvaceous goddess is also covered with quilt block style canes.
These are only a few of the incredible artists using canes in their work.
Dec 12, 2009
 These are some of the miniature faces I made in my ceramics class, raku glazed and fired. I like the fiery nature of taking these out of the kiln while still red hot and dumping them into the trash can with shredded paper, then coming back an hour later to see how they look!
I made a lot of different faces using some of my own silicon molds that I created using my polymer clay originals. Thats something else I really enjoy—the creative connections that different media allow.
 These first four faces are all made from the same mold, but look very different, partly because of the varying glazes. The fourth one has no glaze at all on the face, and the bare clay turns black when fired.
Here are two masks that are full sized replications of traditional Noh mask characters, the Maiden and the Fox God. The Maiden’s chin broke during the bisque firing, so I painted her with acrylics.
The Fox is glazed and details were added after firing, like the gold leaf around the eyes using a Krylon pen.
In addition to faces, I also got to try my hand at throwing on the wheel, and managed to create several cups, a teapot, three lidded vessels and two small vases. I had a great time in my ceramics class and look forward to taking ceramics2 next semester!!


Aug 14, 2009

On our PolyMarket Press side of things, work is progressing on new books. In 2010 we will see the debut of two new books from me–
Making Faces, Molds & Forms and The Art of Polymer Clay Masks. Learning a lot more about using programs like Adobe Photoshop, Illustrator and InDesign has been keeping me very busy this year, and now I’m focusing on using them to produce new books. I’ve assembled a fabulous array of hundreds of images from polymer clay artists who create masks, and I am looking forward to sharing them all in print.

 Judith Skinner is also beginning work on her new book about the Skinner Blend, the variations of it and the many uses it has for polymer clay. There is a tentative publication date set for Fall 2010. If you are a polymer clay artist who uses this technique and you’d like to submit images for consideration, contact me at sarajane@polyclay.com Judith is seeking the best that’s out there with high resolution images (300ppi) in a size format to fit within a 9″x7″ pages. Submission deadline is March 2010, which gives you all some time to get pics of your best pieces that make use of the Skinner Blend technique. Contact the email above and I’ll respond with the full information letter.
Images will be edited as needed to fit. Each artist will be credited by name so include that along with information as to the size and listing of all media used. Since it was first developed and shared with the polymer clay community, artists around the world have been using this color gradation technique in amazing ways. Just wait till you see the variety gathered into one great book!
Aug 1, 2009
 In the most recent polymer clay miniature mask swap (an annual event prized by all who participate) I not only traded my own masks for a collection of 100 wonderful miniatures made by others, I also received some great goodies as gifts!
Patty Barnes did an entire collection of vibrant butterfly masks and all ten were different.
 She’s using a transfer technique and embellishing with sequins and swarovski crystals. It was very hard to choose, by my efforts were rewarded with not just one, but an additional butterfly mask as a gift. It made it easier to let the others fly on to their new homes!
Rebecca Wells- Stout sent an additional mask as well, and I love the extruded red hair on this one! She’s beautifully fierce. Rebecca has used slices of canes and crystals to dress her up.
Rev. Byrd Tetzlaff sent along this colorful character that she calls “Charlie Chaplin on acid” and I can see exactly why she’d say that! I’m told the man had a great deal of energy and was a colorful character himself but not as much as this version, which I like very much!
 These are only a few of the hundreds of masks that I’ve collected from my years of making and swapping miniature polymer clay masks. Next up for Fall semester at college I’ve arranged an independent study course to combine my Adobe InDesign, Photoshop and Illustrator classes and skills into creating new books, and the mask book is one of the projects involved. So after having a delay of more than a year, I’ve got the tools and the skills and (hopefully) the time all coming together to allow me to work on this long awaited project!! Stay tuned for more developments as they happen.
Jul 20, 2009
 and never leave the farm!” is the way I recall that refrain. What song its from is a little hazy, but thats the way summertime and songs ’round the camp fire can be. This year we’re embarking on a World Tour while staying cozy right at home, thanks to the fine folks at TwistedPapers and their fabulous cds! Stan and Russell have put together outstanding collections of all sorts of vintage and original art that can be used in all sorts of creative ways. Shown here are three cds from their Vintage Travel Ephemera Collections. Tickets, maps, menus, hotel brochures, cruise line posters and an incredible array of advertising art from long ago and far away are reproduced in high quality, full color, high resolution files. Thumbnails are easy to view, and you have your choice of file formats too. My husband is using them as part of his musical “world tour” and I have plans to print out a sheet of these little beauties to decorate some vintage luggage for Aunt Acid, and also a charm necklace or bracelet–these images are perfect for printing at a smaller size on photo paper and using liquid polymer clay to create transfers. The collection of vintage perfume, soap, and beauty product labels is another of my favorites. Many thanks to Stan and Russell for creating and selling these fabulous resources. Take a look at their site and see what YOU could do with these vintage graphic goodies! (I just went there now, and they’ve added new vintage art and reduced their prices too!!! What a deal!)

Jun 22, 2009
 Click the pic to see a larger version.
These whimsical wonders are 10 more miniature polymer clay masks from the 2009 Internet Mask Swap. Created by Ellen Bellenot Rumsey, these little works of art are each small enough to fit in a three inch square. She’s used an amazing array of textures and colorful pearl-ex powders. The mica in the powders and in the gold polymer clay give it all incredible glowing lustre.
I’m taking a few hours away from my school work to catch up on taking pictures from the Mask Swap and from the Dyeing Days. These are two huge annual events that take around a week to put together and somehow managed to both happen within a month of each other this year, and along with going back to school full time. We got tremendous amounts done and both events went very well, but I havent had any time to chronicle and share the results.In fact, the massive amount of reading and computer time I put in for the 4 classes I’m taking leave my eyes feeling as though they look very much like the ones in these masks.
I’m going to play hooky from homework once in a while and get some pictures up, so look for more soon! IS it playing hooky to take pics and edit them in photoshop when your classes are in digital photography and photoshop2? hmmm, perhaps I should take an ethics class and see if my homework there answers the question there…
May 16, 2009

Whew! What a huge undertaking, and what wonderful, amazing small rewards! I mean small as in “miniature”, or specifically “fits inside a three inch square” (more or less). Several years ago I was invited to take part in a Polymer Clay Miniature Mask Swap by Sherry Bailey. I was in one of the several groups, and sent in my masks. Shortly thereafter I got my box of goodies, and kicked myself all around the room for not having been in every group—there were pictures included and I missed out on some real gems. I vowed never to repeat THAT mistake! And also to be in another mask swap ASAP. I ended up taking over the job and expanding the number of participants (my artistic greed knows little about bounderies or sensible work loads in some areas…)
So for the last few years, there’ve ben annual swaps that attract wonderful artists who ALSO want collections of these minimarvels. When announced, interested parties sign up for one, two, or three groups of ten. The SwapMistress (thats me, in this case) keeps track of who signs up, and fills the groups. We do a total of ten groups of ten people. For each group, the participant sends in ten masks, all signed/with a card and bagged. When they are all here, my husband and I alphabetize the incoming boxes for easier finding, and then start filling up Group Bags by lining up the brown paper lunch bags. Starting with 10 bags marked “A” we check the All Powerful List and take out each participant’s set one at a time–If Mary is in group A, we put one of her masks in each bag, and the same with the other 9 participants. At the end, each person in Group A will get a Group A bag mailed back to them, containing one of their own and one of each of the other 9 people’s masks. Sounds fairly simple, right? It kindof is…except then we do it for B, C, D, E, F, G, H I and J groups. This generally takes a full day–there are a thousand little masks. Then, the next day, my dear sweet hubby and I start packing boxes. If Mary was in Group A, D and F, we pull an A, D and F bag and put it aside for her in a grocery bag marked with her name and the groups (cross checking is pretty important!! ) with the mailing lable and postage she sent. This also takes a day or so…and then there’s the packing and sealing of the boxes, and three hours or so at the Post Office.
I, being the SwapMistress and therefore In Charge, get to violate the “three groups” thing and be in ALL ten groups. This is great because I get to keep one from every person in every group–no more missed gems!! Except of course for the people that make it harder to choose by sending ten that are all different for their sets. Then I still only get to keep one, but I DO have the opportunity to unbag and photograph them all, then rebag before putting them into the group bags. So I say it again—its a huge undertaking, but OH-so-worth-the -effort. I end up making and giving away 100 miniature masks, and getting 100 masks to keep. All are individual works of art showing a vast array of techniques. All have miniature size and polymer clay in common, and “masks” as a theme, but all are astoundingly different interpretations of that theme. I will be photographing the collection that I have gathered over this decade, and putting them in a book, but I’ll share a few of them here on this blog, and you can see some masks from previous years here.
The group of ten Warm and Cool Masks shown above was sent in by Karen Cowles. The two masks below made using the alcohol inks on polymer clay were sent in by Nina Owens. The light was fading and I only had time to take a few pics. I took more the next day, so watch for future posts! You can also see more at other participants’ blogs like these by Laurel Steven and Tonja . Click the pics to see them larger.

May 5, 2009
I’ve had a great time at college this semester. My favorite class has been Adobe Illustrator 1 , and I’m looking forward to taking level 2 this fall. Adobe Photoshop has long been a favorite tool and plaything both, but although I had an ancient version of Illustrator, I didnt use it. I’d poked around with it a few times, but it’s not intuitively easy to pick up just by poking the buttons, and the Pen tool is downright scary without a little guidance. But Oh—–!!!! Once you get a bit of familiarity, this program is the Magic Coloring Book that I dreamed about when I was little…the kind that can be any picture you can imagine and drawn much more smoothly than I could manage by hand. The kind you could color in and then change all the colors to different one just by picking them!! “Darker green there…no, blue.” And the 3D modeling makes this program extra sweet. I’m not so great with perspective and mathematical formulae, but the computer is, and it makes creating images a LOT of fun. Of course, there’s so many choices its also difficult, but thats the way it is with any art, and its all part of the fun.
Here are two images I created using Adobe Illustrator. The assignment was to make two calendar pages. You can see the other one over at Aunt Acid’s blog.
Aunty is a wonderfully patient model. She’s shown in these two images in homage to the art nouveau stylings of Alphonse Mucha. I’m looking forward to spending months learning more about this program, now that its not quite so intimidating.

Apr 11, 2009
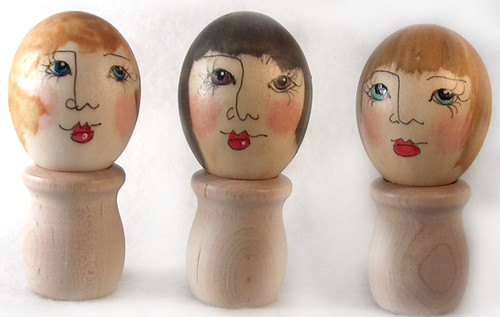
eggladies1, originally uploaded by sarajane helm.
These ladies are made from blown eggs that have been painted with three layers of Liquid Polymer Clay and baked in between each application.
Each one was then given a hand-drawn face using a Micron Pen (this brand is compatable with the clay). Acrylic paints supply facial coloring, and the hair is more liquid polymer clay–it comes in gold, silver, black, and other colors.
The eggs are incredibly light weight, and can still be crushed if not packaged carefully but they are much stronger than untreated eggs.
Its fun to further decorate them with Easter Bonnets or Christmas Finery and use them to decorate a tree or hang from a branch!
Here are some more pages from the PolyClay Gallery about decorating eggs with polymer clay!
Feb 20, 2009

“You are what you love–and not what loves you back”.
That’s so true–and its also part of a line from a song by Jenny Lewis and the Watson Twins from a CD that I really love, “Rabbit Fur Coat”. It is a delightfully witty and beautifully played set of songs. I’ used to love to listen to music and do my homework….Recently I went back to college after a long winter break that lasted 30 some years. I’m enjoying all of my classes, especially learning about Adobe Photoshop and Illustrator. What wonderful tools!! I’m learning a lot of things that I had no clue about in these programs; some of the tools just don’t lend themselves to easy self-discovery. Even reading about them isn’t the same as having someone show you what the tool does and how it works and then practicing it for a while. Oh, the joy of realizing that something you’ve been frustrated at can indeed be done!
Now I am doing something I really love a lot; taking bits and pieces of art that I have and re-contextualizing them in new ways. Collage and mosaics and masks and miniatures and textiles and image manipulation all play a large part of “what do you do?” for me, and its wonderful to be moving into the next layer of “how do you do that?”. School can be really illuminating; and it certainly lights up lots of new creative connections, even in older brains like mine! Using what’s old and making it new again is what creativity is all about. Here’s a recent assignment; a collage that uses Photoshop layers and masks, plus a quote. It features a doll (BonBon Bertie) and her setting that I made with fabric and FIMO polymer clay photographed by Bob Grieser back in 1999, and other images–plus the quote by Jenny Lewis!
You can see more dolls here, and at Aunt Acid’s blog.
Jan 19, 2009

With a CanoScan 8800F scanner in the house for the last month, I’ve been scanning slides and family photos, editing with Adobe Photoshop and making slideshow presentations to burn onto CD’s.
The scanner gives me access to all the slides that always lived in the box at my Grandparents’ house, first cupboard on the left in the living room, top shelf. And if we were good, my sister and I could look at them in the viewer.
Looking at those slides now digitized, thinking of the technology I access now and the technolgy of then–our world (my world) has certainly come a long way since the late 1950’s! And somethings are just the same–I still like to draw. Its just the tools that change, not the joy in the creative connections!
 I’ve done a slideshow for my friend Margie’s family reunion too. (Take a look at her freshly updated glass art webpage here.) Her family brought photos dating back to the 1920’s, and we scanned them right there at the reunion, as well as getting pictures of the event. Later, I put them all on a slideshow cd that she can distribute to the whole family–those that were able to come and those that were not! Its great to be able to better access the past while we still have the memories of those around us available to tell stories about the pictures, and identify the people, times and places.
When I went to school the first time, it was A Very Big Thing to be allowed to learn to use the ELECTRIC typewriter. The mimeograph and ditto machines did not allow for “undo” or editing….
Now I have computers and digital tools available to me, and I am going back to school to learn how to better use them. This will no doubt continue to change how I am able to do my work in the future, and I’m looking forward to it! I’m also looking forward to using slides and pictures of past work and using those new tools to present things in new ways. I’m starting with pictures of Madame & Her Shady Ladies dolls in minature sets that were taken by Bobby Grieser in 1992, before I had my digital camera or computer. Now I can use them! You can see more of them at Aunt Acid’s blog, and there’ll be a page and even a calendar later. I’m looking forward using them alot in this coming year of 2009. Hard to think that we’re more than halfway through that first month already, and so much going on! Here’s a view of one of the ladies. She’s about 8 inches tall, and shown with a paper and epoxy resin fan made by my friend Elaine.