Apr 17, 2021
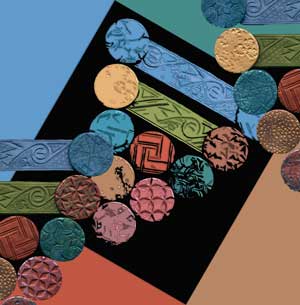
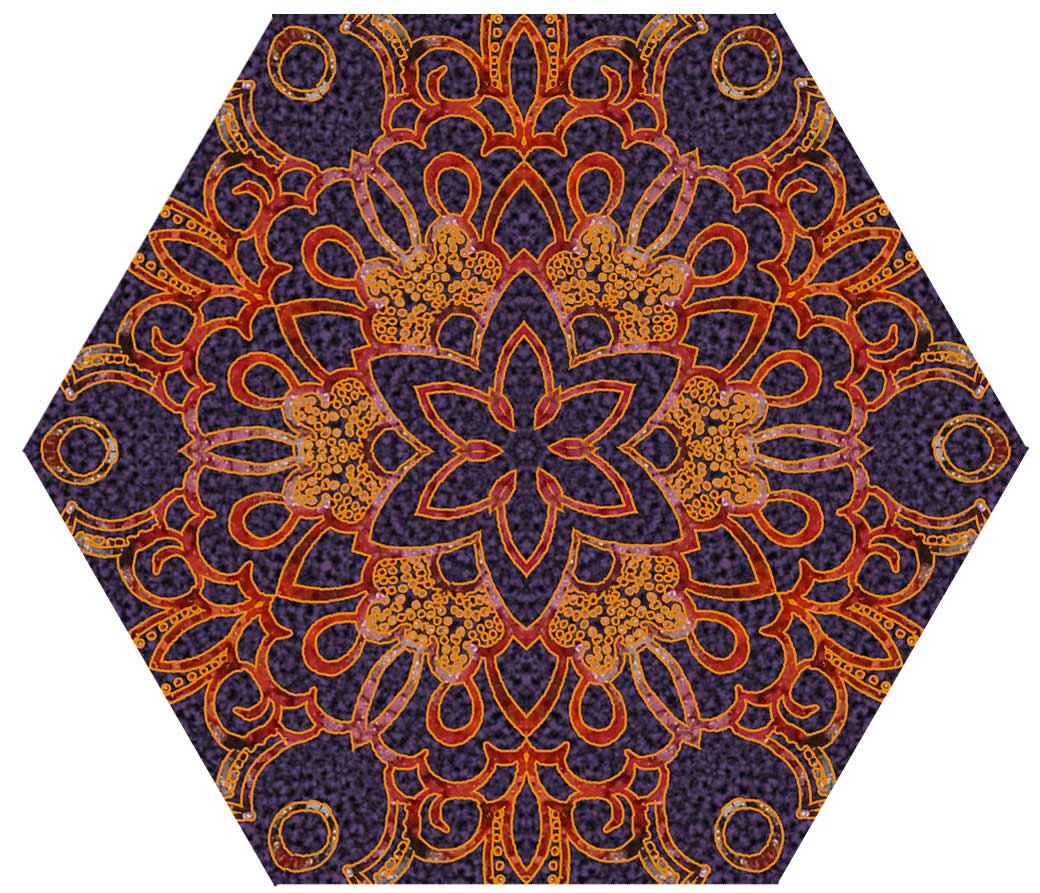
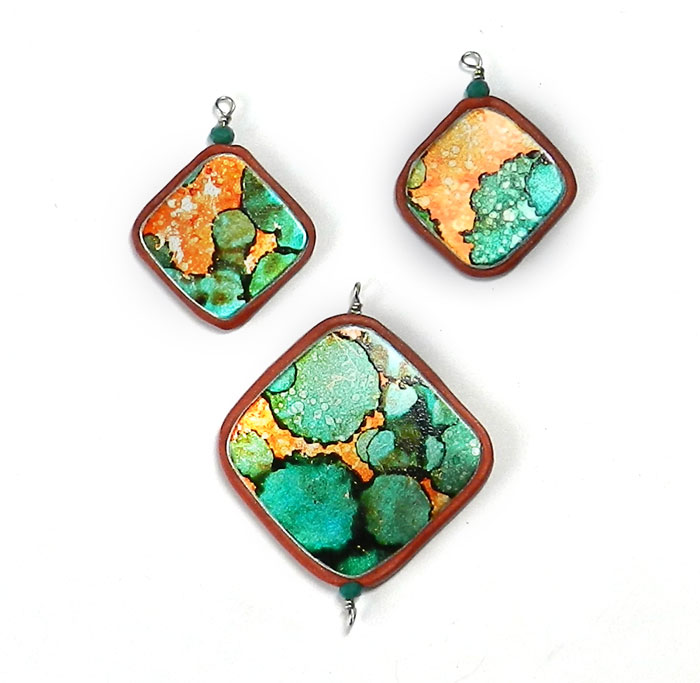
I love the vibrancy of alcohol inks on metal. I like to cut the resulting pieces up to make jewelry components and decorative objects. Before doing that, I photograph and scan each one as a whole image. Then I can digitally manipulate them. I like to use them in many ways, including creating mandalas.
I have an account at Pixels.com, a Print On Demand supplier for artists. I make my designs available on clothing and household decor items, and if others purchase them, I get a royalty. I can also buy my items and sell them elsewhere, but I do like letting Pixels do the fulfillment and shipping!
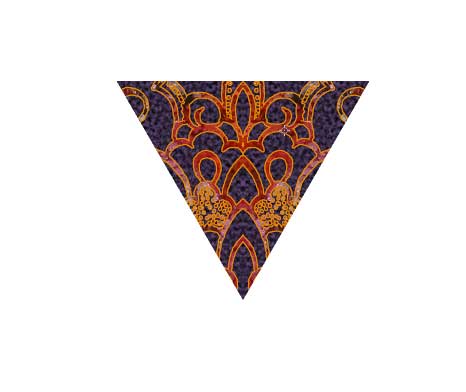
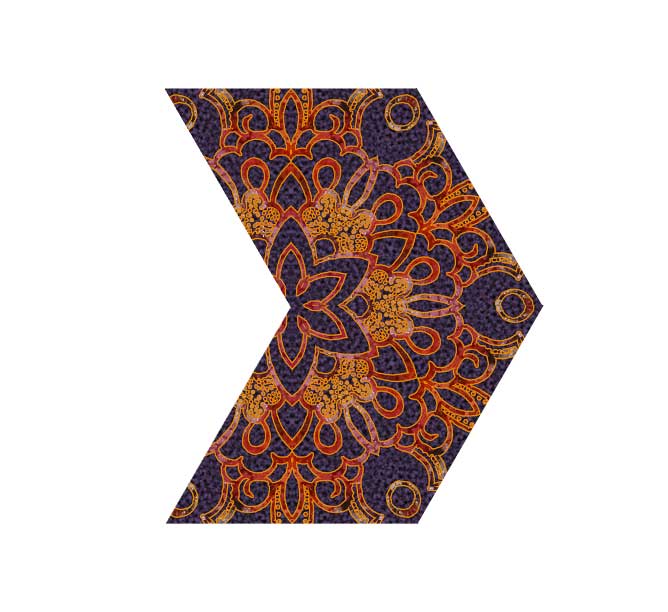
By using photo editing tools to make masks and layers, I can combine and recombine beautiful bits and pieces in many different ways. I create a triangle, then duplicate it–and keep duplicating.
Oct 22, 2020
Since I last posted here, I’ve been spending some time and effort turning textiles and beads I already have into new dolls and wearable art, and exploring new techniques along the way as I go. For months I spent an hour or so most weekdays embellishing dolls with beads, silk ribbons, dyed textiles…I also did some sewing using versions I altered of Patti Culea’s wonderful doll patterns from her books. I had used parts of her patterns before–she designed wonderful hands and feet for her dolls–but I had never made a doll just as it was in her designs.I jump around from instructions on my own curve, but you can miss things that way too. So I made one of my 2020 projects to get out my stash of dyed cotton jersey and try the patterns as given, and THEN mess with them more…
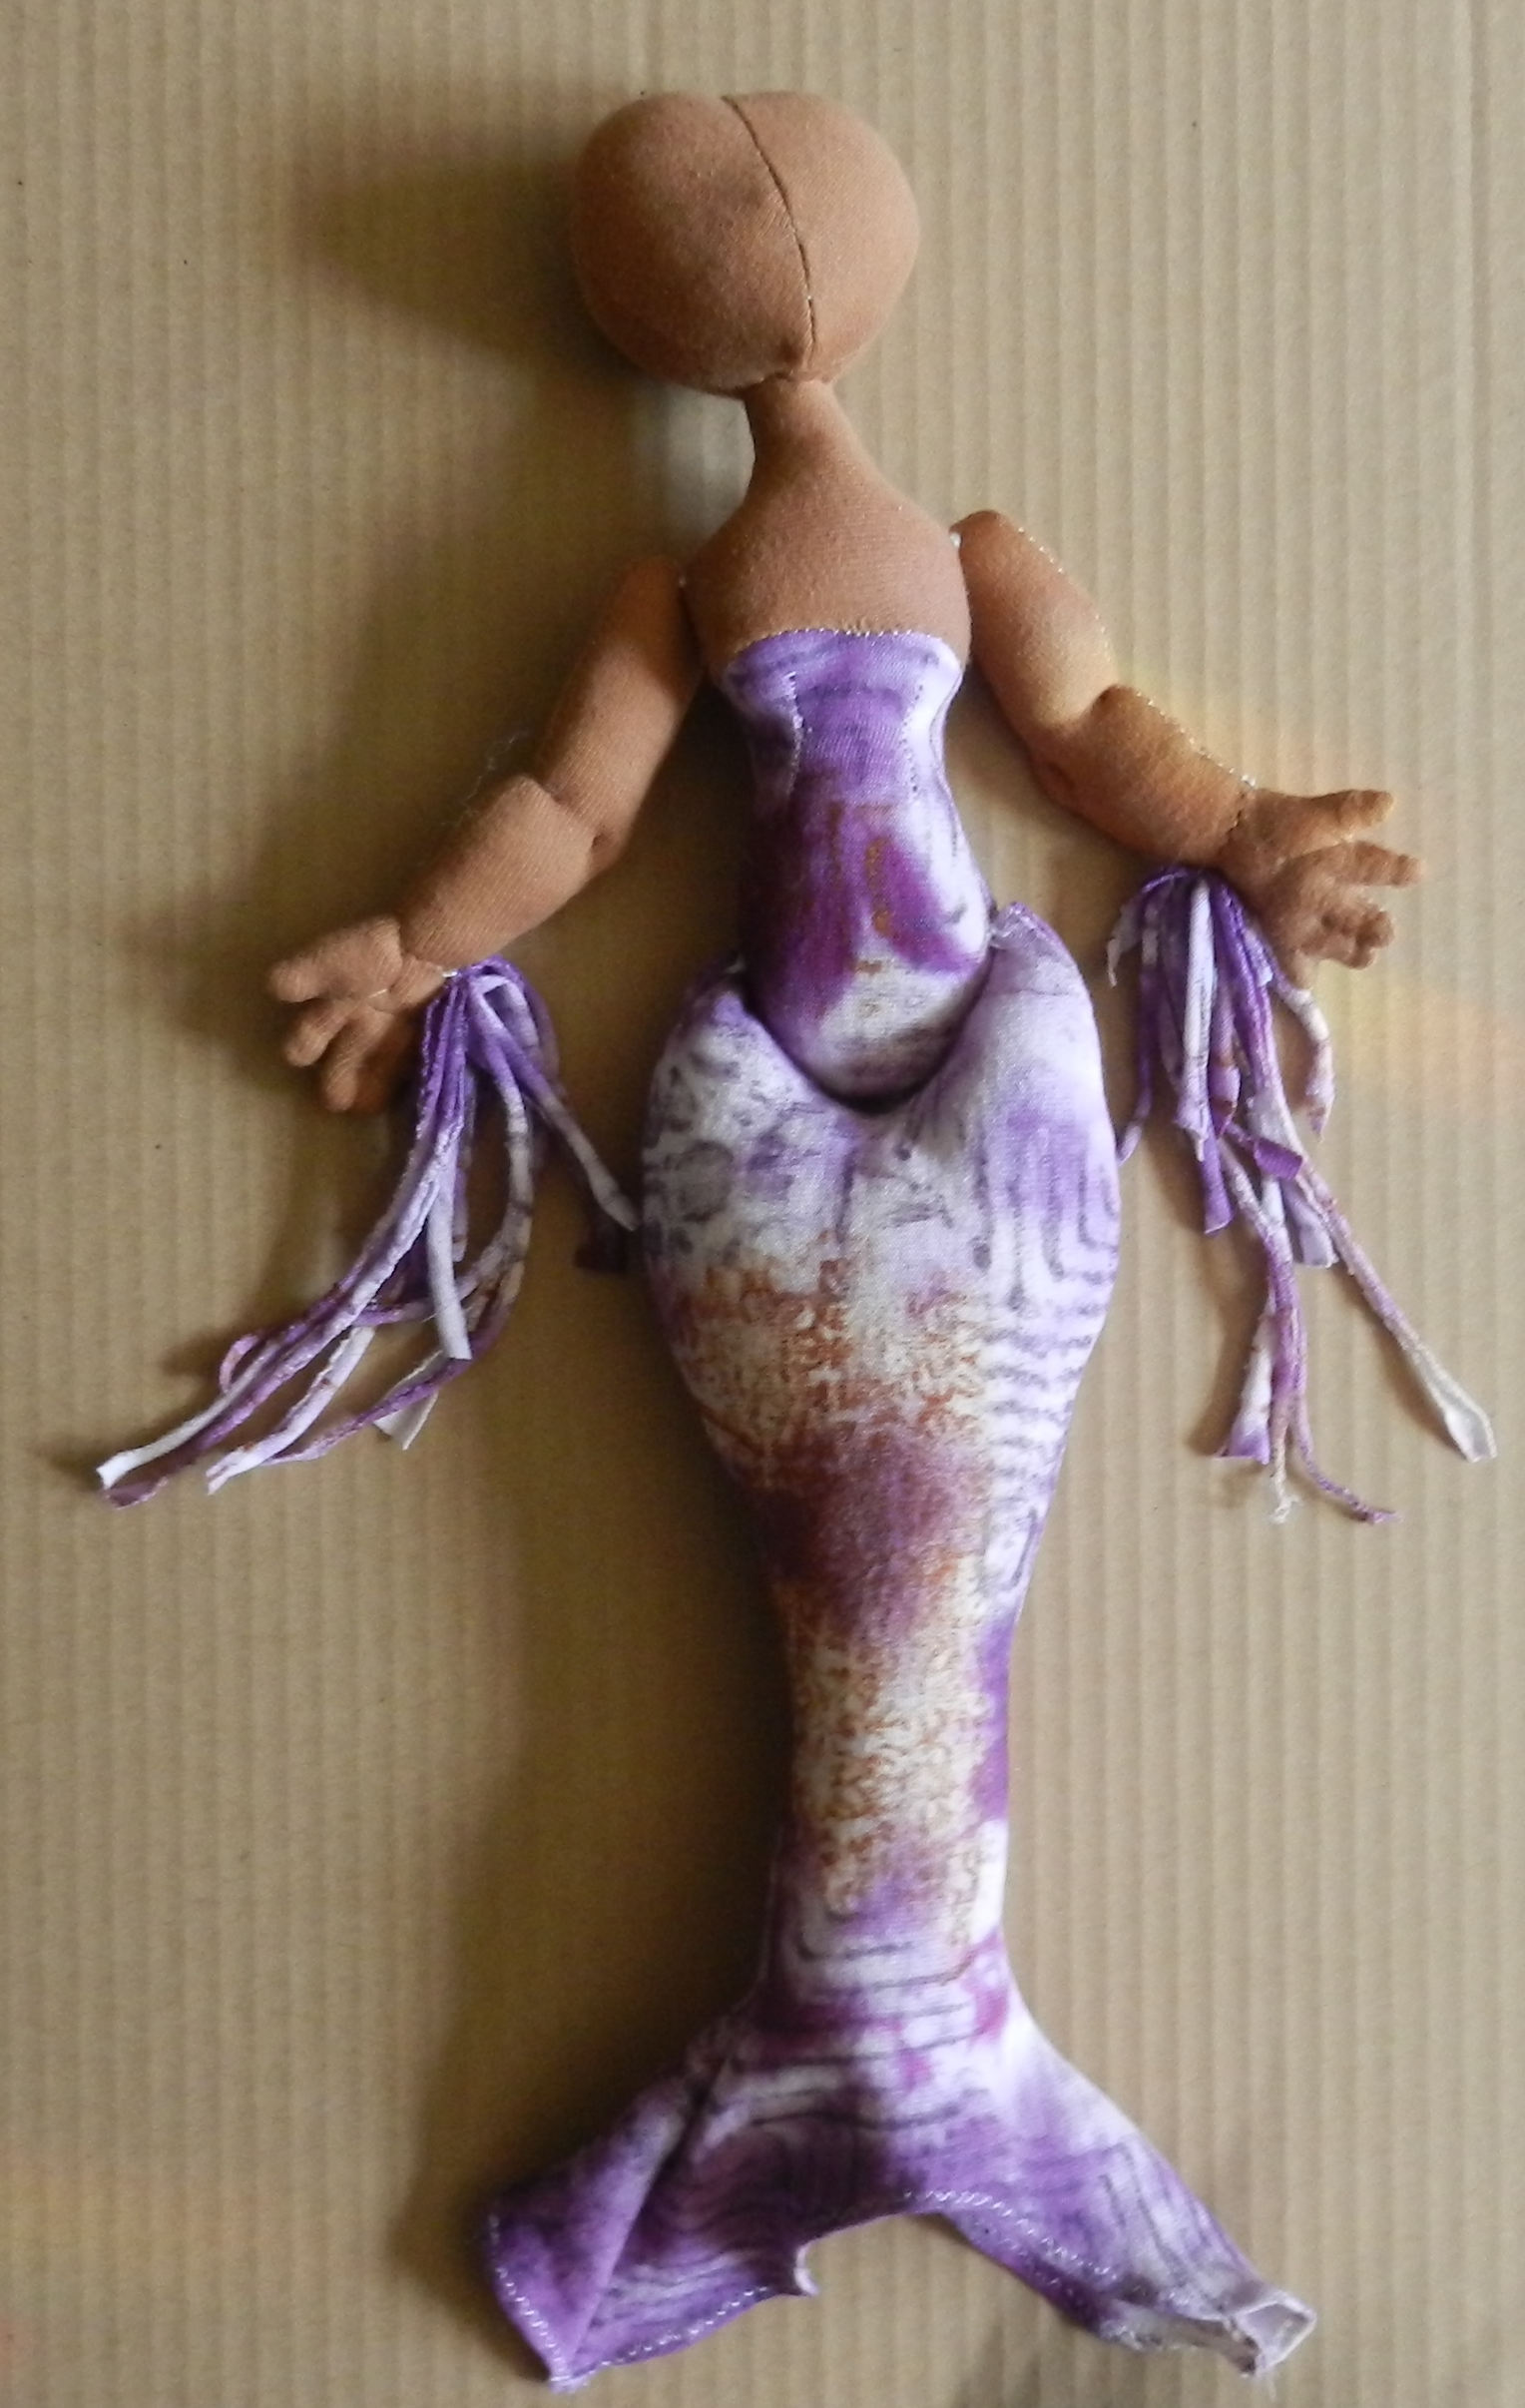
I played with scale and body shape and ended up with 3 dolls that need to have some clothes made for them (coming later this year!) and one that had a mermaid tail instead of legs, with moveable hips and shoulder joints. I used Procion coldwater fiber reactive dyes with some over painting using Shiva Oil paint sticks to give the body and tail fabric some color. Then it was stuffed with polyester fiberfill and wire to create a bendable bottom armature. Dyed silk gauze gives her tail a flowing purple flourish. Her face and nails were painted with acrylics, and I sewed on many sessions-worth of beads and sequins to her body, arms, and tail flukes.
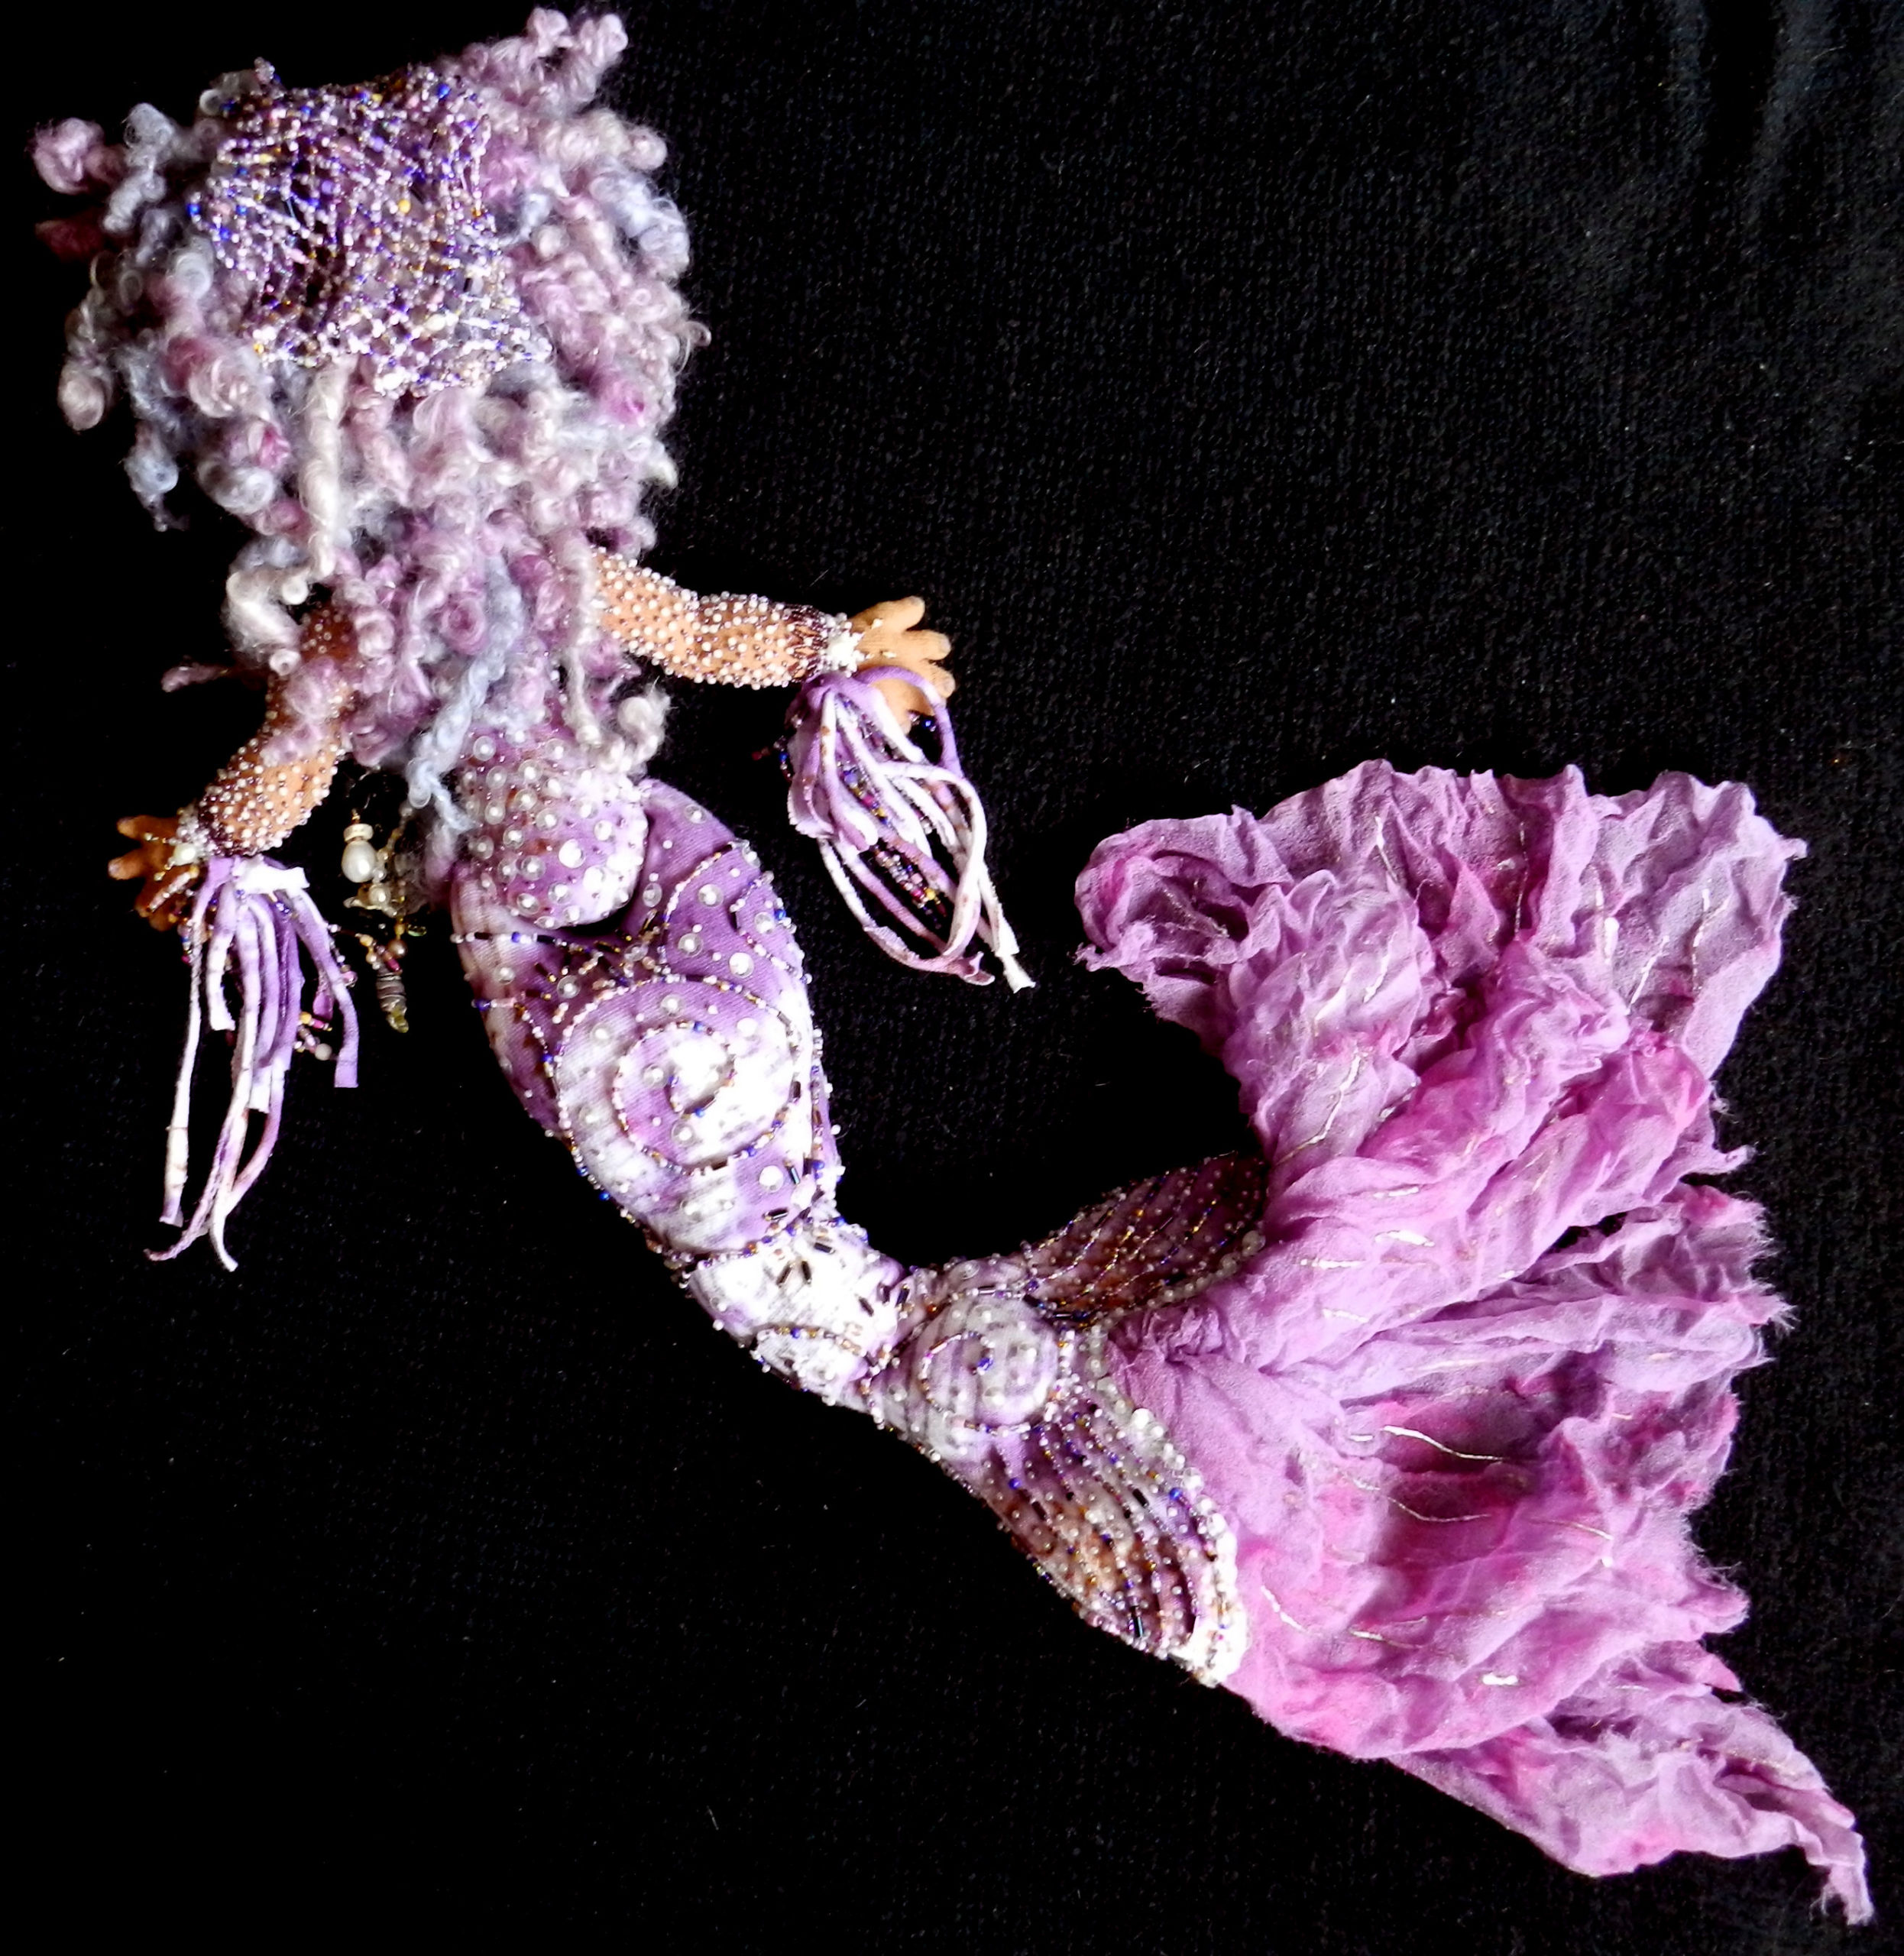
I made her some polymer clay seashells, starfish and black coral, and fashioned her some necklaces, earrings, and hair decorations. Several of these still need to be glued into place in her hair, Her hair is where it all started so it is fitting that that is where she finishes up. Several years ago I was given a skein of beautiful hand dyed and mixed fibers that I knew instantly I wanted to use on a special doll. This one makes great use of it, and I have enough left to wig up a blue fairy as well! But that’s another project. I quite enjoyed this mermaid and would like to make more, but smaller, as the beading took a long while. She is 18″ from head to flukes, and more added for her piled up hair and gauzy tail! I’d like to get the pattern tweaked to about half that. After all, I have lots more fabric, sequins, and beads, and this seems like a good time for more fairies, mermaids, dolls and divas. I’m happier doing some beautiful distractions along with the realities.
mermaid-lower-body-detail
Mar 13, 2020
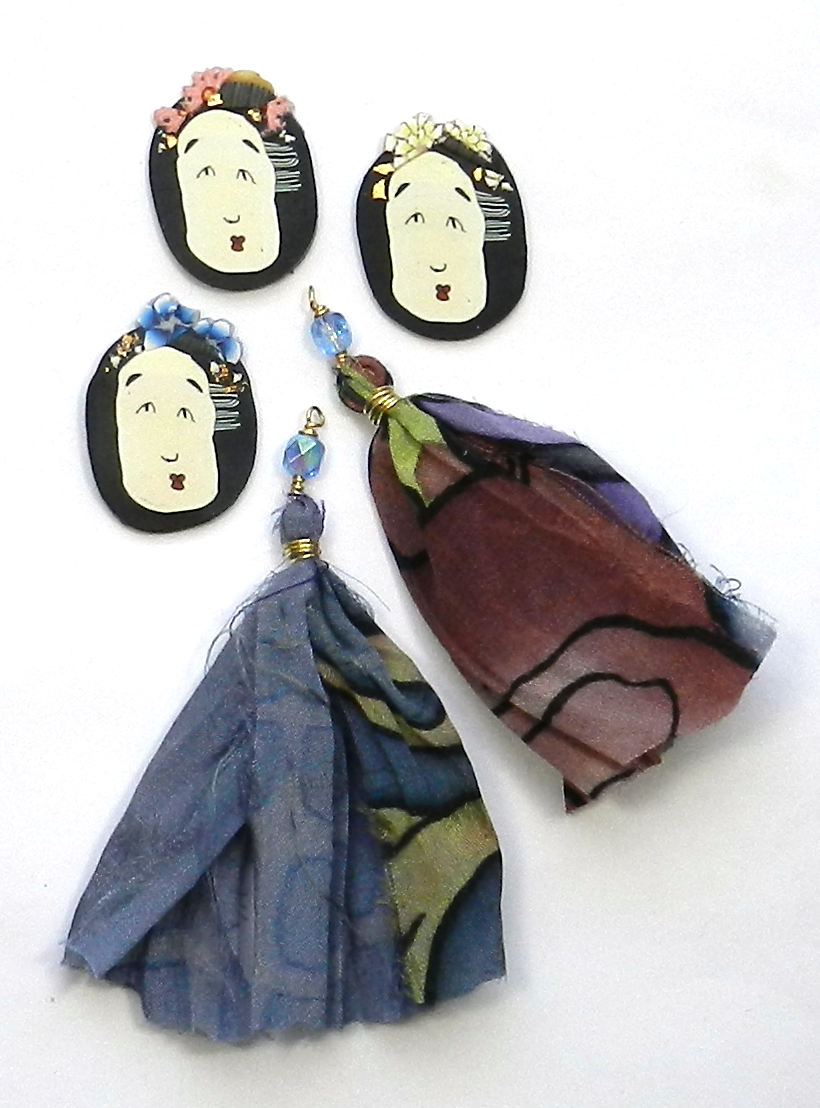
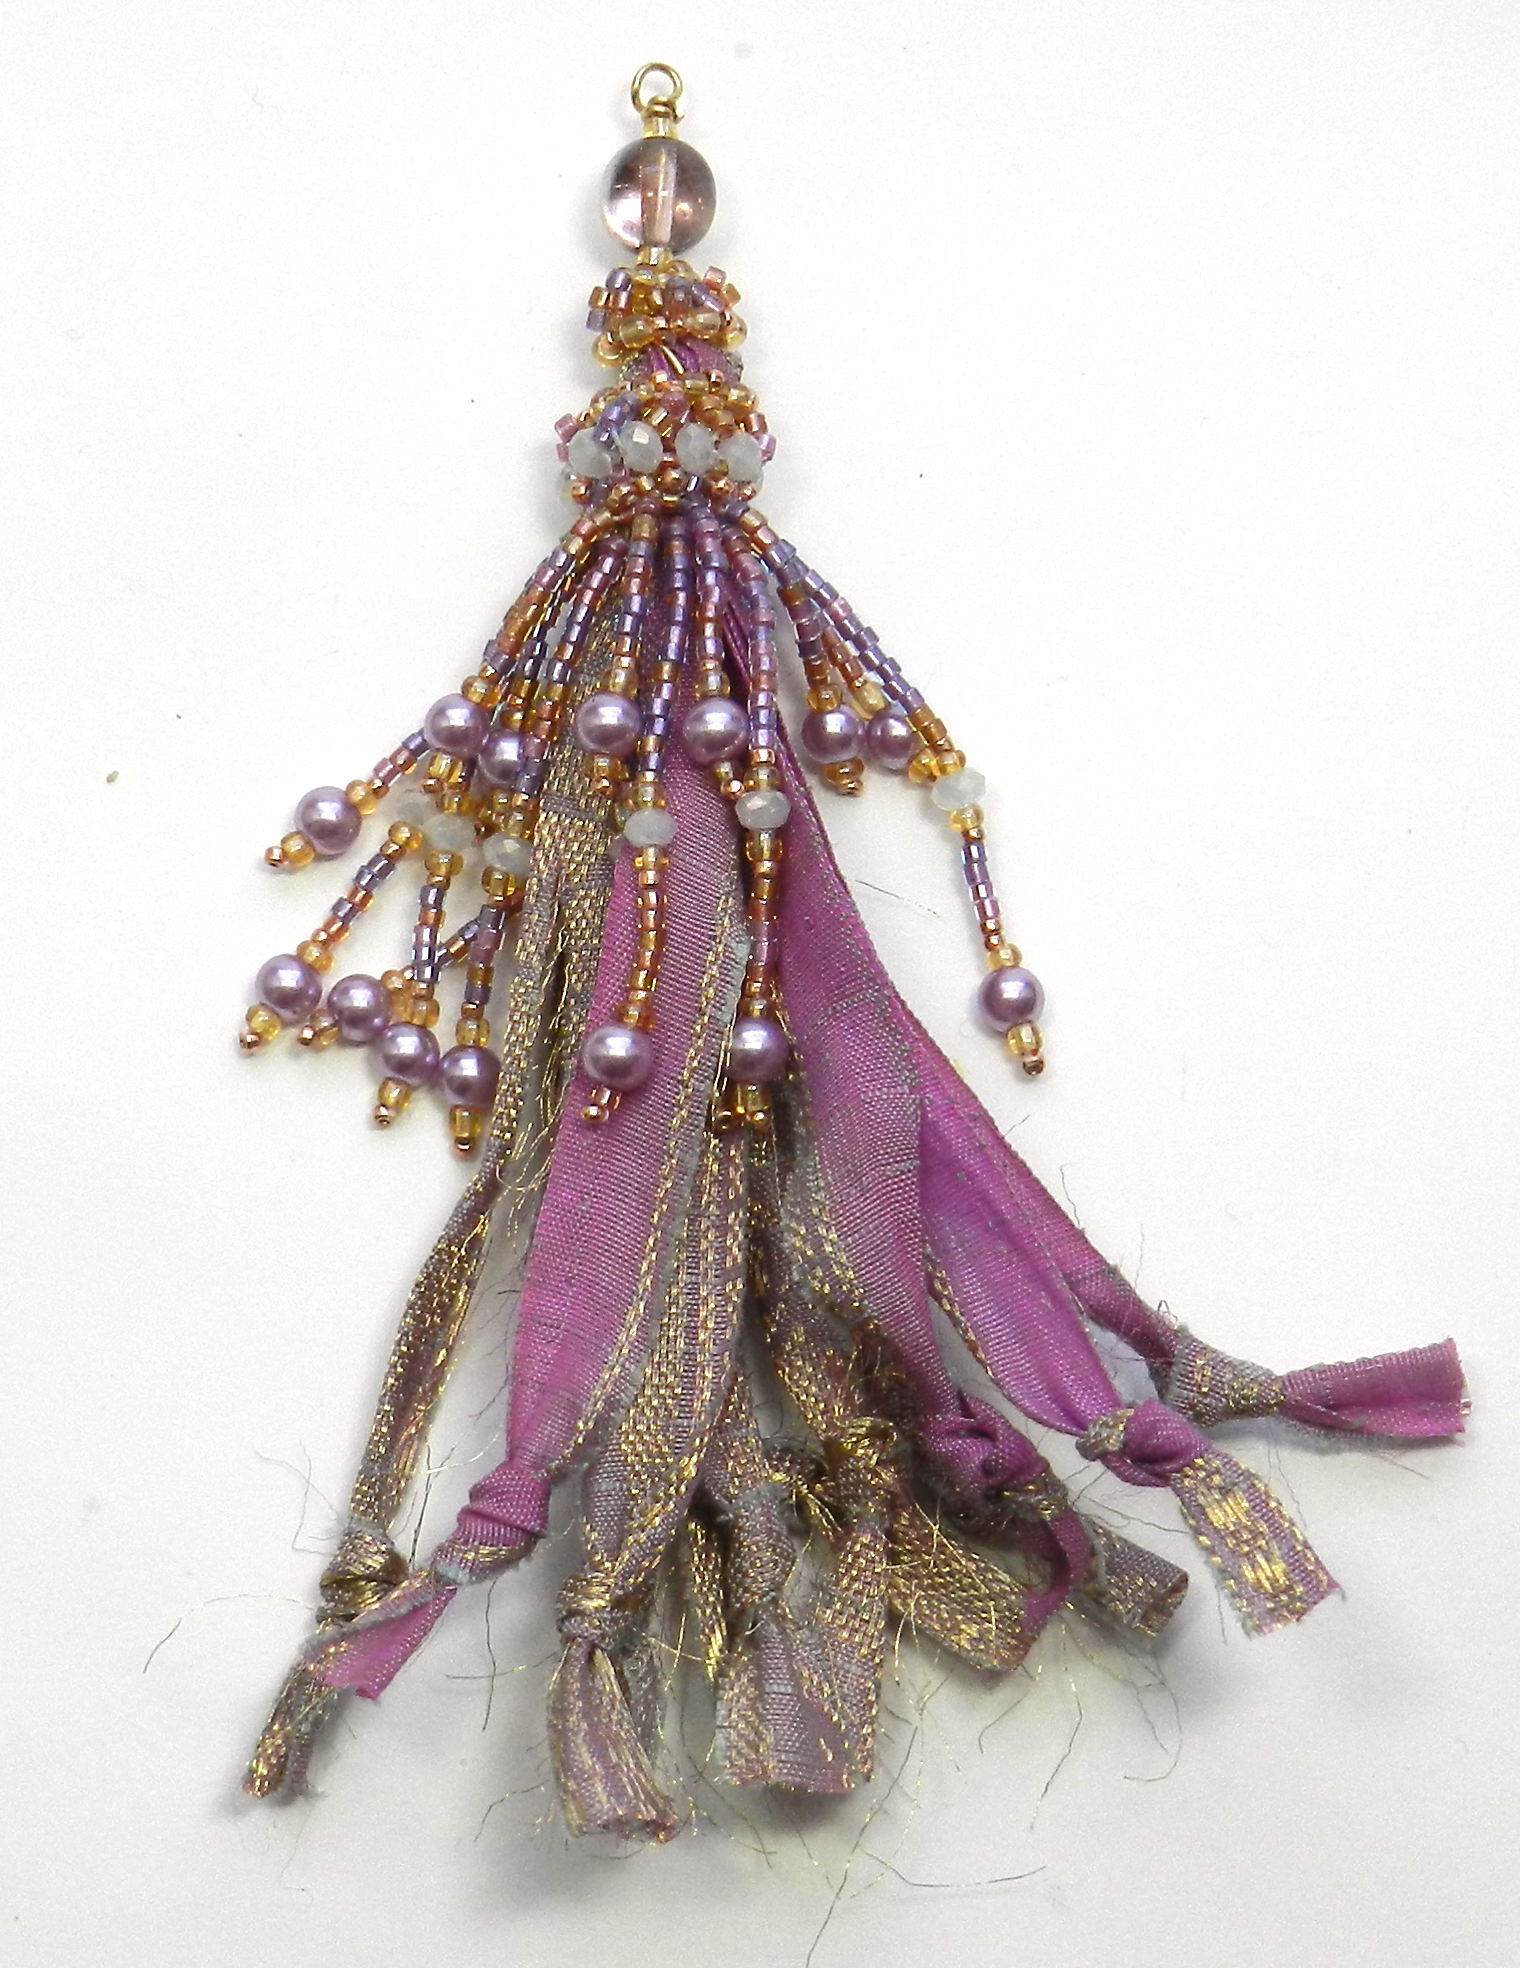
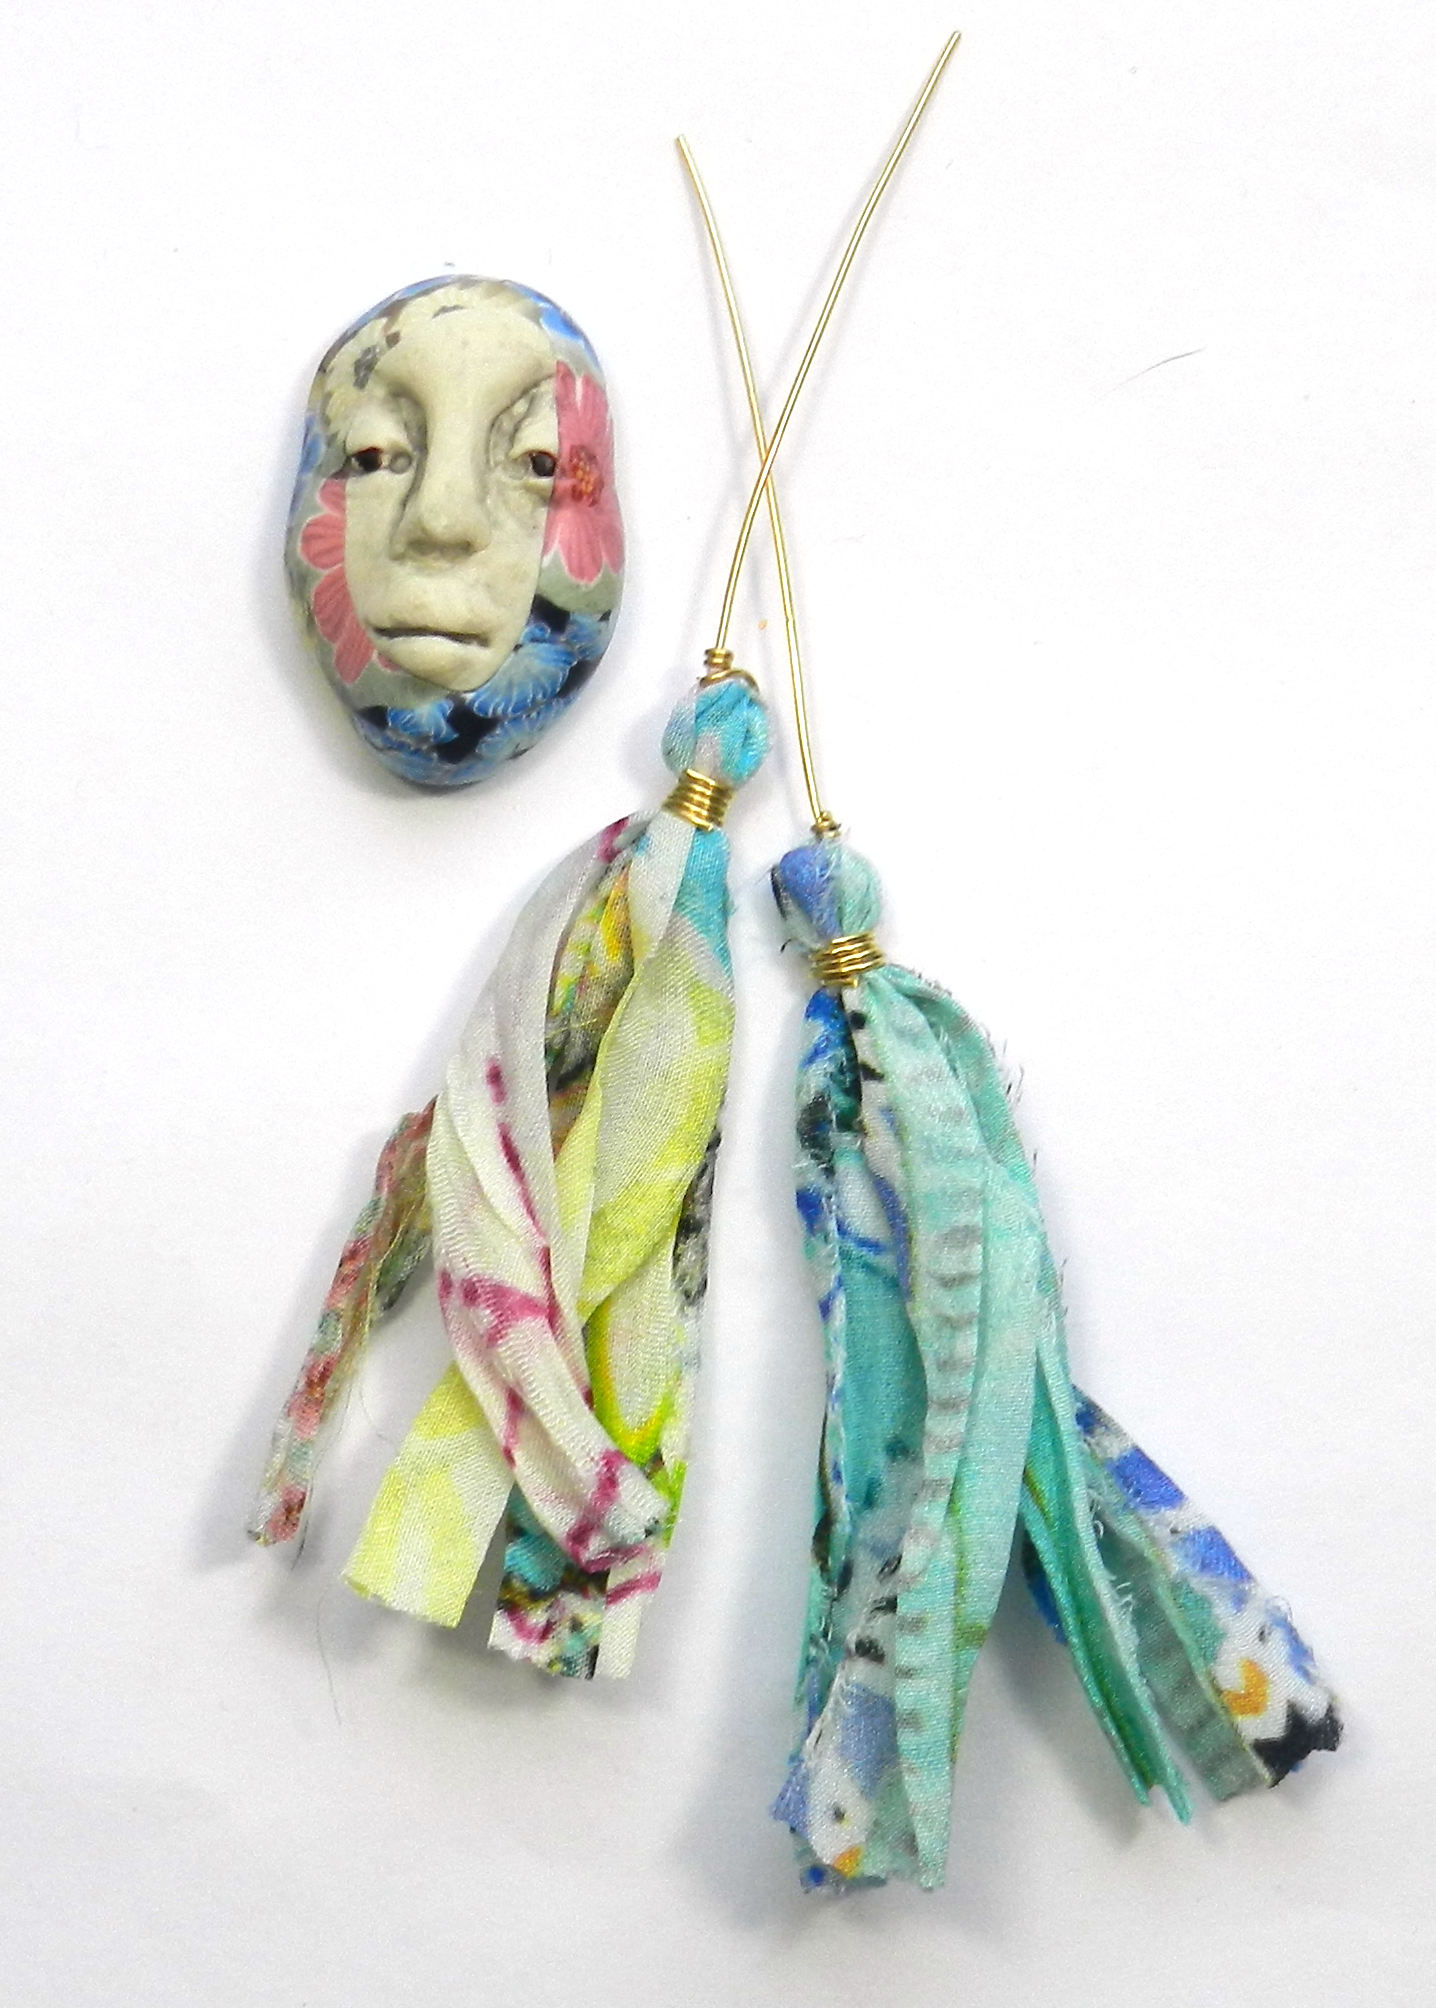
I purchased some beautiful vintage silk sari ribbons recently, and I got two kinds–sari silk chiffon prints, and sari trim with woven metallic threads. Both are beautiful bursts of color and pattern. I spent a few snowy afternoons turning ribbons into tassels with 22g brass wire.
Now I’m having a great time pairing them up with beads for earrings, or with polymer clay faces, destined to be focal elements in bead embroidery, jewelry, collage…
I want to do some bead embroidered pendants next. I love how the colors of the textiles and the polymer clay or ceramics go so well together, and of course, beads will also be involved.
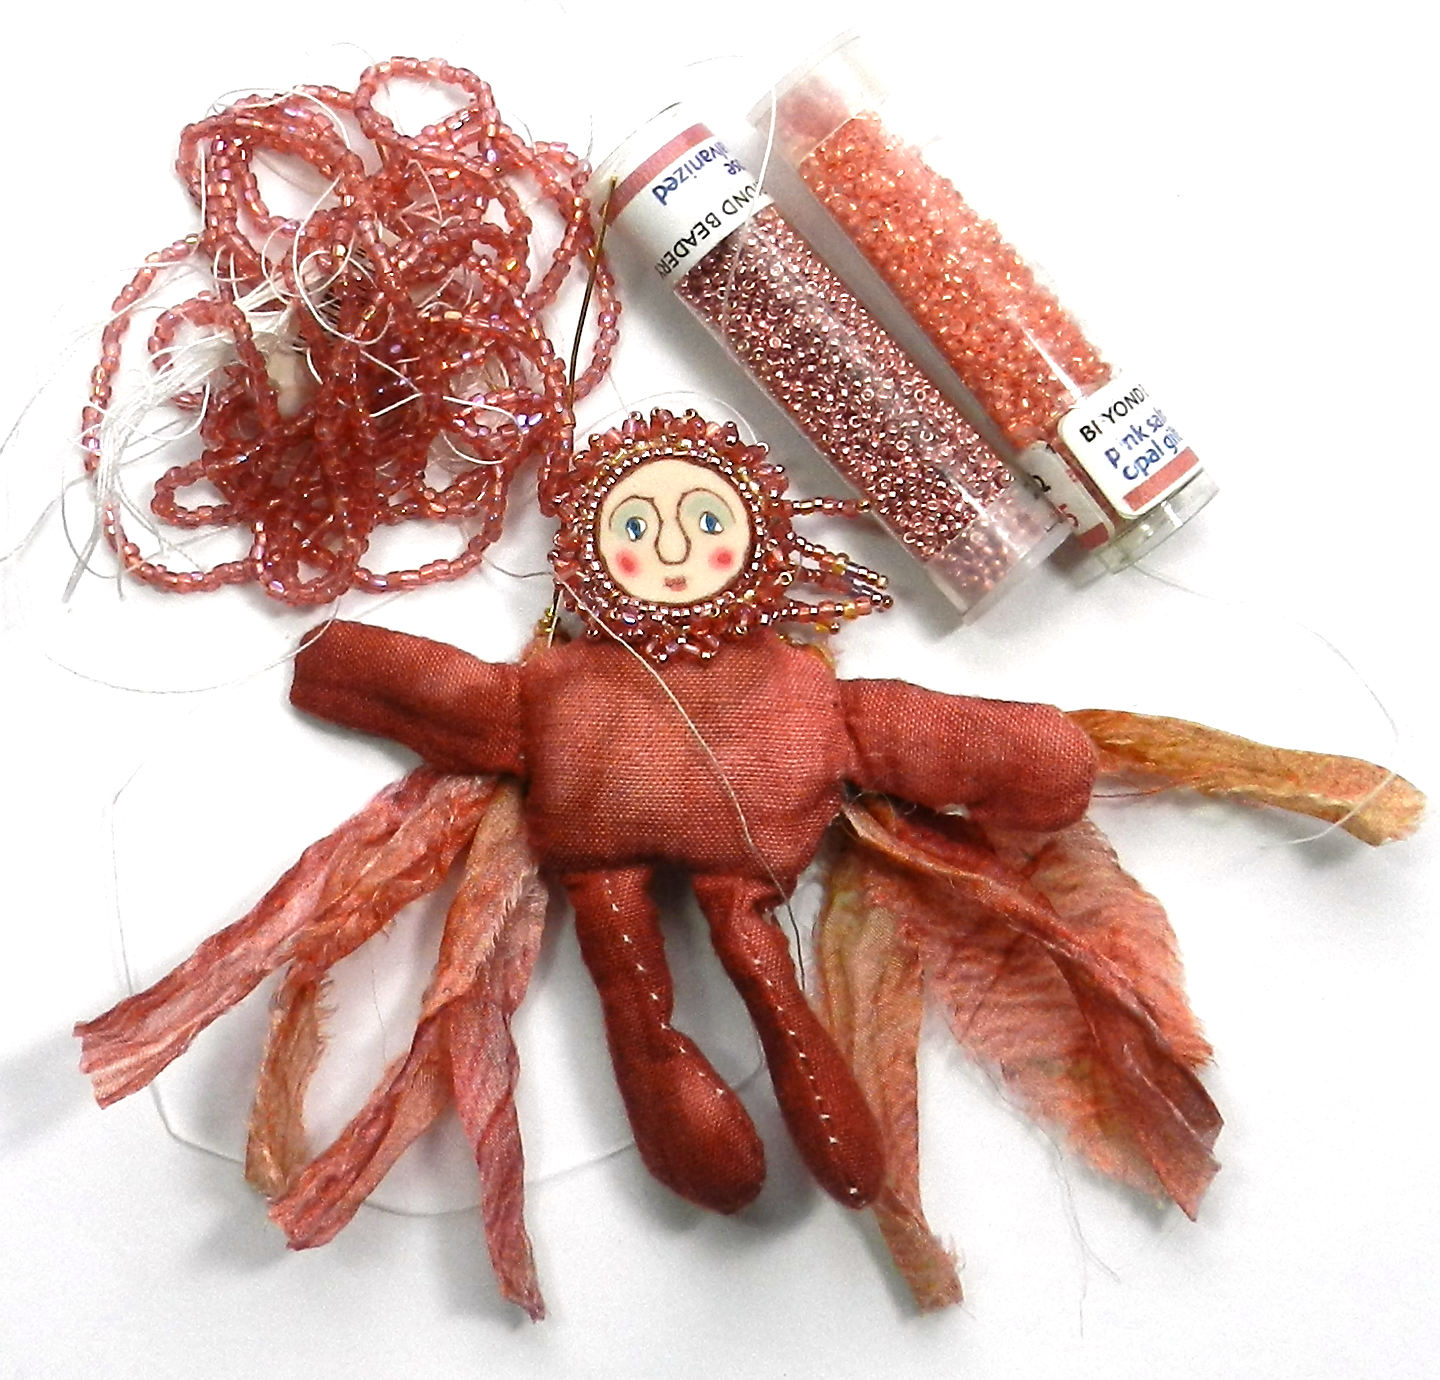
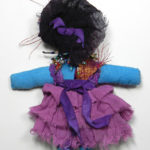
I’ve made some into art dolls, and they are a lot of fun to create! This pink 3 inch hand dyed doll is getting lots more beads, and will have silk chiffon tassels for wings draped down her back.
Nov 19, 2019
 Art Dolls are particularly fun projects for me because I love costuming and dress up, as long as I get to remain in comfy clothes and shoes–so with dolls I can indulge. Making art dolls can be a way of expressing and working though strong feelings, of pleasurably and creatively spending time by yourself or with like minded friends. Some dolls I make from cloth, paper or clay from my own patterns, but I also enjoy staring with a pre-made cloth body and dressing it up. I like the portability of these small projects. You can do a lot in a few hours or continue to add more and develop their style.
I’ve spent many years dyeing natural fibers with Procion MX Series cold water dyes, and built up a lovely cache of cottons, silks, and rayon. So, I put together kits with fabric, lace, ribbons and 3,5,and 8 inch cotton dolls. Then to some I added goodies like sequins, beads, Angelina fibers, dyed feathers, polymer clay or ceramic faces and vintage silk sari trim ribbon. I had a wonderfully colorful time adding ingredients to each kit, and now it is time to share the fun, so art doll kits are going up for sale in my shop here. I’ll be adding more all month!
Shown here is an art doll made from a 5″ art doll kit. I used scissors, a needle and thread, and some E-6000 to affix the polymer clay face to the body. I put a small heavy box on her as a weight as the glue dried to get a good bond. I used everything in the kit except a dozen beads or so. She looked great, but I wanted more..so I added some size 11 gold glass seed beads and size 15 glass purple beads. Much better! She still needs a bit of glitter, some feathers, some paper flowers…but I will come back to her another day. That’s my favorite way to play with dolls! In the meantime, I get to make up samples from the 3 and 8 inch doll kits next. Stay tuned!
-

-
3 and 5 inch dolls
-

-
5 inch doll kit
-

-
front
-
-
back
-

-
with more-front
-

-
with more-back
Aug 18, 2019

I’ve got new metal and more to show and sell at a 24 hour event in the One Sweet Bead Market on Facebook, coming right up on Tuesday, August 20th. This is a great group, and one of three I sell through on Facebook. I’ve closed my Etsy store, and opened my own shop here at Creative Connections. I’ll be putting new work up in sales on Facebook, and then stocking the digital shelves here in my shop!
Aug 5, 2019
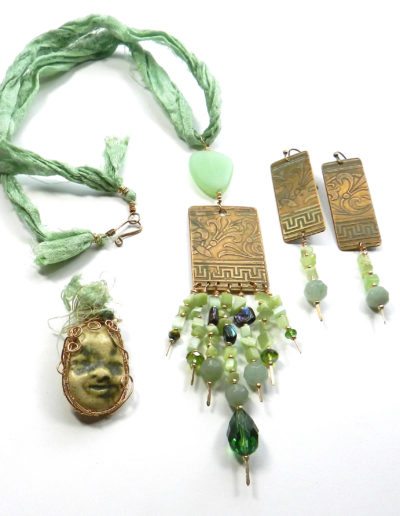
In my previous post, I showed the components and green, pearl and ivory beads I picked out for putting together a necklace and earring set or two. I got them made up, and its time to show them off! The first necklace is a chain of beads that are in a harmonious color grouping–a great way to use up beads that are not enough for an entire necklace by themselves. I like the collector’s mode best anyway–a few of these, one or two of those…
The second image shows the etched brass pendant and earring set made up into a set with some hand dyed sari sil ribbon and a hand-formed bronze wire hook and eye clasp. I also wire wrapped a ceramic face with some bronze wire and a bit of the silk fiber fluff–now it is a pendant just waiting for a ribbon or chain.
The third image shows another necklace, made with etched brass using images of vintage foreign stamps. this one also has a hook and eye clasp–very sturdy and easy to make. All these lovely cool greens were fun to bring together. Now I think I will move on to some blues!
Jul 19, 2019

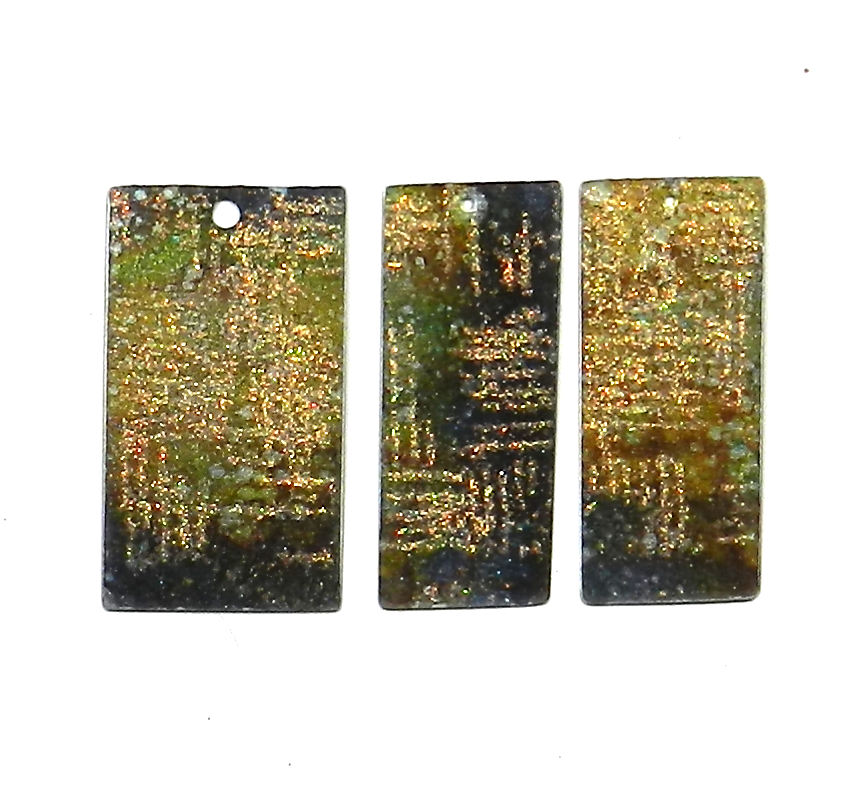
I’ve been packaging up the etched and patina metal sets from the most recent batch, and they turned out so well that I had to keep a few things for myself. Electrically etched versions of vintage foreign postage stamps in green, and a lovely brass set in a Renaissance design caught me, and I set them aside for a bit of beading fun. I already had a lunch tray with beads in that soft green, and one in ivories and pearls. When you work in colors you like, things go together, and there are often leftovers from projects. Two or three beads are enough to become part of a brand new design, and a color coordinated display.


I like taking an eclectic group of beads and seeing how they can dance together—that’s more fun for me than one kind of bead repeatedly strung in a row. I’m using metal, polymer clay, shell, glass and crystal, rocks and pearls. Chain lengths made with wire segments are a great way to use up a lot of beads in small groupings. I am using 22ga bronze wire to make this necklace, which will feature an etched central pendant piece with fringe—eventually! I think the stamps will be another necklace, or maybe a charm bracelet…

Of course, there needs to be a pair of earrings; since I started with one of my 3 piece metal earring pendant sets, that makes it easy to get that going too! This project is coming together a little at a time, as I take breaks from the work of the week. Gotta have those creativity breaks, especially when it is hot outside and the computer needs a rest.

Sep 15, 2018
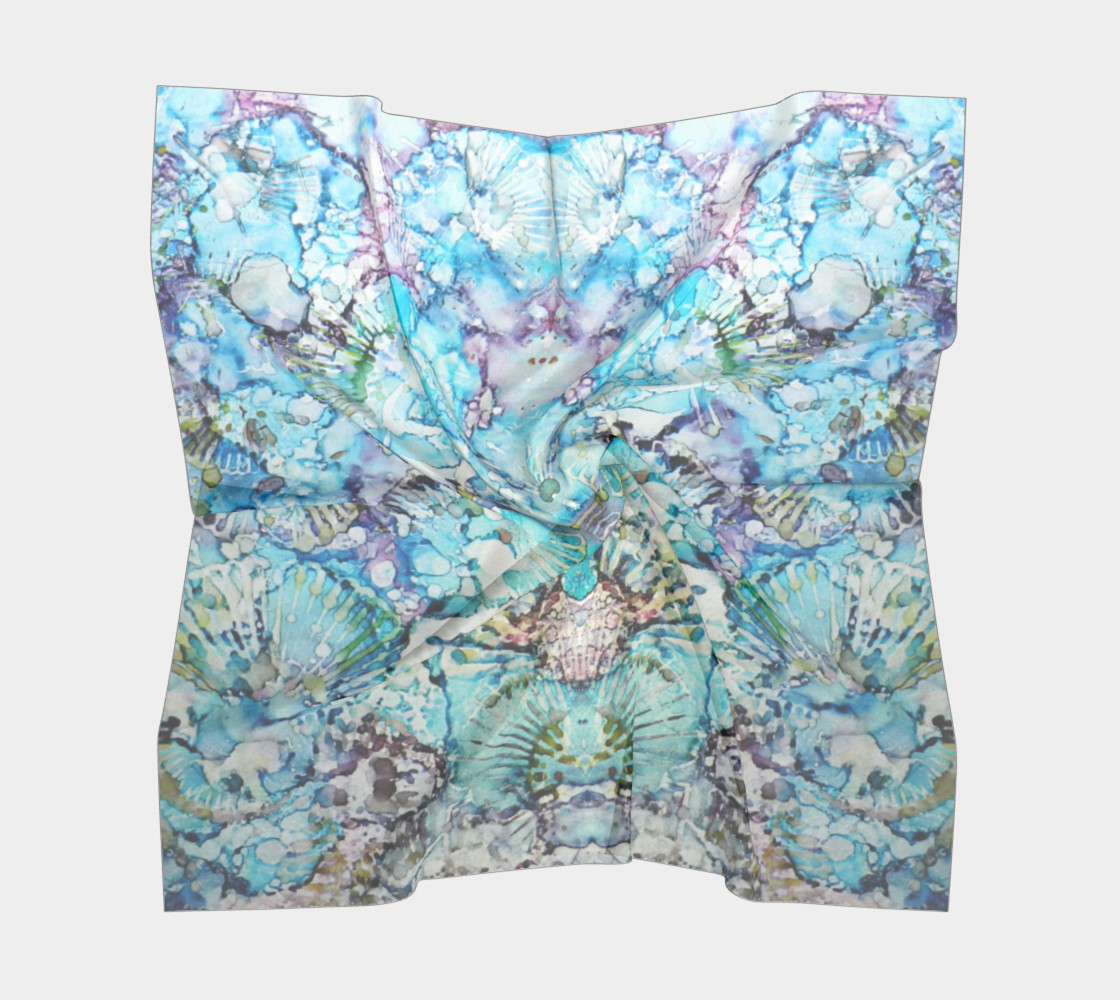
 Well this certainly is fun! I took a 3 Inch by 6 inch piece of metal (seen at right) and painted it with alcohol ink and gave it several coats of Rustoleum Varathane, Then did the back of the metal with a design in a simpler but co-orrdinating color design. After that I took pictures, and now I can use the pictures to create POD (Print On Demand) products. Right now you can buy through their website, but I am in the process of putting my own store together with Shopify.
The original art is seen at right. Below in the gallery are the pieces and the POD items
These particular items, a scarf, yoga leggings, a draped kimono, tote bag and zipper carry call are all from Art For Where in Montreal Canada.
They mill their own fabric, print it, cut and sew and drop ship the orders. Then I cut up the metal, ground down the edges, and got the pieces ready to make into jewelry!
Oct 16, 2017
 We’ve been spending the past few months digging in with creative endeavors here in our new place. We’re producing new art, music, writing, and also preparing for winter. (We’ve already had snow three times!) I’ve been putting major efforts into metal work that has been languishing unfinished or unsorted for a while. I had a pile of etched metal and metal with beautiful patinas as well as decorative ways with inks. Now I have quite a few trays filled with earring parts, pendants, cuff bracelets, and sets. I’m selling components to other jewelry designers and having fun seeing what they do with them.
I’m reaping a bonanza harvest of brass, bronze, nickle silver, copper, tin and aluminum components for making earrings, pendants and charms. I’m selling on Facebook groups and also wholesale to stores. Plus, when the winter days keep me indoors, I’ll have plenty to choose from when making jewelry.

Aug 3, 2017
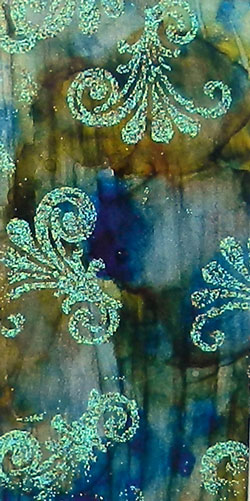 I love the vivid colors and fun effects that are obtainable with alcohol inks on metal. For my first art experiments in my new home state of Wyoming, I got all my inks and my embossing powders out for several days of summertime fun! I’ve wanted to see how the inks and powders held up to cutting and filing for some time, but life in Colorado and then moving kept nudging project days to the side. But here in my new studio spaces (I have several now–indoor, outdoor, and a shed, all with power and lights!!) I’m finding it much easier to get some art time.
 My experiments started with cutting up some 30 gauge aluminum and getting it cleaned up and ready for the inks. After having lots of fun with color, all the pieces were carefully heated to help further set the inks permanently, and then sprayed with two coats of polyurethane.
After that, I cut up the pieces, making 2″x4″ rectangle pieces for my embossing experiments, and 4″x4″ squares, and a larger piece that will get played with later and cut up to make decorative parts for boxes, mobiles, and jewelry. Some for now, some for another time! I want to do some that incorporate other elements too, like metal leaf.
In the course of our recent move, I got to see all my art supplies, and now they are out where I can see them all the time, motivating me to actually use them. While accumulating tools and supplies is a lot of fun itself, I’ve pared down to the ones I want to use, and it is very satisfying to use them. I love seeing how the different things go together.
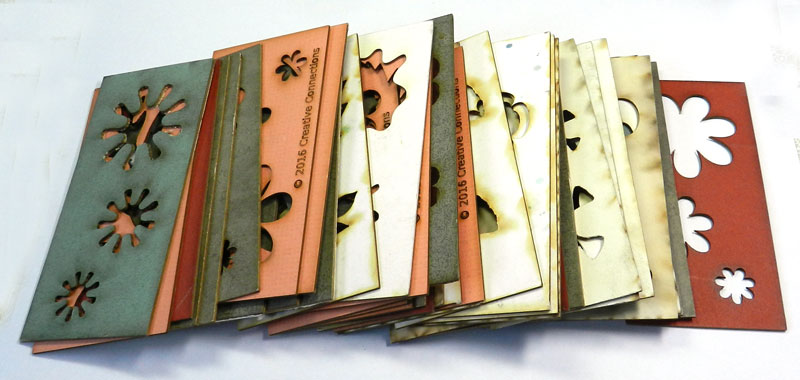
Once I have the prepared metal pieces, I like to cut them up further and make things like jewelry components or inserts for decorative boxes. For jewelry use, I use a large metal shear to cut straight across, disc cutters to make circles, and metal shears to cut more complex shapes. In order to easily duplicate shapes, I made myself some laser cut templates of shapes that I like. I used a Open Source program called Inkscape to create my shapes and then used them with the laser cutter at Tinkermill, the makerspace in Longmont Colorado. Makerspaces are great hubs of creativity, and I hope to see more of them established.
Here are the templates I cut, with all sorts of shapes, flowers, leaves, and more. I use them in metal, paper and textile work a lot. The set on the right is particularly useful for making earring pairs and pendants or pins. Now I have a lot of different pieces and can try a variety of different things. I love the freedom to experiment and play with colors and textures. Sometimes I go too far, but I always learn things that inform more pleasing work later.
I cut out shapes and then smooth the edges with a habilis 00 file, some sanding, and then I can pierce holes with the Euro Tool punch, glue pieces to leather or other backings, or embed the pieces in polymer clay to be cured. (Pieces with embossing powder cannot be heat cured–embossing must be done after the baking step.)
The next step for me is to make some finished jewelry, and I’ll be doing that this week; from where I am sitting now I can see just the right beads to make these all up. Check back soon to see how they look when finished, and please do view the results of my ink and embossing experiments as well as other work.
May 20, 2017
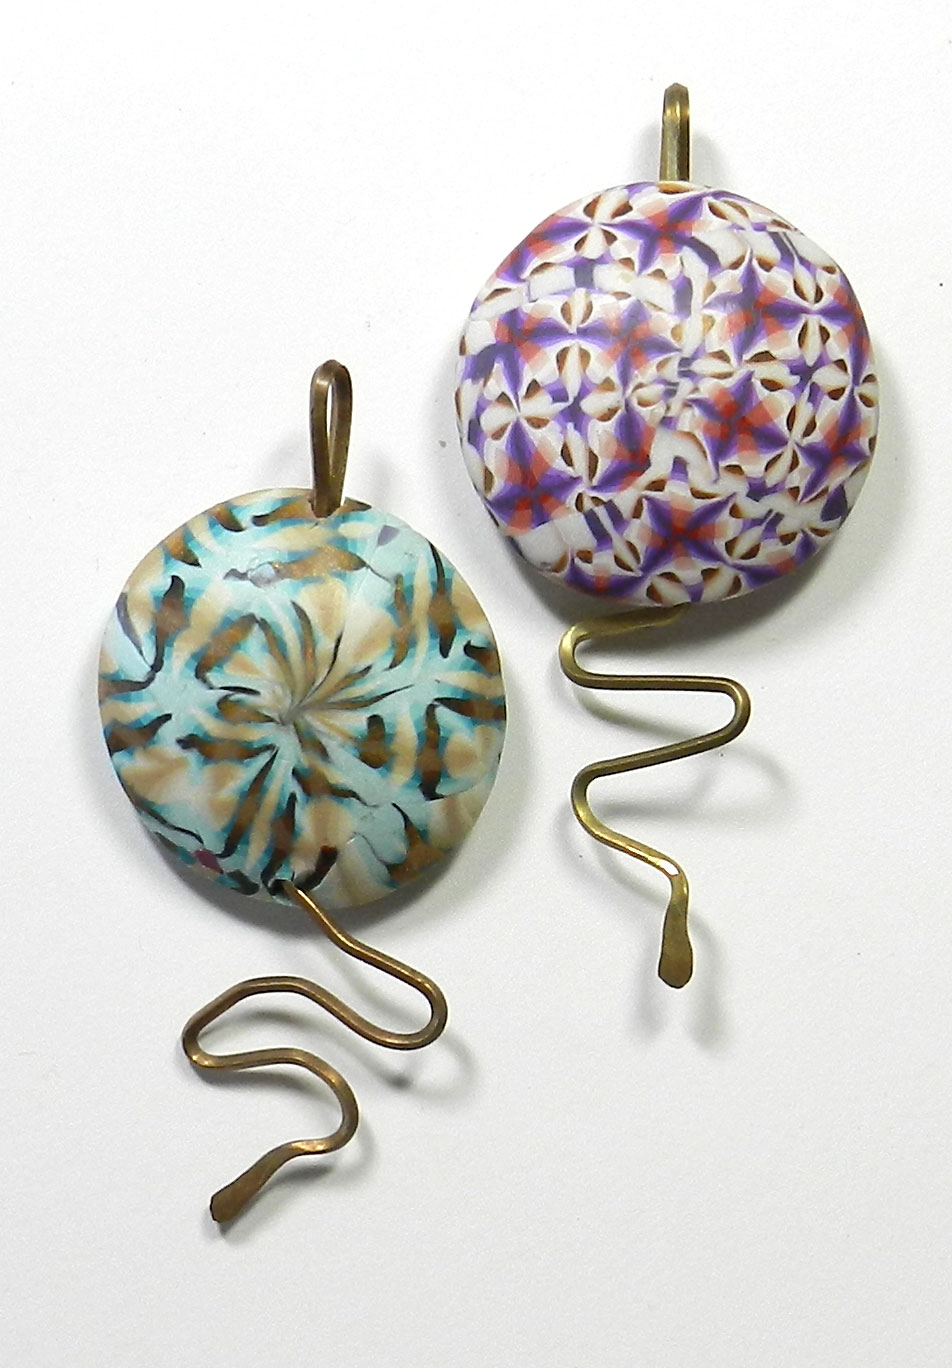
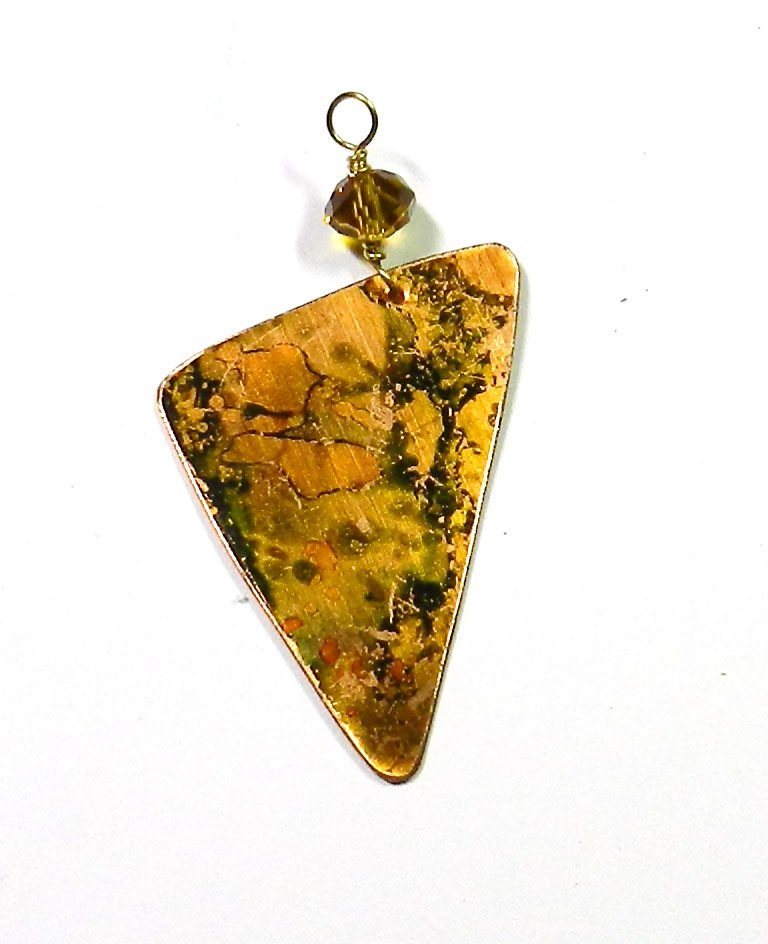
 The process of transformation can be fascinating–I love starting with a flat, shiny sheet of copper, brass, bronze or nickle silver and then using electricity, fire, hammers, rollers, and chemicals to change it completely. Each step along the way–patterns, textures, shapes and colors is part of a trail of discoveries. After etching, hammering, cutting, creating a patina, waxing or spraying, grinding, filing and sanding–I have developed a relationship with the metal!
Some pieces I make into earrings, pendants, and bracelets. Cuffs are great because they offer a larger “canvas” to show off the gorgeous colors that are possible with patinas. The processes involved are a mixture of precision and serendipity, and seeing what occurs is a gift that I get to unwrap each time. Sometimes surprising, always fun to explore; each piece is individual.
In addition to metal, wood, ceramics, polymer clay and textiles, I’m changing things around here at Creative Connections as well. I’ve been building up inventory all winter long, and now that the snows have melted and Spring is here, its time to get things out to market.
I am now selling finished jewelry and components for designers who want to use them in their own art. The Store section here at Creative Connections is just getting started, and will continue to grow, so do please check back again soon to see what is new!
Mar 20, 2017

I think everyone would benefit from a having at least one crown. Pageants take up too much time for only one or two crowns, and not everyone is born into families that have a few to pass around. So, making your own is the way to go! I’m hosting a class at Tinkermill to do just that.
It has been such a busy season making things and taking pictures that I have not had much time for posting them here! I’ve been exploring the business side of social media and Facebook, and there is a Creative Connections Facebook page in a beginning state. I’ve found some great groups there with a growing array of artisans displaying their wares to a world wide audience. It’s hard not to spend too much time looking, and so I’ve been at the metals workbench, the dye pots and the laser cutter. I believe there are lots of colorful new things coming up this Spring! A little flower fae told me so. I like how she looks, just playing with the bits and pieces I have around on the workbench well enough to think it would be fun to host an after noon of making these little cuties too. I’ll have to add that to the calendar for later in April!
I’m marketing jewelry, components and digital downloads through several online outlets, galleries and bead stores. I’m also enjoying the luxury of big tables, lights, and cool tools at Tinkermill in Longmont. I’m teaching a wide roster of classes there each month, and I’m about to add some new ones.
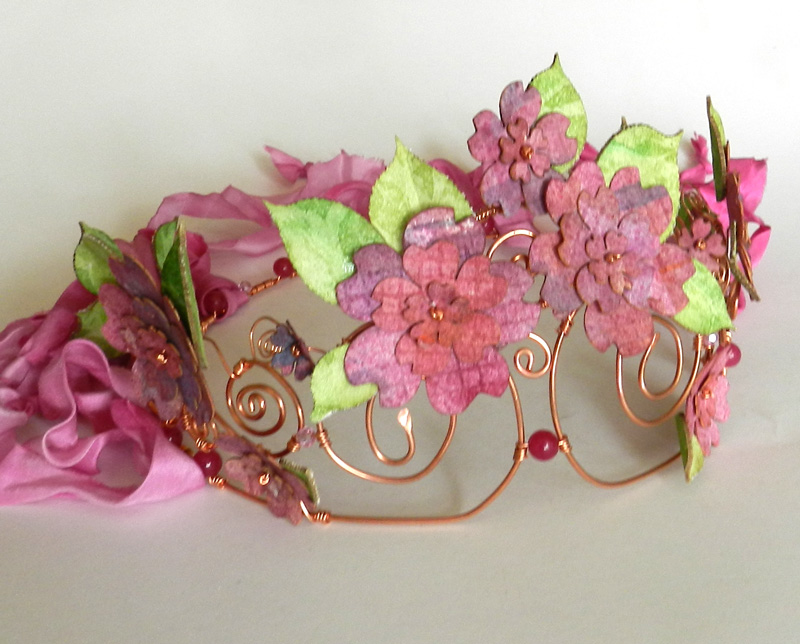
Right now I’m enjoying an infusion of color and flowers for Spring. I Iove being able to bring all sorts of different elements together, like making a spring princess crown of copper coils, carnelians, and hand dyed ribbons, which would be at home in celebrations long ago and far away—and then decorating it with flowers made from handpainted watercolor paper cut with a laser beam! Such an artistic luxury to be able to combine drawing and hand coloring with laser precision. Computers and other great tools are a LOT of fun..particularly if you get to add paint, and dyes, and beads…so many projects comic right up!

Nov 11, 2012

I’m home from Houston, after another wonderfully colorful and inspirational Quilt Festival. What fabulous things people can make with fabric and fibers of all kinds!
With an eye towards historical, vintage and cutting edge (literally; there are several booths selling scissors and sharp tools and pointy things of all sorts) textiles and fiber arts, there is so much to be seen at the George R Brown Convention Center that you just can not do it all in one day. It is as large as 9 football fields, with over 1000 vendors–and I was one!–plus amazing exhibits of quilts, textiles from around the world, art dolls and more.
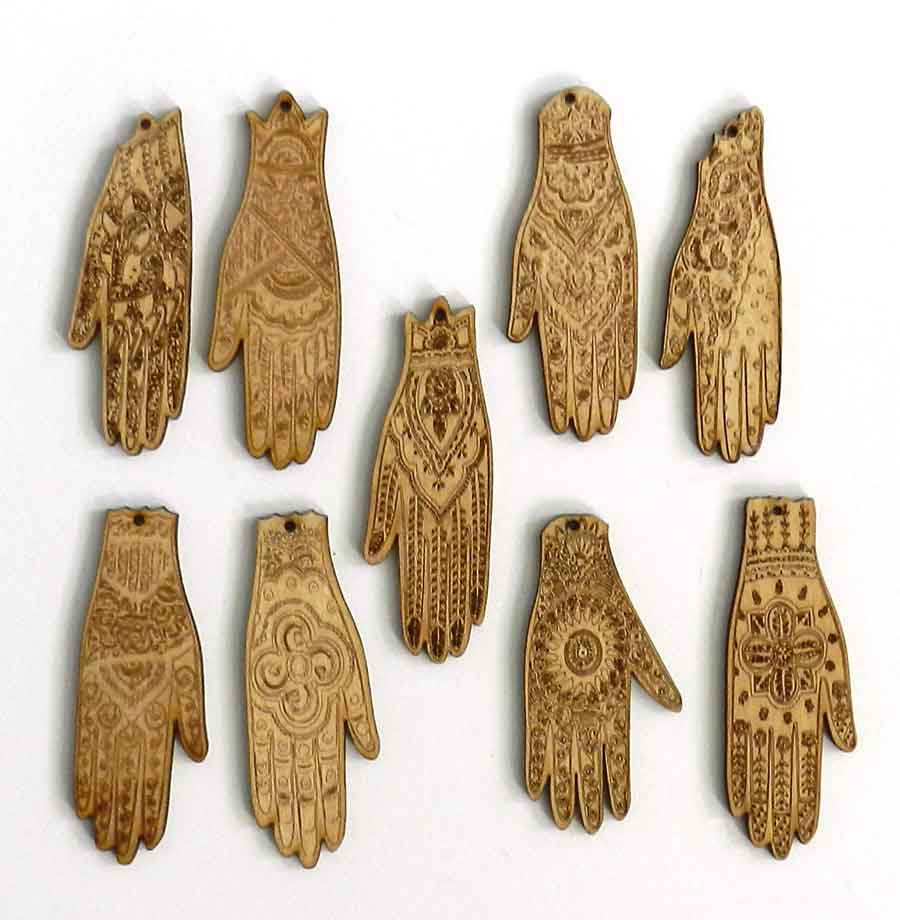
I had a wonderful time and came home inspired, as always, with how to change my booth display ( more grids–they work really well for me, pare things down and keep back-stock), what to make for next time (more of the Painted Face Bags and more polymer clay Victorian Hands, more of my dyed fabric in wearable form that goes with more colorful jewelry!
But that’s next year…. now its time to finish up final projects at school and get little rest over the upcoming holidays. Maybe I’ll have time to learn how to learn to use the kumihimo braiding wheel my friends got for me at the show!
Aug 27, 2012
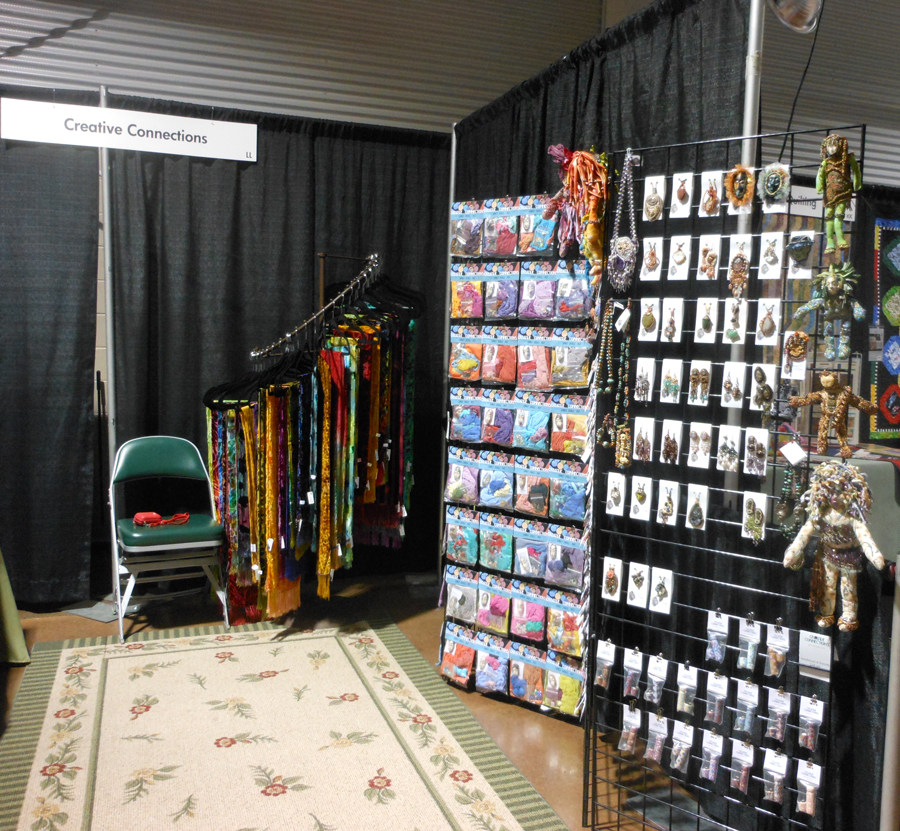
Laura Humenik of Lands Glory Artisan Jewelry and I had a booth at the Rocky Mountain Quilt Festival this year. I saw lots of beautiful quilts while there, and the dolls from the Hoffman challenge too. While sales were slow, it was good to get out and try my new grid display and new ways of presenting things in the booth. It’s also a great way to see what is popular in this area and what I need to make more of before the next upcoming shows. All in all, we were glad for a chance to try and new venue and see how everything looked set up in this configuration! I really do like my new grid displays. This time I have them set up like a folding screen. Here are some pics from the show–click the image to see a larger version.
Aug 5, 2012
 Quilters, beaders, and textile artists are some of the most colorful people I know!
There will be a lot of us–and a lot of color going on–at the Rocky Mountain Quilt Festival coming up this August 17-18-19 in Loveland, Colorado.
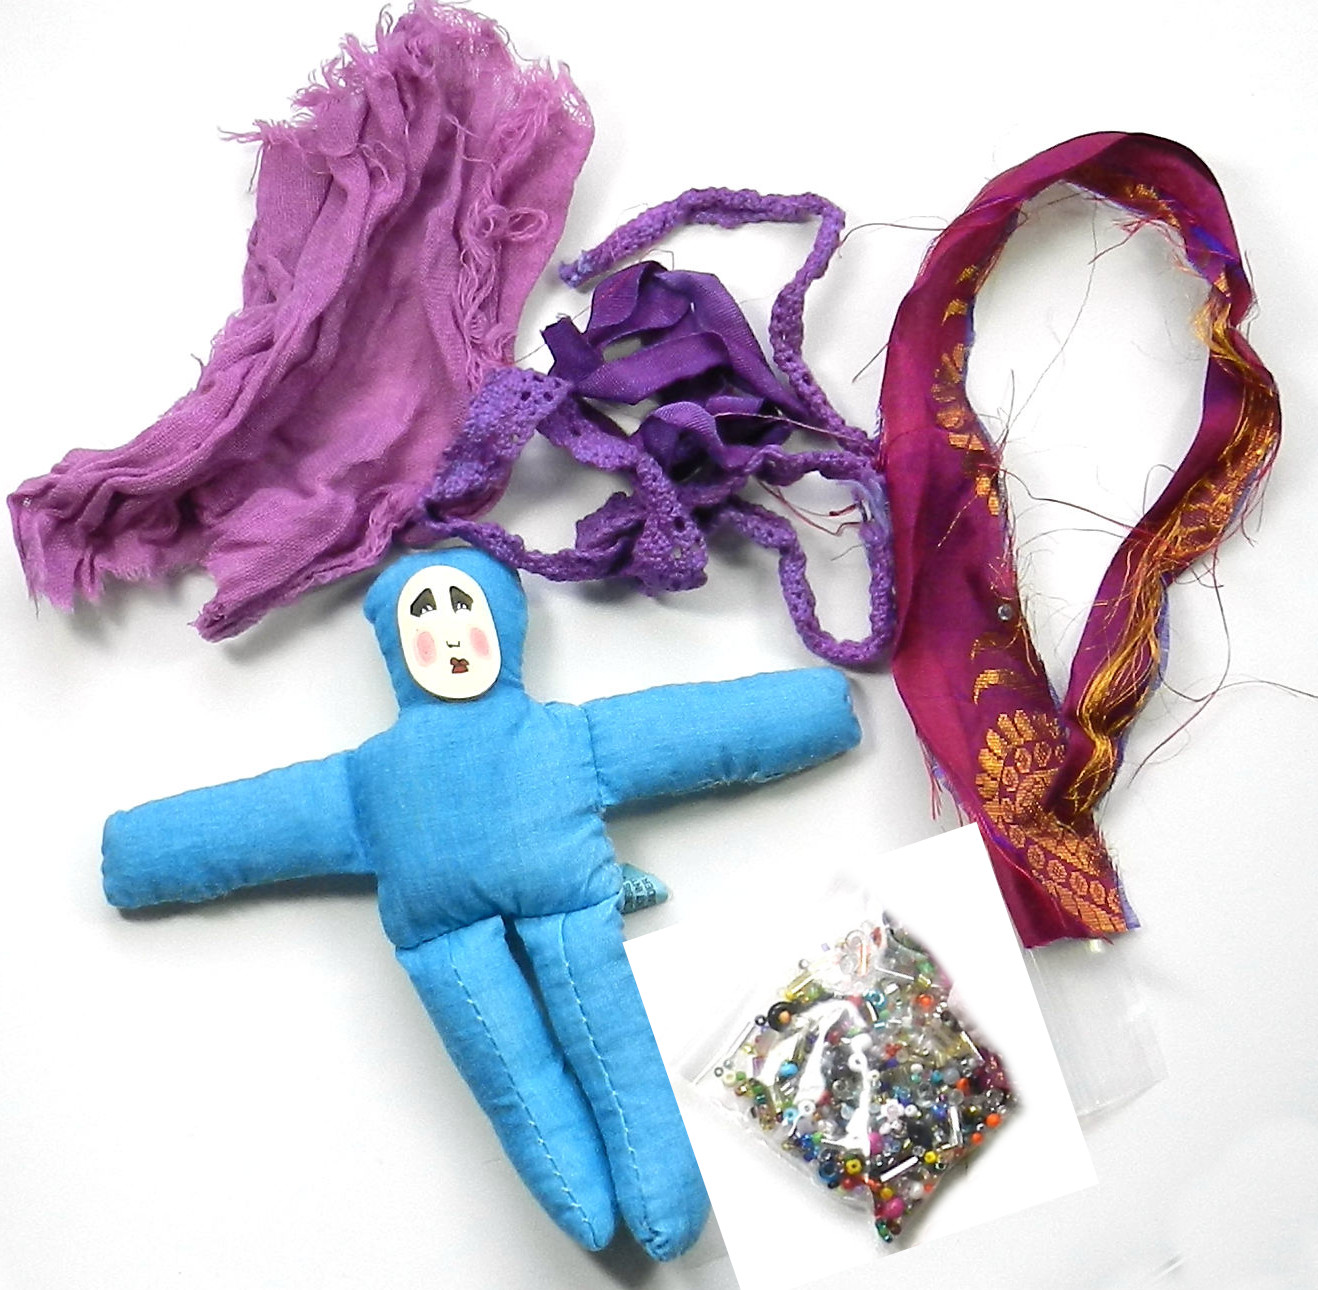
Please come see me and Laura Humenik at our booth #LL and see all the hand dyed scarves, ribbons, textiles, and Spirit Doll Kits. Shown here are some three inch tall colorful babes that are hand dyed cotton with polymer clay faces attached, all ready to decorate. Now I have to finish packing them up with sequins, and dyed feathers, ribbons, fabric and other trims! The colors are all a result of our Annual Dyeing Days color marathons.
We’ll have beads, cabochons, buttons, and all sorts of beautiful, colorful wearable art, and art-parts!
Title: Rocky Mountain Quilt Festival
Location: The Ranch | 5280 Arena Circle Loveland, CO 80538 Booth #LL
Link out: Click here
Description:
Fri. August 17, 2012 10 am – 5 pm
Sat. August 18, 2012 10 am – 5 pm
Sun. August 19, 2012 10 am – 4 pm
Start Date: 2012-08-17
End Date: 2012-08-19
Dec 31, 2011
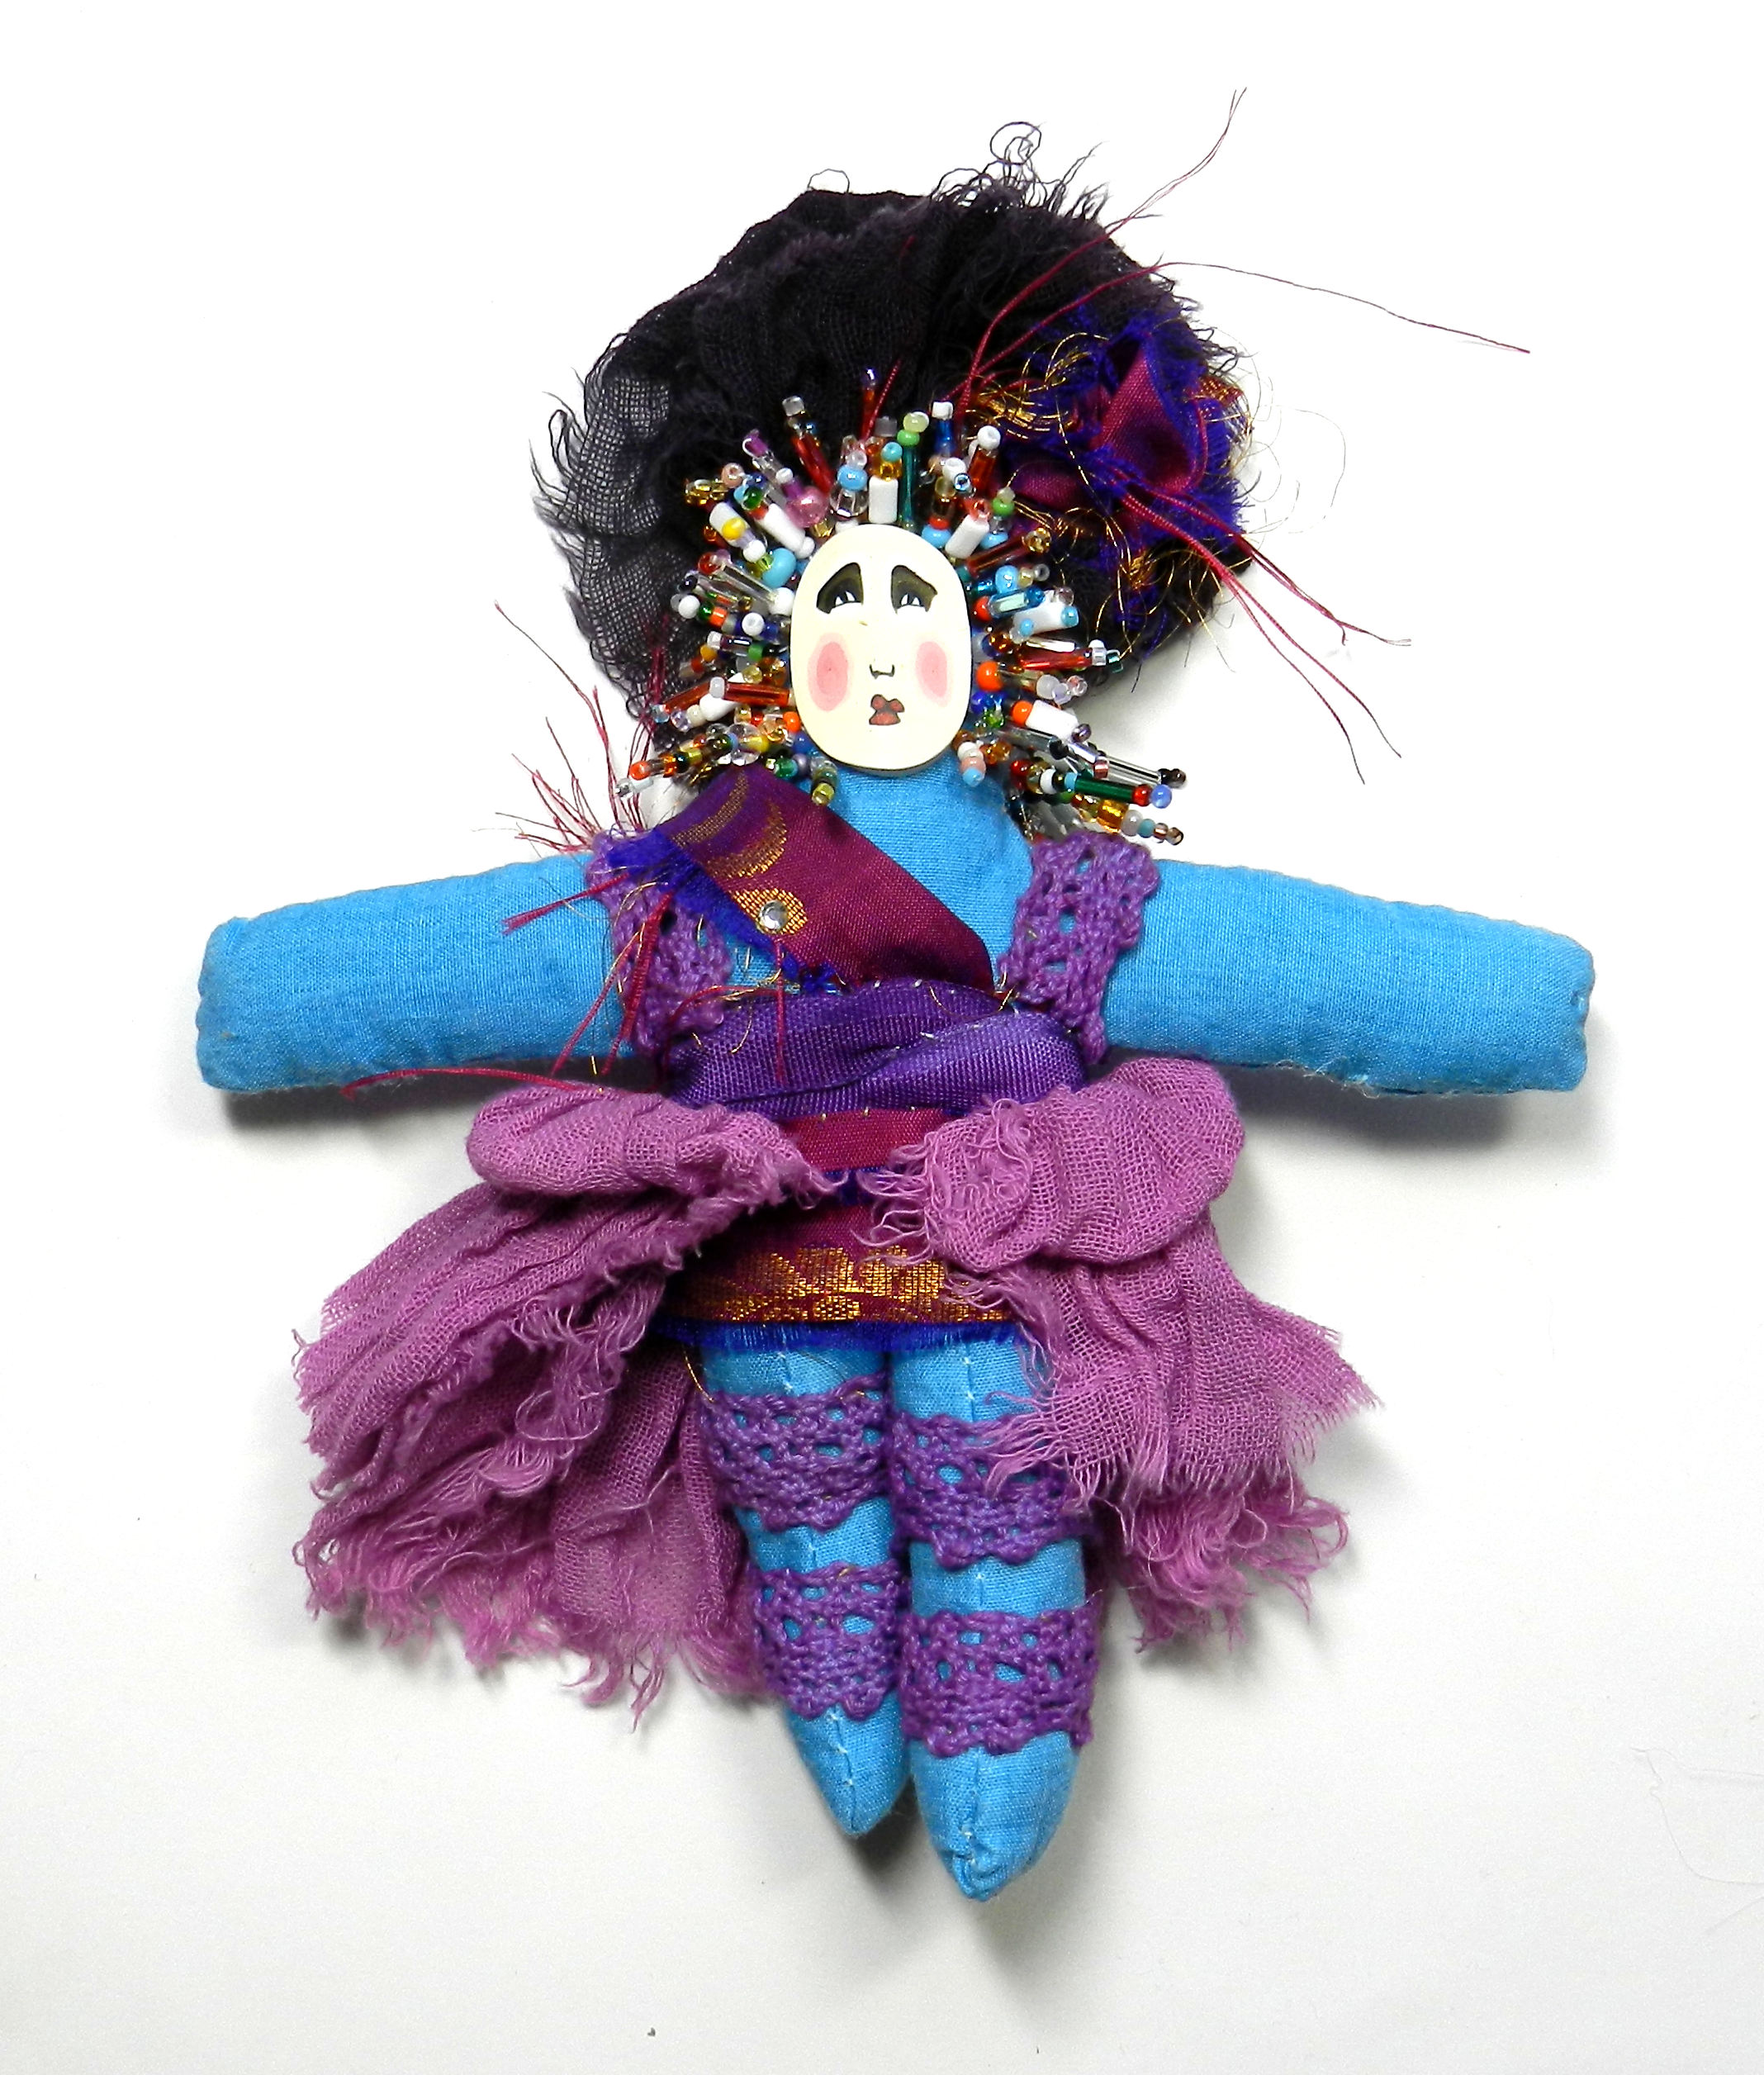
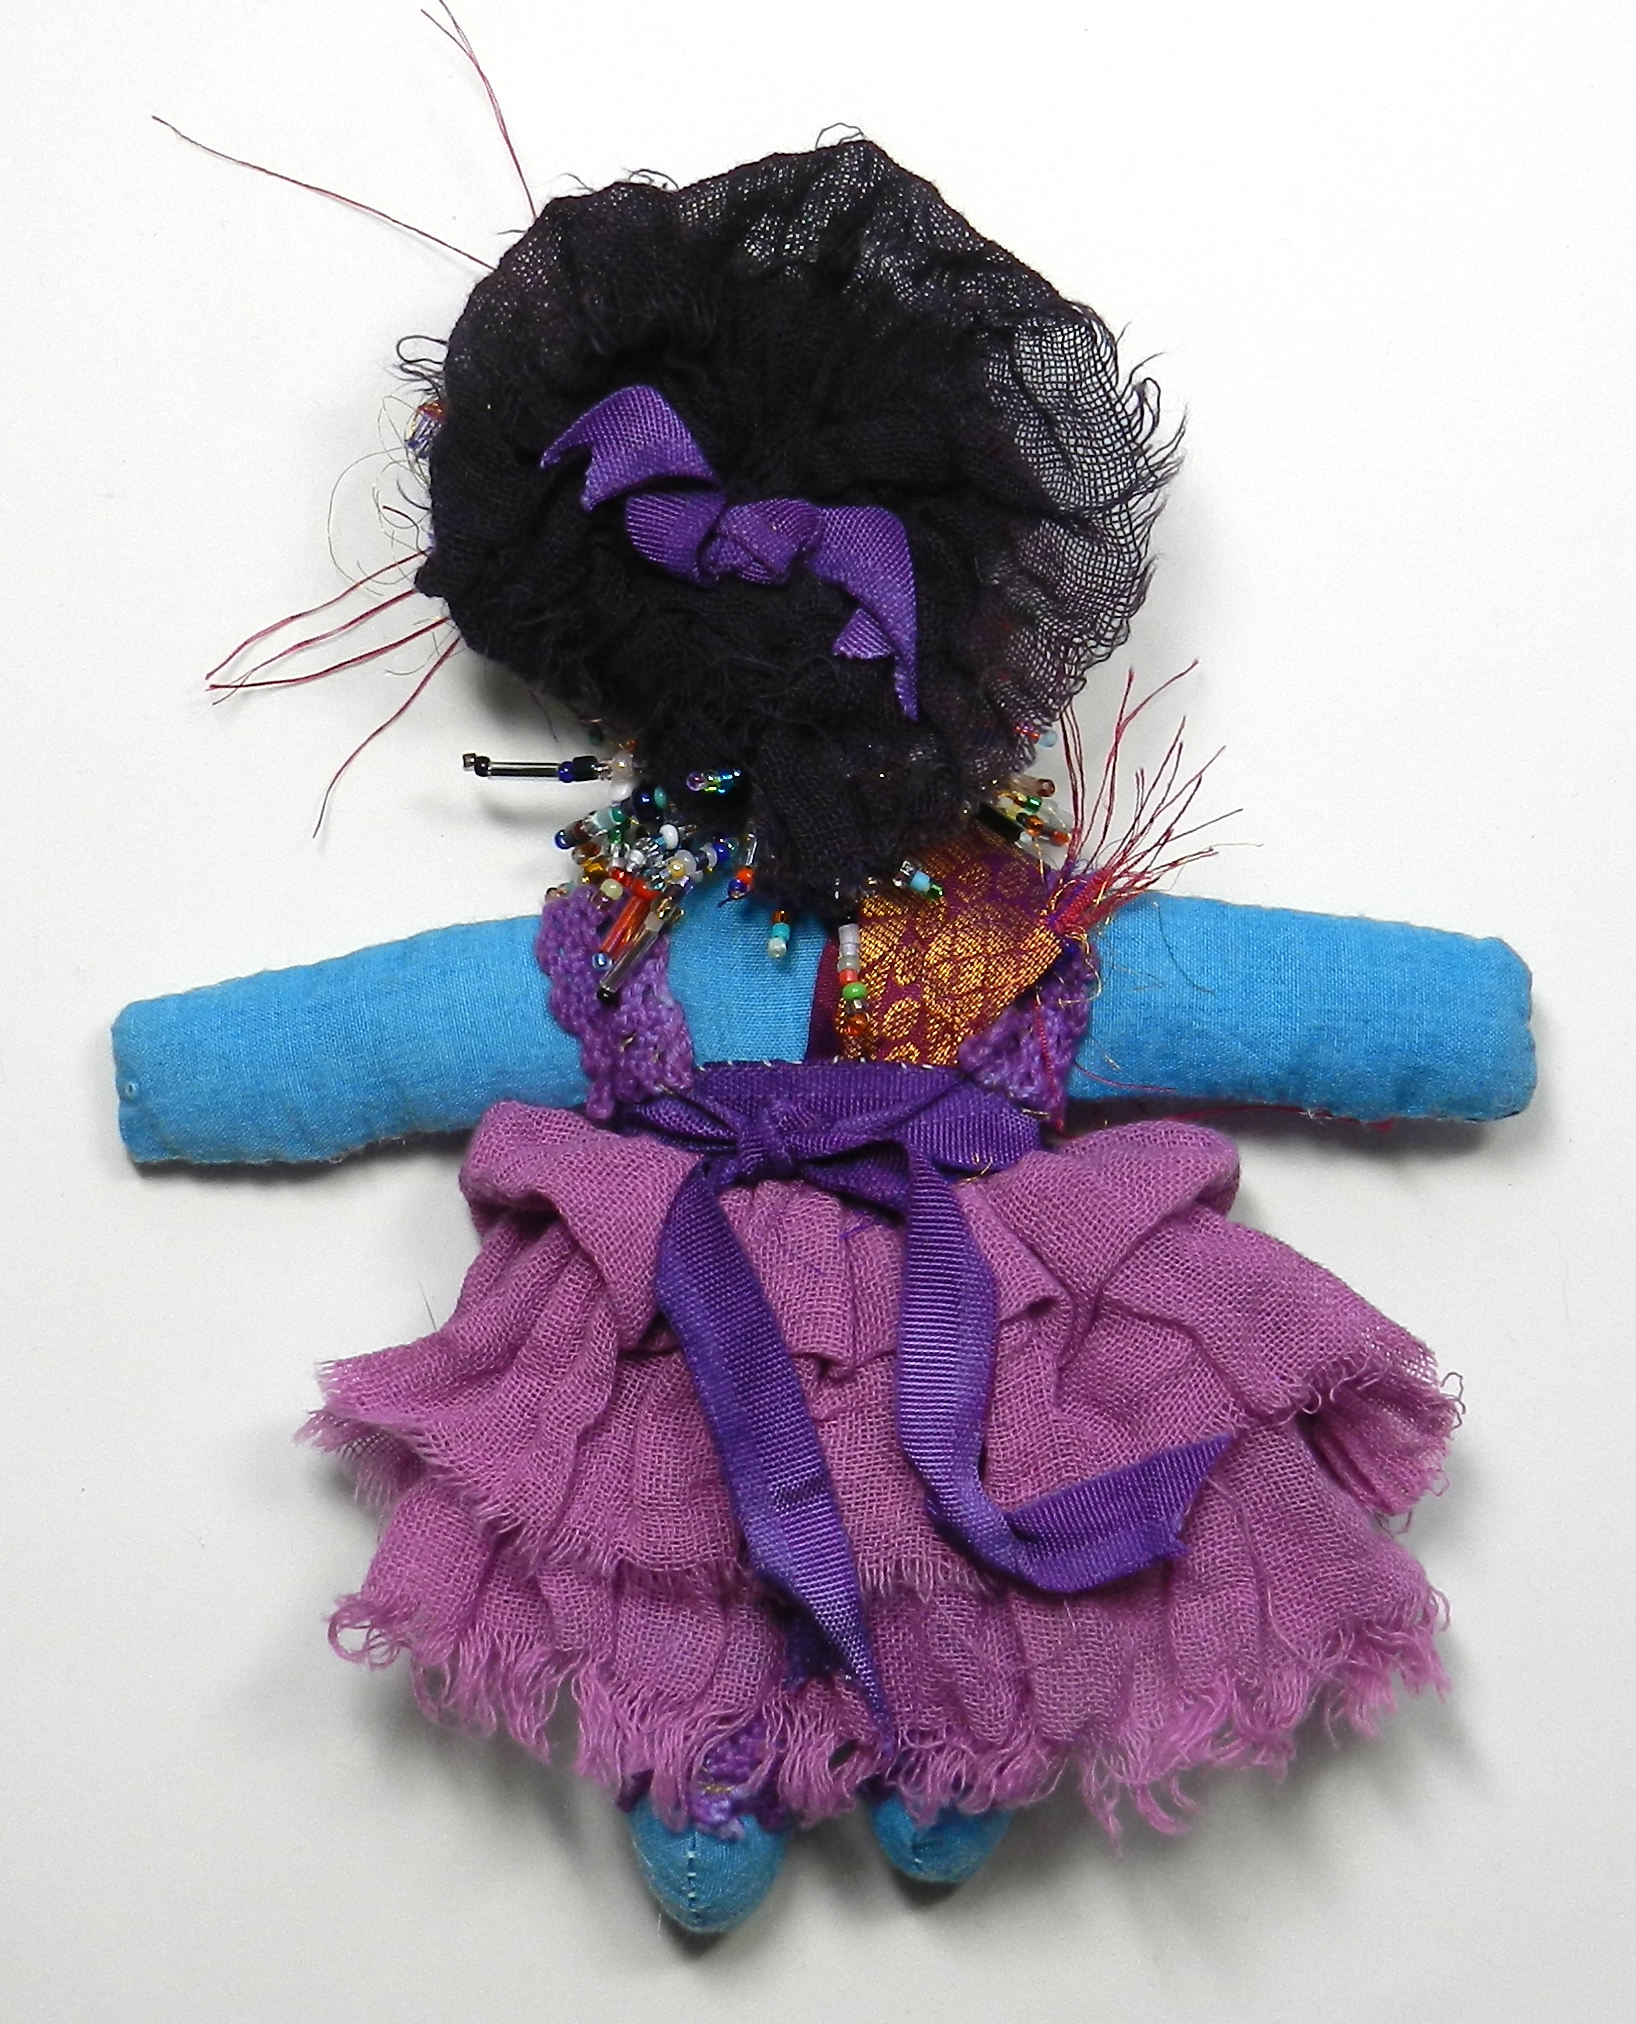
 Not only have I made a start on the pink and purple spirit doll, I’ve also had some great ideas recently about how to combine textiles, metal and clays to do bead enhanced spirit dolls with ceramic and metal bodies. I’m looking forward to getting back to school in the new year to make up examples of what I’ve been seeing in my imagination. A few things finally fell into place with the “how will I do that?” aspects and I look forward to realizing these very soon.
In the meantime, there’s lots to do with making up Spirit Doll Kit Samples and getting the bits and pieces all pulled together for making the new ladies and producing new finished work to get out to stores and galleries.
So much to do–and I do love doing it! Over the semester break I’ve had a chance to rest, see family and friends, read, and to delve into my art supplies to work on old and new projects both.
What a wonderful year of artistic and personal opportunities its been in so many ways…and I’m looking forward to more in 2012!
May we all appreciate and cherish the marvelous parts of our lives, past present and future…with lots more to come!

Dec 23, 2011
 I’m enjoying the break between semesters and taking some time to restock the shelves at my Etsy store. I’ve had a very busy and productive year in 2011, and now it’s time to share some of the results.
I’ve revamped the packaging and I’m putting together more Spirit Doll Kits with ceramic and polymer clay faces that go with dyed cotton doll bodies, fabrics and trims.
In addition, I’m making up the contents of each kind of kit for a sample or two, and taking pictures as I go.
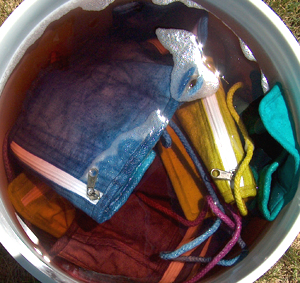
 Here’s a picture of the contents of a Large Spirit Doll Kit. I’m going to spend a few days working on this doll, adding some beads and silk flowers from my stash of stuff, and do a bit of embroidery.
I’ve been wanting to do a little needlework and this is a perfect spot for some! I’ll be taking pictures as I work on the doll, and I’ll post an update after Christmas.
Large Spirit Doll Kits like this one have contents that include:
- one ceramic face, hand drawn and painted with under-glazes and clear glaze, affixed to
- one (premade) 12″ hand dyed cotton doll body,
- one 18″x 22″ (fat quarter) piece tie dyed cotton jersey
- assorted dyed fabrics, trims and embellishments

I also sell the ceramic faces by themselves.
I made a specially shaped cutter from a strip of aluminum, cut each face from a rolled ceramic sheet, then shaped each one with a curve.
After they dried, I sanded each one to get smooth edges and a good surface for drawing the faces.
After the pieces were bisque fired, I drew and colored them all in with painted under glazes and gave each a finishing coat of clear glaze before firing them all again!
The results are colorful “dolled up” ladies all ready to turn into dolls, or wearable art.
Jun 13, 2011
 Actually, it involves LOTS of splashes and lots of colors–I think we had 43 colors this year at our Annual Dyeing Days event.
As always, it was a marathon event, spanning 10 days of mixing, dying, rinsing, washing and of course cleanup!
This year we added a pole vaulting event. That is to say, we raided the vault which is our garage full of precious stuff–like old pvc pipes–and did some shibori arashi.
 This form of resist dyeing (shibori) is done around poles to create an effect that can look like rain in a storm (arashi).
Or it can look like feathers, or leaves. You can see the shibori arashi designs we did this year on garments and fabric yardage in the tiedye slideshow.
Our friends come to dye along with us at these events. Here’s Susan shown unwrapping a shibori arashi dyed shirt.
Here’s the pattern it created on the shirt.
This year as always I dyed lots of fabric–cotton jersey and kona cotton this time as well as some lovely cotton gauze. I also did lots of doll bodies, silk handkerchiefs and lace for making up more Spirit Doll kits, and this time I even did feathers. They took the dye beautifully!

Jul 2, 2010
 A summer time face pendant with a flowered babushka head wrap and beaded embroidery shows off luscious fringe in beautiful shades of berries and teal with long crystal twist is a great example of the fun can that come from collaborations. I made the face from polymer clay, and Laura Humenik of LandS Glory Artisan Jewelry did the yummy bead work. She has amazing patience, a wonderful sense of color, and has collected an amazing variety of beads. Her beautiful pieces are wonderful–do take a look at the the LandS Glory gallery page. Laura creates all sorts of things that are better with beads–pendants, necklaces, Spirit Dolls and more plus dyed textiles that showcase more of her love of color!
I’m making lots more polymer faces in the same “babushka” style with lots of different millefiore cane patterns for the headwraps right now, and I will show them off in the next few weeks. Between the silver and bronze metal clays, ceramic clay, and polymer clay, (even painted textile faces!) I’m making hundreds of faces, and each one a bit different. Be sure to check back in the next few weeks to see more!

Feb 14, 2010
 I’ve been working with ceramic clays lately in addition to all that I do using polymer clays, and there are also precious metal clays in bronze and silver, and now there is even glass clay, made using frit. I enjoy working with them all, and will continue to show off what can be done with them at my website Sarajane’s Polyclay Gallery.
I’ve been re-doing the pages there and just finished the brand new page on making millefiore canes using polymer clay.
I LOVE making canes, and this is a technique where polymer clay has all sorts of advantages over other kinds of clays. Not all polymer clay artists use caning as a technique–some sculpt, paint, texturize and do all sorts of things without ever create these little packets of pattern.
Other artists do nothing BUT make canes and sell them to others to use. Many artists use their own canes to create fabulous jewelry, sculpture, objets d’art, and even illustrations for books and magazines.
Here’s a horse covered with millefiore canes made by Judy Summers. Jewelry artist Klew made the gorgeous necklace and pendants using her cane slices applied to other shaped pieces of polymer clay. Carolyn Potter’s curvaceous goddess is also covered with quilt block style canes.
These are only a few of the incredible artists using canes in their work.
May 16, 2009

Whew! What a huge undertaking, and what wonderful, amazing small rewards! I mean small as in “miniature”, or specifically “fits inside a three inch square” (more or less). Several years ago I was invited to take part in a Polymer Clay Miniature Mask Swap by Sherry Bailey. I was in one of the several groups, and sent in my masks. Shortly thereafter I got my box of goodies, and kicked myself all around the room for not having been in every group—there were pictures included and I missed out on some real gems. I vowed never to repeat THAT mistake! And also to be in another mask swap ASAP. I ended up taking over the job and expanding the number of participants (my artistic greed knows little about bounderies or sensible work loads in some areas…)
So for the last few years, there’ve ben annual swaps that attract wonderful artists who ALSO want collections of these minimarvels. When announced, interested parties sign up for one, two, or three groups of ten. The SwapMistress (thats me, in this case) keeps track of who signs up, and fills the groups. We do a total of ten groups of ten people. For each group, the participant sends in ten masks, all signed/with a card and bagged. When they are all here, my husband and I alphabetize the incoming boxes for easier finding, and then start filling up Group Bags by lining up the brown paper lunch bags. Starting with 10 bags marked “A” we check the All Powerful List and take out each participant’s set one at a time–If Mary is in group A, we put one of her masks in each bag, and the same with the other 9 participants. At the end, each person in Group A will get a Group A bag mailed back to them, containing one of their own and one of each of the other 9 people’s masks. Sounds fairly simple, right? It kindof is…except then we do it for B, C, D, E, F, G, H I and J groups. This generally takes a full day–there are a thousand little masks. Then, the next day, my dear sweet hubby and I start packing boxes. If Mary was in Group A, D and F, we pull an A, D and F bag and put it aside for her in a grocery bag marked with her name and the groups (cross checking is pretty important!! ) with the mailing lable and postage she sent. This also takes a day or so…and then there’s the packing and sealing of the boxes, and three hours or so at the Post Office.
I, being the SwapMistress and therefore In Charge, get to violate the “three groups” thing and be in ALL ten groups. This is great because I get to keep one from every person in every group–no more missed gems!! Except of course for the people that make it harder to choose by sending ten that are all different for their sets. Then I still only get to keep one, but I DO have the opportunity to unbag and photograph them all, then rebag before putting them into the group bags. So I say it again—its a huge undertaking, but OH-so-worth-the -effort. I end up making and giving away 100 miniature masks, and getting 100 masks to keep. All are individual works of art showing a vast array of techniques. All have miniature size and polymer clay in common, and “masks” as a theme, but all are astoundingly different interpretations of that theme. I will be photographing the collection that I have gathered over this decade, and putting them in a book, but I’ll share a few of them here on this blog, and you can see some masks from previous years here.
The group of ten Warm and Cool Masks shown above was sent in by Karen Cowles. The two masks below made using the alcohol inks on polymer clay were sent in by Nina Owens. The light was fading and I only had time to take a few pics. I took more the next day, so watch for future posts! You can also see more at other participants’ blogs like these by Laurel Steven and Tonja . Click the pics to see them larger.

May 5, 2009
I’ve had a great time at college this semester. My favorite class has been Adobe Illustrator 1 , and I’m looking forward to taking level 2 this fall. Adobe Photoshop has long been a favorite tool and plaything both, but although I had an ancient version of Illustrator, I didnt use it. I’d poked around with it a few times, but it’s not intuitively easy to pick up just by poking the buttons, and the Pen tool is downright scary without a little guidance. But Oh—–!!!! Once you get a bit of familiarity, this program is the Magic Coloring Book that I dreamed about when I was little…the kind that can be any picture you can imagine and drawn much more smoothly than I could manage by hand. The kind you could color in and then change all the colors to different one just by picking them!! “Darker green there…no, blue.” And the 3D modeling makes this program extra sweet. I’m not so great with perspective and mathematical formulae, but the computer is, and it makes creating images a LOT of fun. Of course, there’s so many choices its also difficult, but thats the way it is with any art, and its all part of the fun.
Here are two images I created using Adobe Illustrator. The assignment was to make two calendar pages. You can see the other one over at Aunt Acid’s blog.
Aunty is a wonderfully patient model. She’s shown in these two images in homage to the art nouveau stylings of Alphonse Mucha. I’m looking forward to spending months learning more about this program, now that its not quite so intimidating.

Apr 11, 2009
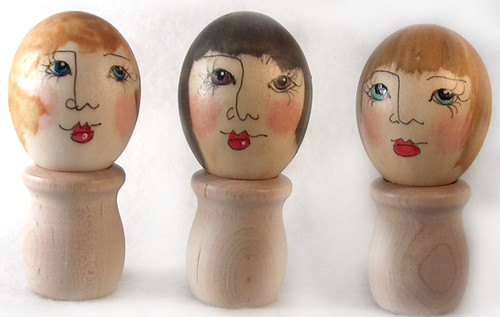
eggladies1, originally uploaded by sarajane helm.
These ladies are made from blown eggs that have been painted with three layers of Liquid Polymer Clay and baked in between each application.
Each one was then given a hand-drawn face using a Micron Pen (this brand is compatable with the clay). Acrylic paints supply facial coloring, and the hair is more liquid polymer clay–it comes in gold, silver, black, and other colors.
The eggs are incredibly light weight, and can still be crushed if not packaged carefully but they are much stronger than untreated eggs.
Its fun to further decorate them with Easter Bonnets or Christmas Finery and use them to decorate a tree or hang from a branch!
Here are some more pages from the PolyClay Gallery about decorating eggs with polymer clay!
Dec 12, 2008
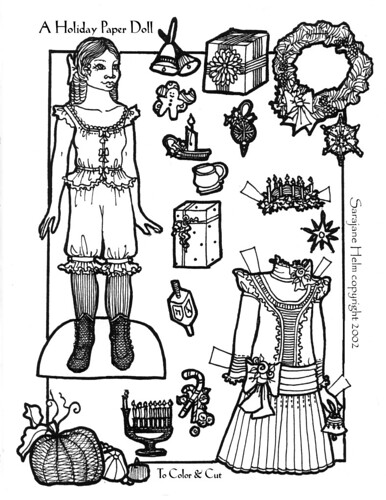
Holiday Paper Doll Page1, originally uploaded by sarajane helm.
Happy Holidays!
In the spirit of the seasons of giving thanks and more, I’m posting this two page set of paper dolls that I drew at full resolution size–please print them out and have fun coloring, or give a set to someone who will! This Victorian Era young miss has a party dress and accessories for celebrating all sorts of holidays including Thanksgiving, Santa Lucia Day, Christmas, Hanukkah, and Soltice. Ring those bells!
I remember when I was younger, and the best presents of the holiday season were art supplies, and the time and freedom to use them. Fresh sheets of white paper, a new box of crayons with LOTS of colors–freshly sharpened colored pencils….those are wonderful things still! Although these days I’m learning to draw with my Wacom digital pen mouse and color with tools in Adobe Photoshop, I still have a fascination with a fresh sheet of plain white bristol board, a sharp pencil, a micro fine tipped ink pen..and then the fun of coloring in the results of my drawings with inks or paints. The computer is a wonderful art supply. But there’s just something about drawing and coloring on a cold winter afternoon when you don’t have to be someplace else like school, or work. Creative play brings about some of the warmest holiday memories still!
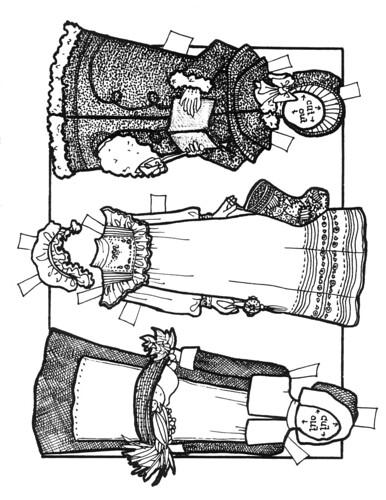
HolidayPaper Doll Page 2, originally uploaded by sarajane helm.
Here’s the second page of this Holiday paper doll set, with a wooly and warm coat and bonnet ready for Yuletide Caroling, a nightgown and cap complete with Christmas stocking ready to hang by the fire, and a seviceable Pilgrim’s gown and bonnet with a basket of harvest fare.
If you’d like to see more please visit Polymarket Press or my etsy store.
Blessings to all in the upcoming year!
Nov 9, 2008
 Last week Judith Skinner and I were vendors for our third year at The International Quilt Festival in Houston Texas. The show is the absolute best in the world, and there are more beautiful quilts and amazing wearable art pieces than I could possibly imagine–and I have a VERY good imagination!! We go every year to promote our books, including Adapting Quilt Patterns To Polymer Clay and The Business Of Professional Art as well as to sell our polymer clay jewelry, beads, faces, and Spirit Doll kits. Next year we’ll be bringing new titles as well–I think its time to ship all the books ahead, though. We take all of our booth setup and displays and all merchandise with us, and things are getting heavier the more titles we add! This year we shipped some of the books, and that worked out very well. The Houston Polymer Clay Guild helped out with Receiving and made us welcome at a lovely evening reception too! It is always great to see our friends there again.
 In addition to seeing polymer clay vendors like Jennifer Patterson and Karyn Kozak, we get to explore as much of the show as we can. There are 20 rows of booths, and thats not counting the Quilt Display areas!!
There’s an area in the farthest back block for Embellishments, where you can find us in our PolyMarket Press Booth and many other suppliers of textiles, trims, buttons and beads, and other great stuff.
 Like Glitter! Barbara Trombley was there with her Art Institute Glitter. Not only do she and her sparkly assistant Nancy show off the uses of an incredible line of glitters that are compatible with polymer clay use, Barbara’s line of “Elements” make great inclusions in translucent polymer clay and all the supplies in their booth have possibilities when it comes to mixed media art that is so dear to many, including me!
As a certifiable color addict, I warn you to be careful when looking at her color samples. Many, many colors, in very many sizes–like seed beads and paint chips it can be an occasion for gazing a long time.

I also had the opportunity to meet Jenny Doh, editor at Belle Armoire magazine. It was lovely to see in person someone with whom I’ve worked well and happily as a writer of the Business Of Professional Arts column there. I rthoroughly enjoy working with talented, creative people, who are very good at what they do.
It was exciting to see the “Where Women Create” booth and to meet her and the other ladies there. WWC is all about the “inspiring work spaces of extraordinary women” to quote their website. Keep an eye out for this newly debuting magazine!
Click here to see more about this exciting show.
Oct 6, 2008
 oh, I do love the time of year when summer is over, winter isnt here yet—and the fall weather starts to make inroads into the garden. There are wonderful holidays at this time, including Halloween, when I’ll be in Houston Texas at the International Quilt Festival again with Judith Skinner, taking lots of new beads, jewelry, faces, and other items made from polymer clay, plus spirit doll kits and more.
The Day Of The Dead gets celebrated around here for more than just one day, as do many holidays. This year my polymer-clay-headed spokesmodel Aunt Acid is taking a turn displaying her flowers and skulls decked out in DOTD finery and seated with her dogs in the front window of Nomad Designs, a fabulous bead bazaar in Boulder Colorado where you can find all sorts of exotic things.
Jul 25, 2008

I just returned from the Tougaloo College Summer Art Colony in Jackson Mississippi. This year was #12 for this week long celebration of art. Its also the second time that I’ve been there as an instructor. Our class made masks, spirit dolls, icons and boxes, beads and more…all with polymer clay. Click here to read more about it and follow the links to see what we made!
The mask shown above is a full sized domino style mask. We also made a lot of miniature masks, making the original sculpt and then creating silicone molds using Amazing Mold Putty by Alumilite. The bacground in the banner is a digital picture of the night sky with full moon as sseen from campus. The picture didnt come out all that well–but parts of it are beautiful, and as instructor Carmen Hathaway (Digital Dreams) tells her students, the original photograph is just the starting point. I would have eagerly taken her class–or any of the other classes given by VERY talented instructors. Seeing what other artists do, and speaking openly with them about making and marketing art is tremendously inspiring and helpful. I had a wonderful time at the Artists Colony, and I encourage everyone to spend some time this summer viewing the work of other artists and making more of your own!
Jun 14, 2008

Here’s a link to a brand new page with the mosaic table Bryan just finished. There’s a LITTLE bit of polymer clay in this one–but mostly stone and ceramic with crystal glazes. It ended up looking kinda like a game board! It has all the beautiful pieces swimming permanently in a poured two part epoxy resin surface. The picture shown here is of one corner of the table. Featured are crystal glazed tiles created by master crystalierre and potter Fara Shimbo.
http://polyclay.com/epoxyresin.htm
Jun 13, 2008
 Dyed in the wool comes this weekend…but LAST week we dyed the cottons and silks. While we rested up and things dried, we put together a quick 30 second video with an ambient music soundtrack.
I’m learning how to use a webcam and the digital camera as a video recorder, and playing with the hardware and software is how I learn best.
http://vids.myspace.com/index.cfm?fuseaction=vids.individual&videoid=36089812
Music provided by Bryan Helm. If you like it, take a listen to his podcasts at My Life In Sound.
Jun 6, 2008

We’ve had rain all the first part of this week, and we needed the moisture. It is beautiful in a sunny way today, and we’re starting into the annual dyeing days! Today is prep day–I’ll be mixing dyes, and getting them into the bottles. I just ran off the sheets of labels for the plastic bottles. This year we have:
#03 Golden Yellow
#05 Soft Orange
#8A Pagoda Red
#09 Scarlet
#13 Fuchsia Red
#14A Hot Pink
#15 Amethyst
#18A UltraViolet
#19 Plum
#19A Lilac
#21 Teal Blue
#23 Cerulean Blue
#25 Turquoise
#27 Midnight Blue
#28A AquaMarine
#37 Bronze
#44 BetterBlack
#45 Jungle Red
#47 Chartreuse
#50 JadeGreen
#60 Lavender
#62 PeacockBlue
#64 Orchid
#96 Lapis
#97 Citrus Yellow
#105 Pewter
#111 Black Cherry
#112 Periwinkle
#113 GoldenBrown
#115 Eggplant
#118 Yucca
#312 Strongest Red
#510 Basic Brown
 We use Procion MX series coldwater fiber reactive dyes. We’ve found that labeling the bottles after mixing them up makes it easier to tell what’s what, when you have lots of colors. We also have bagged swatches (that’s the picture at top) so that we know how the color is going to come out, mostly.
Another good tip I’ll share with you is to mix your dyes with water and then pour through a coffee filter into the bottle, that way those pesky little red or turquoise spots are not a problem.
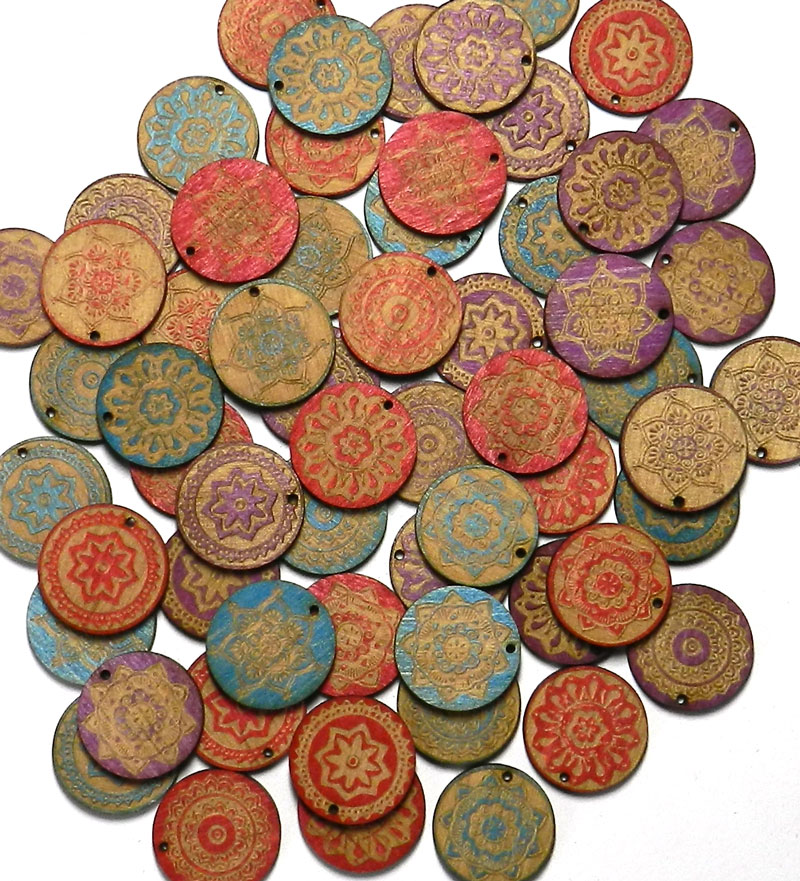
 This year I’m dyeing lots more pieces of turned wood, because I LOVE how last years batch turned out. No ribbons this year–I did a lot of them last year.
They went into the current crop of Spirit Doll Kits along with the cotton and silk fabrics, and polymer clay faces. I’m selling them on Etsy.comwhich is an on-line site presenting handmade and vintage items. I’ll be adding lots more items in the upcoming weeks as I clean out the studio and help fund upcoming shows and projects.

I’ll also be dyeing some t shirt dresses and shorts for my own summertime wardrobe, and backdrop and curtain fabric that will be used in the Aunt Acid Show. They WERE beige muslin–how drab!! They were great when I did out door shows and needed backdrops that did not compete with the displays. But for this particular show, we can take LOTS of color. I’ve been gluing mosaic set pices, and things are coming along splendidly in a visual sense. Now for another big dose of color, and we’ll be onward into the Summer of More Love…and we happen to love art and music and humor, so I’d say these good times to “Be Happening”.
Speaking of summer time fun, I’ll be teaching a week long seminar on using dyed fabrics and polymer clays to make spirit dolls, icons, and masks this summer at Tougaloo College Summer Art Colony. July in Mississippi is time for some HOT ART!!