Oct 22, 2024
What a busy year it has been! I had a great session of dyeing, with traditional tied shibori and ice techniques giving great results, Months of metal too, with a big batch of etched copper and brass as well as flat patinas on both. Then came the cutting and finishing, and now the photos.
Which is very timely, as I am redoing my websites! I have closed my Polyclay site and am consolidating the parts that I want to keep into this site, updating and freshening as I go. I’ll be posting here, and I’ll be putting items for sale into my shop.
Lots to do, but now that my outdoor gardening is done for the year, I can grow my website…and work on some new projects too!
Nov 11, 2019
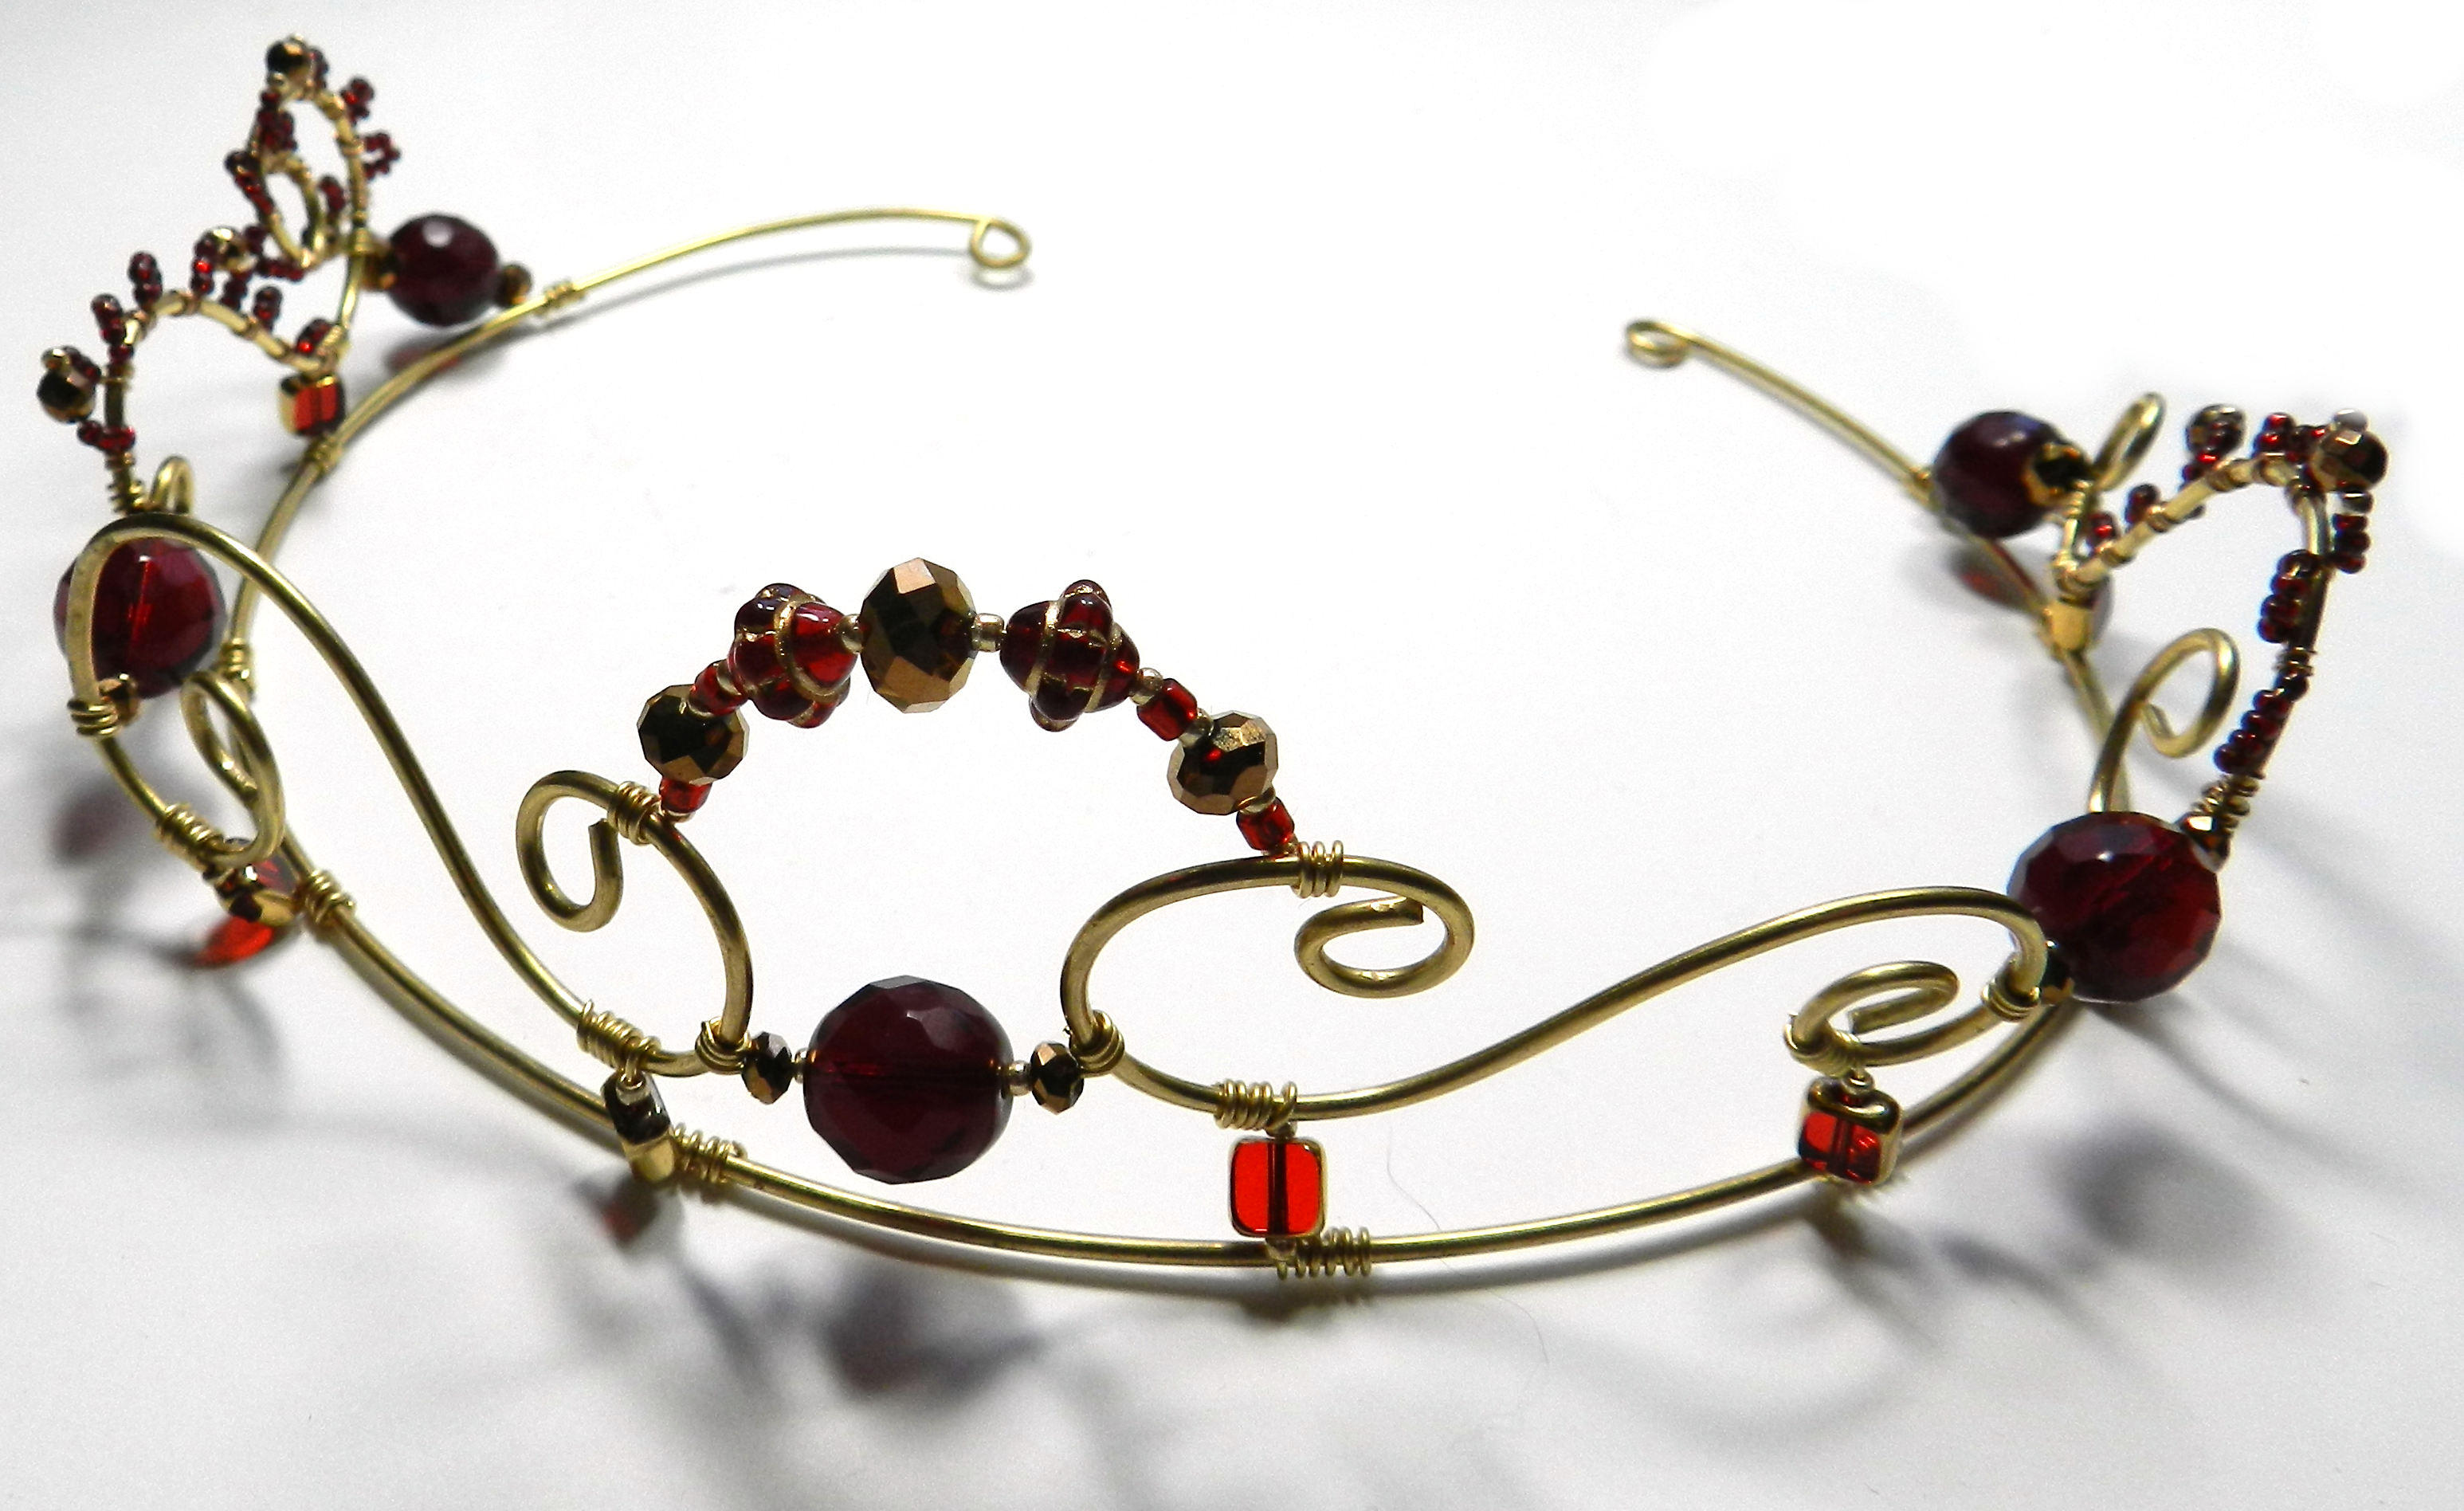
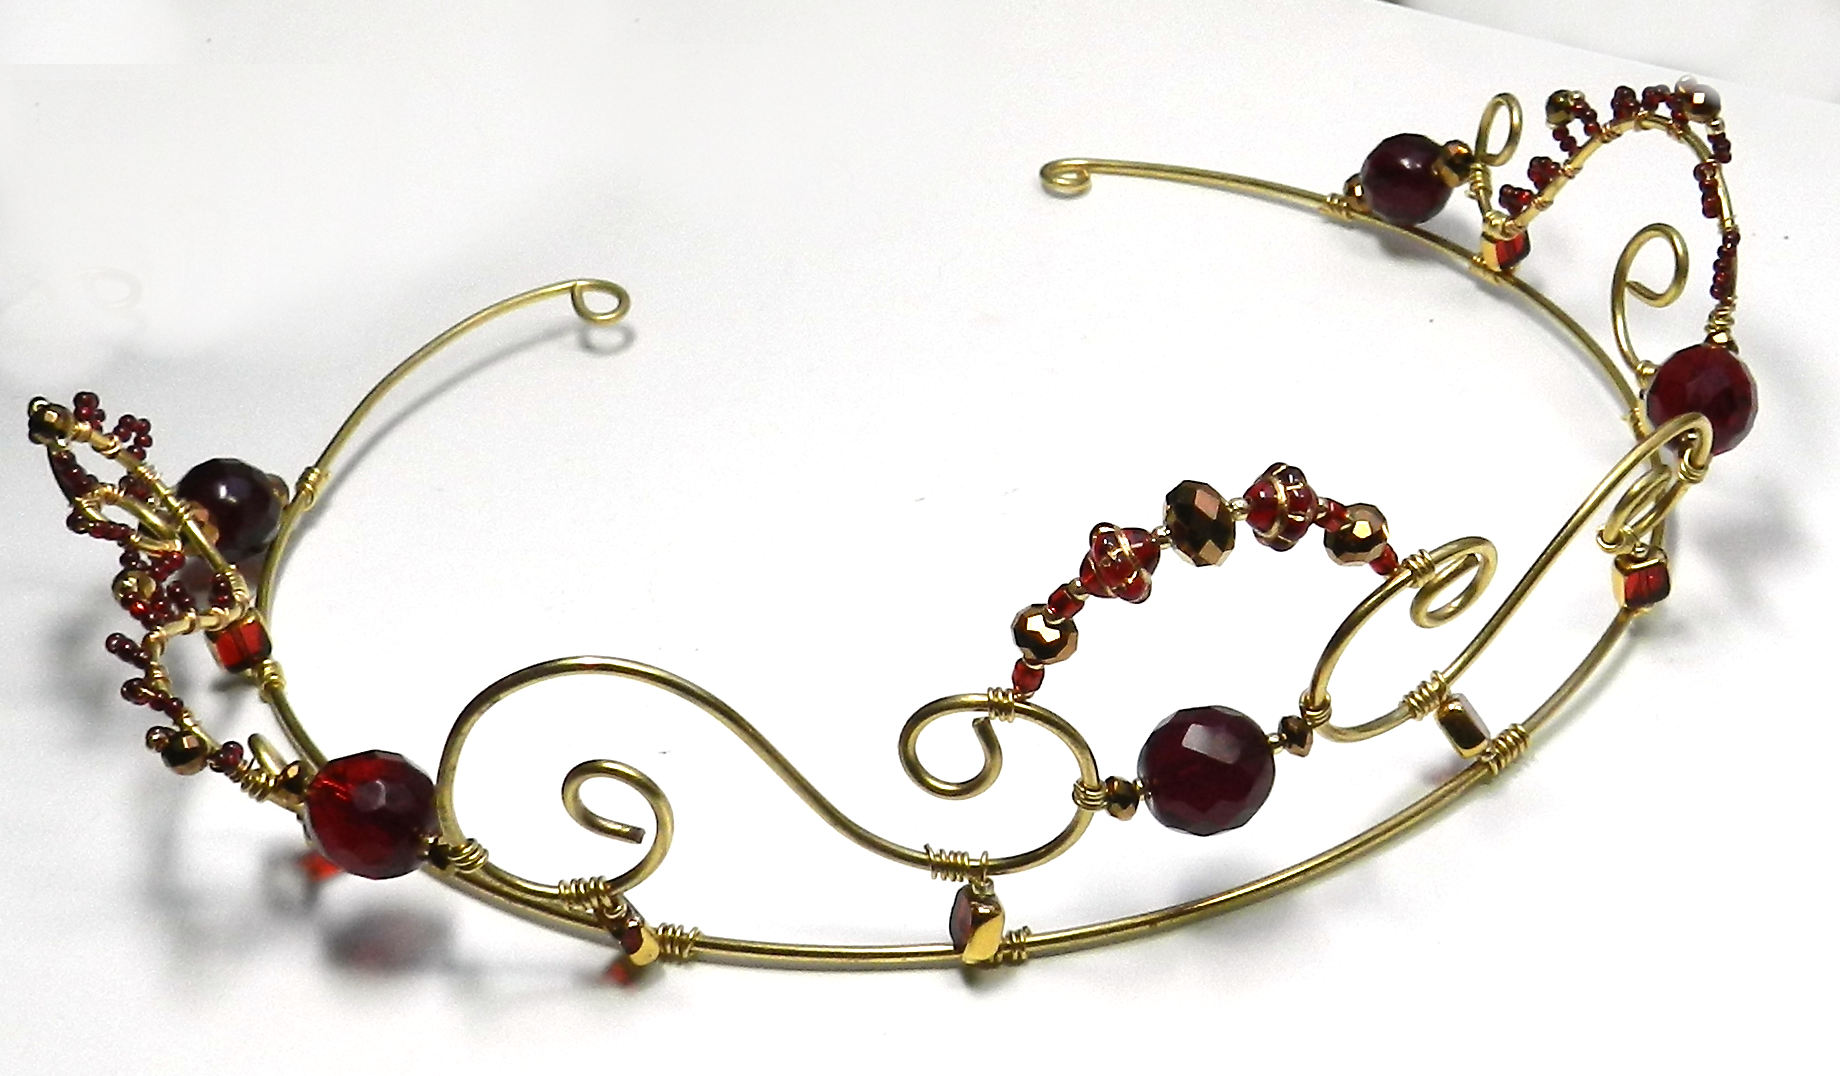
I wasn’t born a Crowned Head of anywhere or in any line to be one. I don’t really think I’d want to be Royalty, either—but I do like crowns! A good crown can improve the mood or accessorize that power suit.
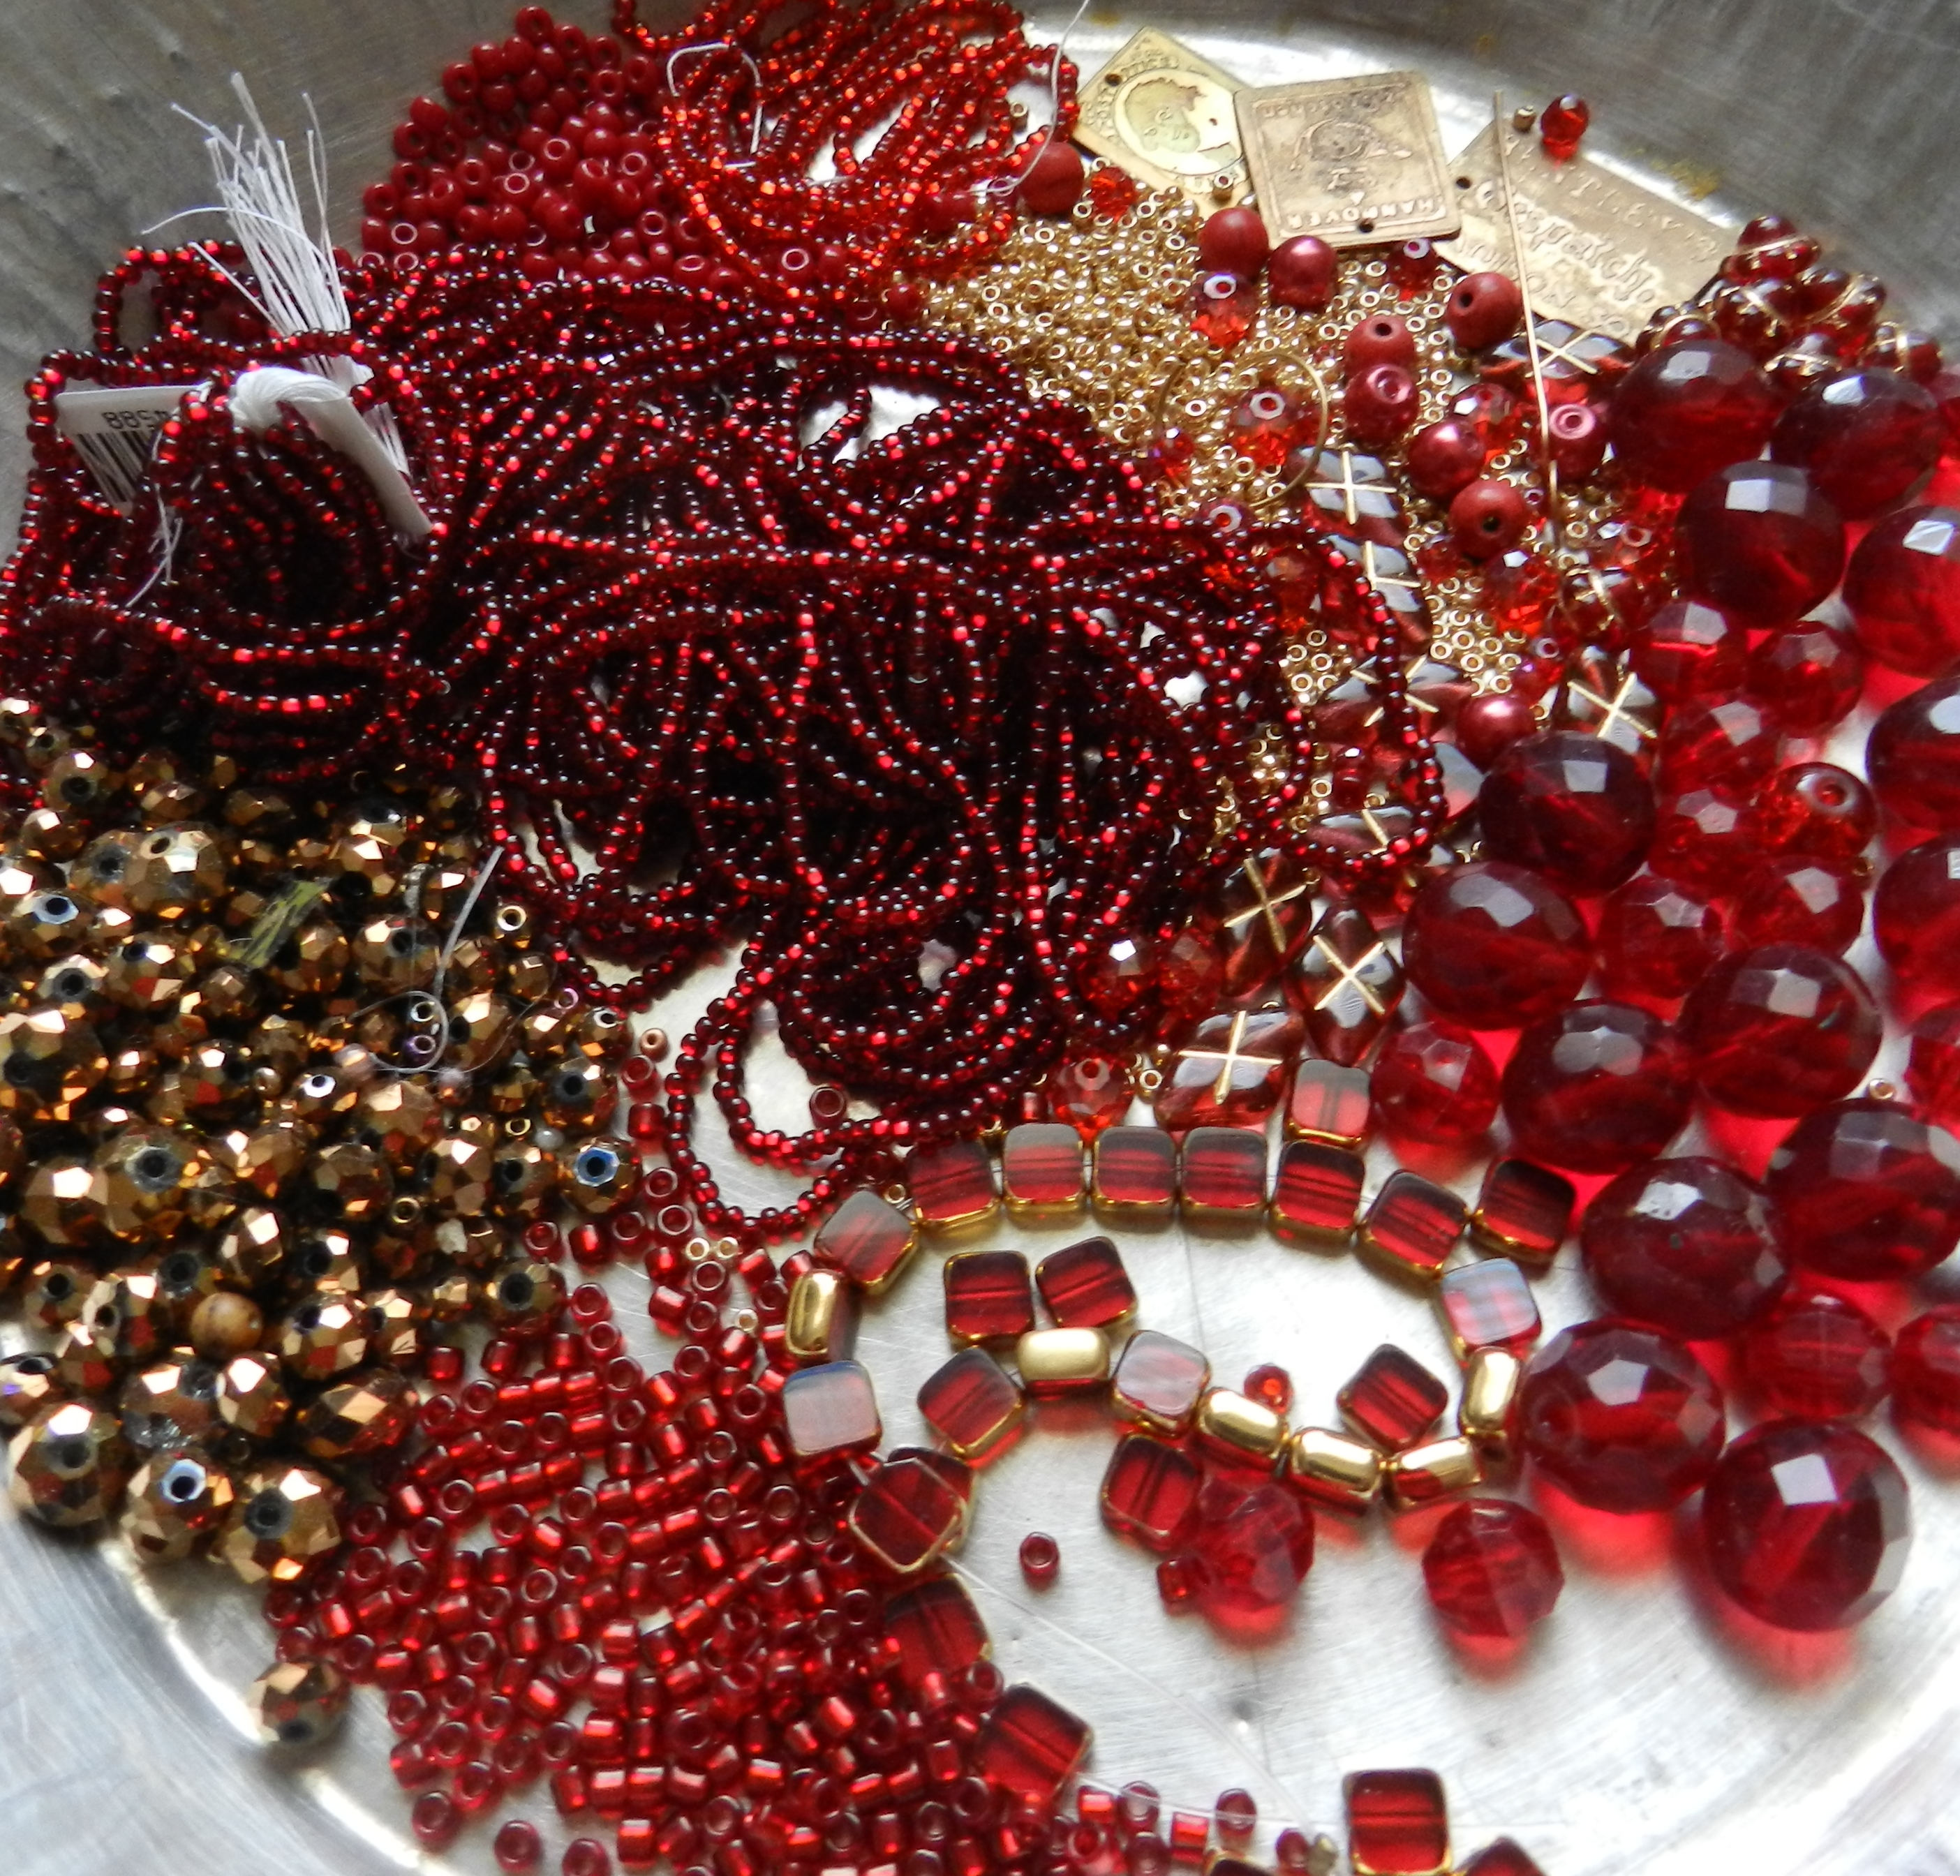
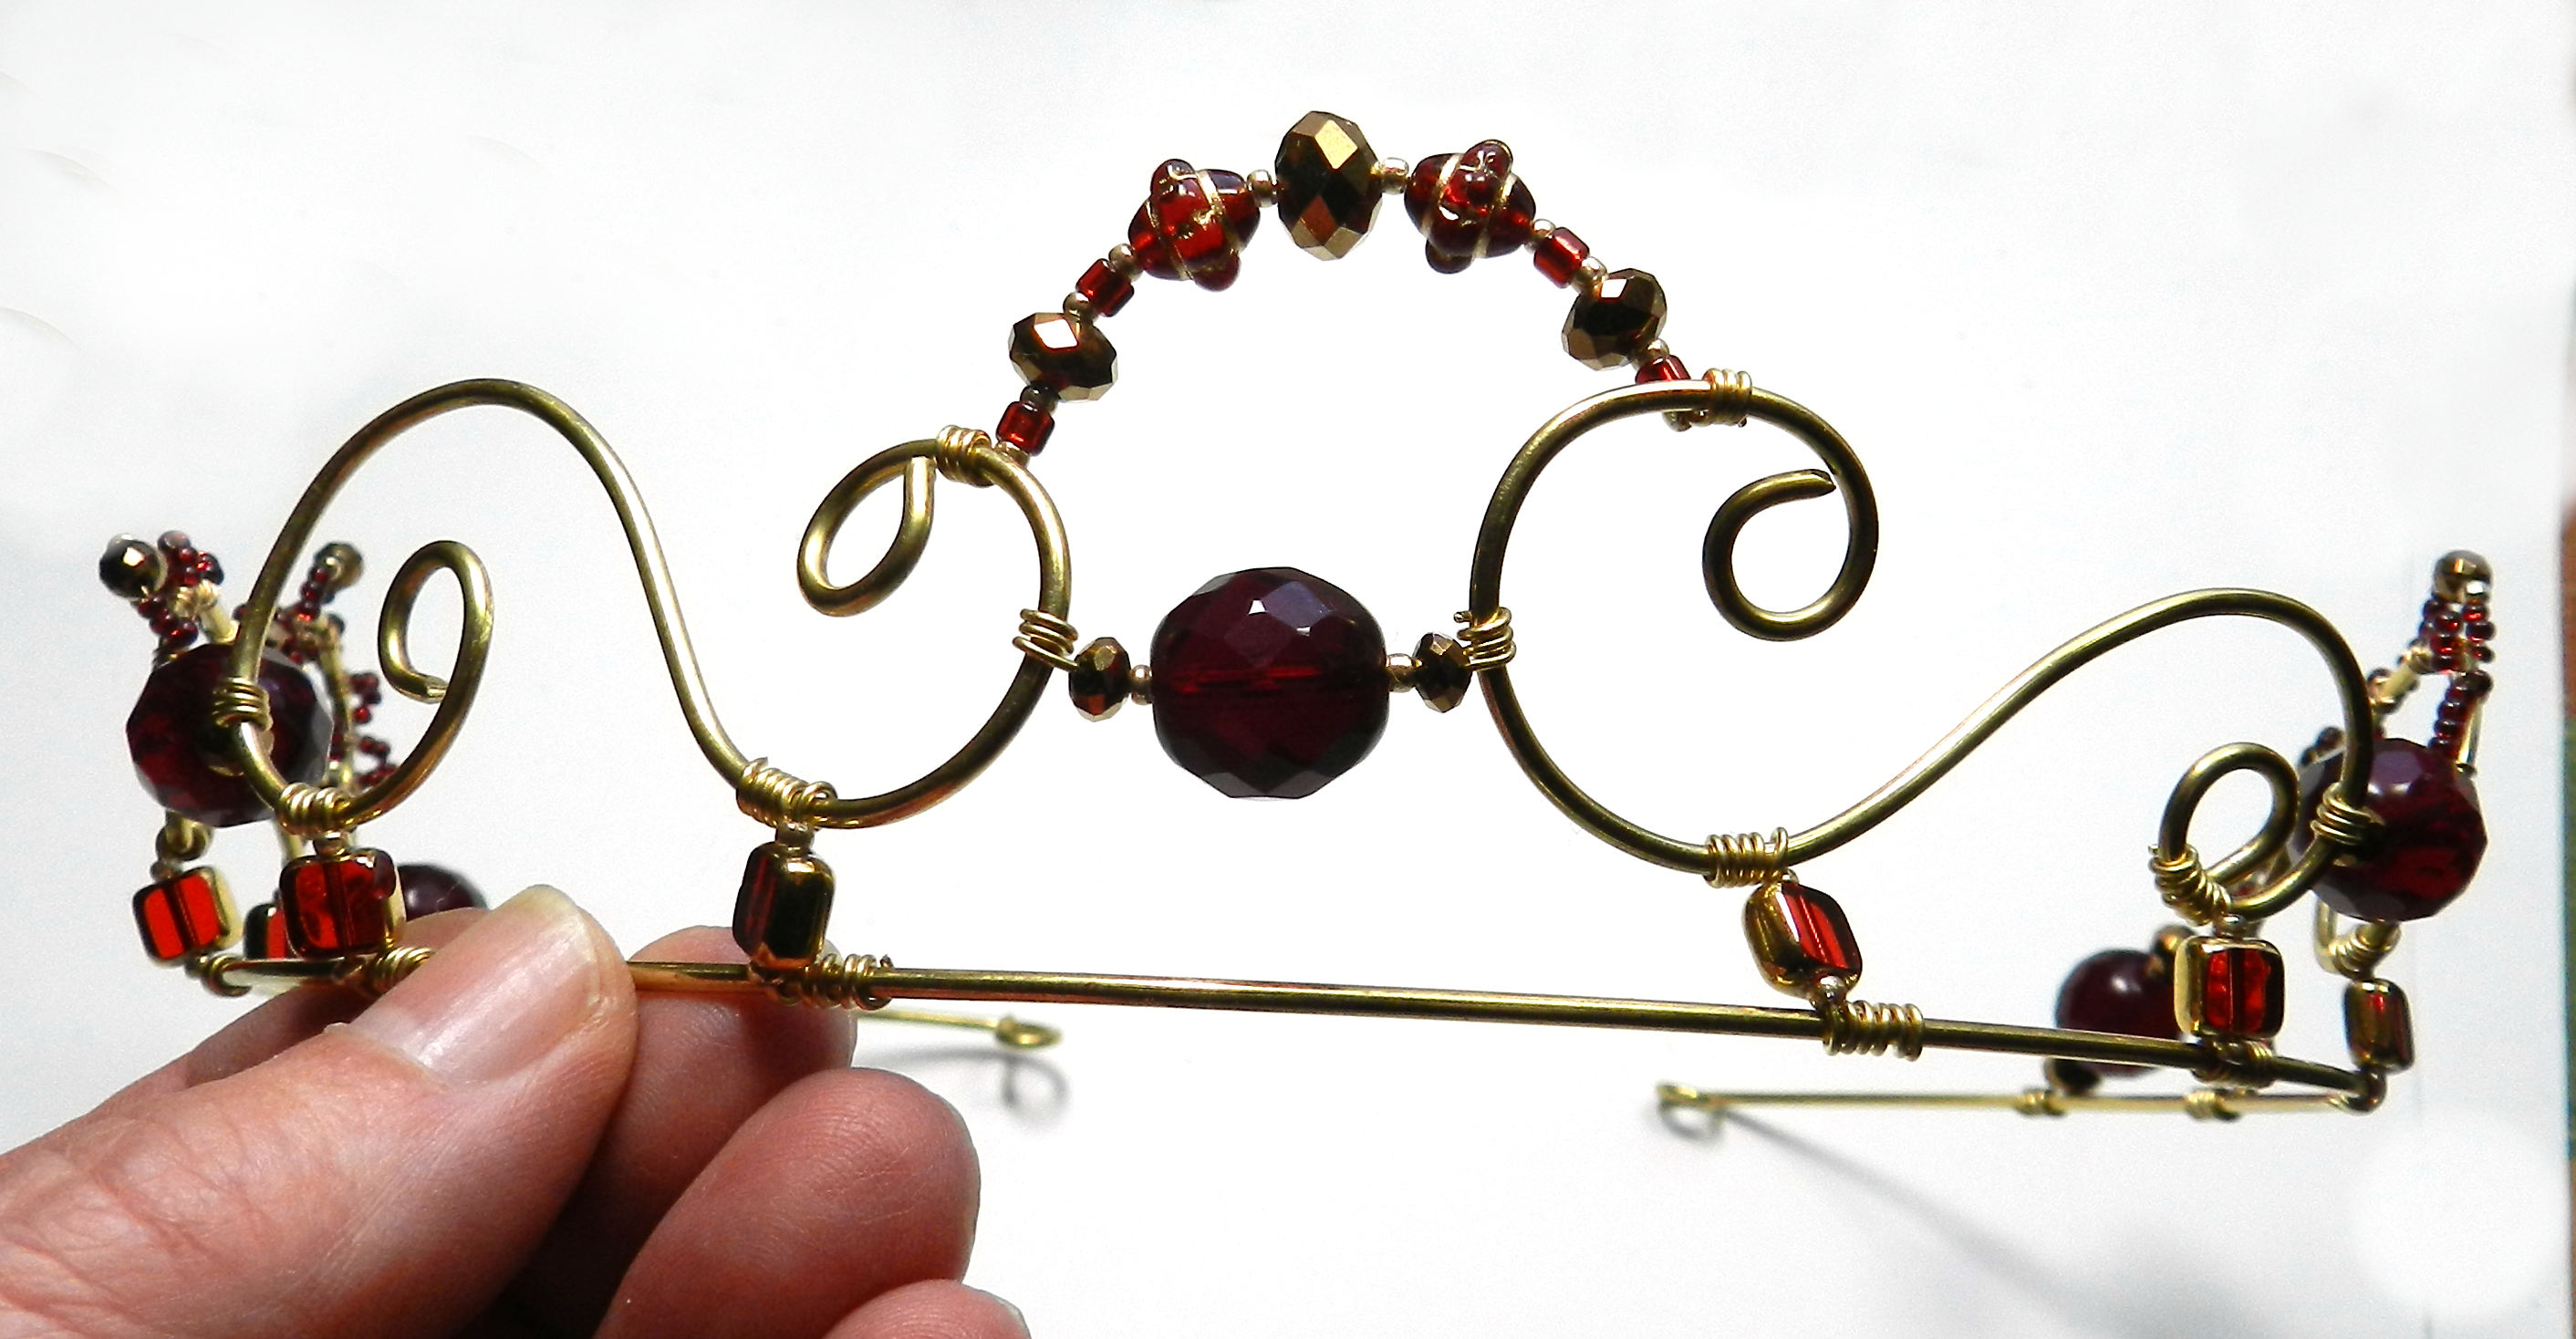
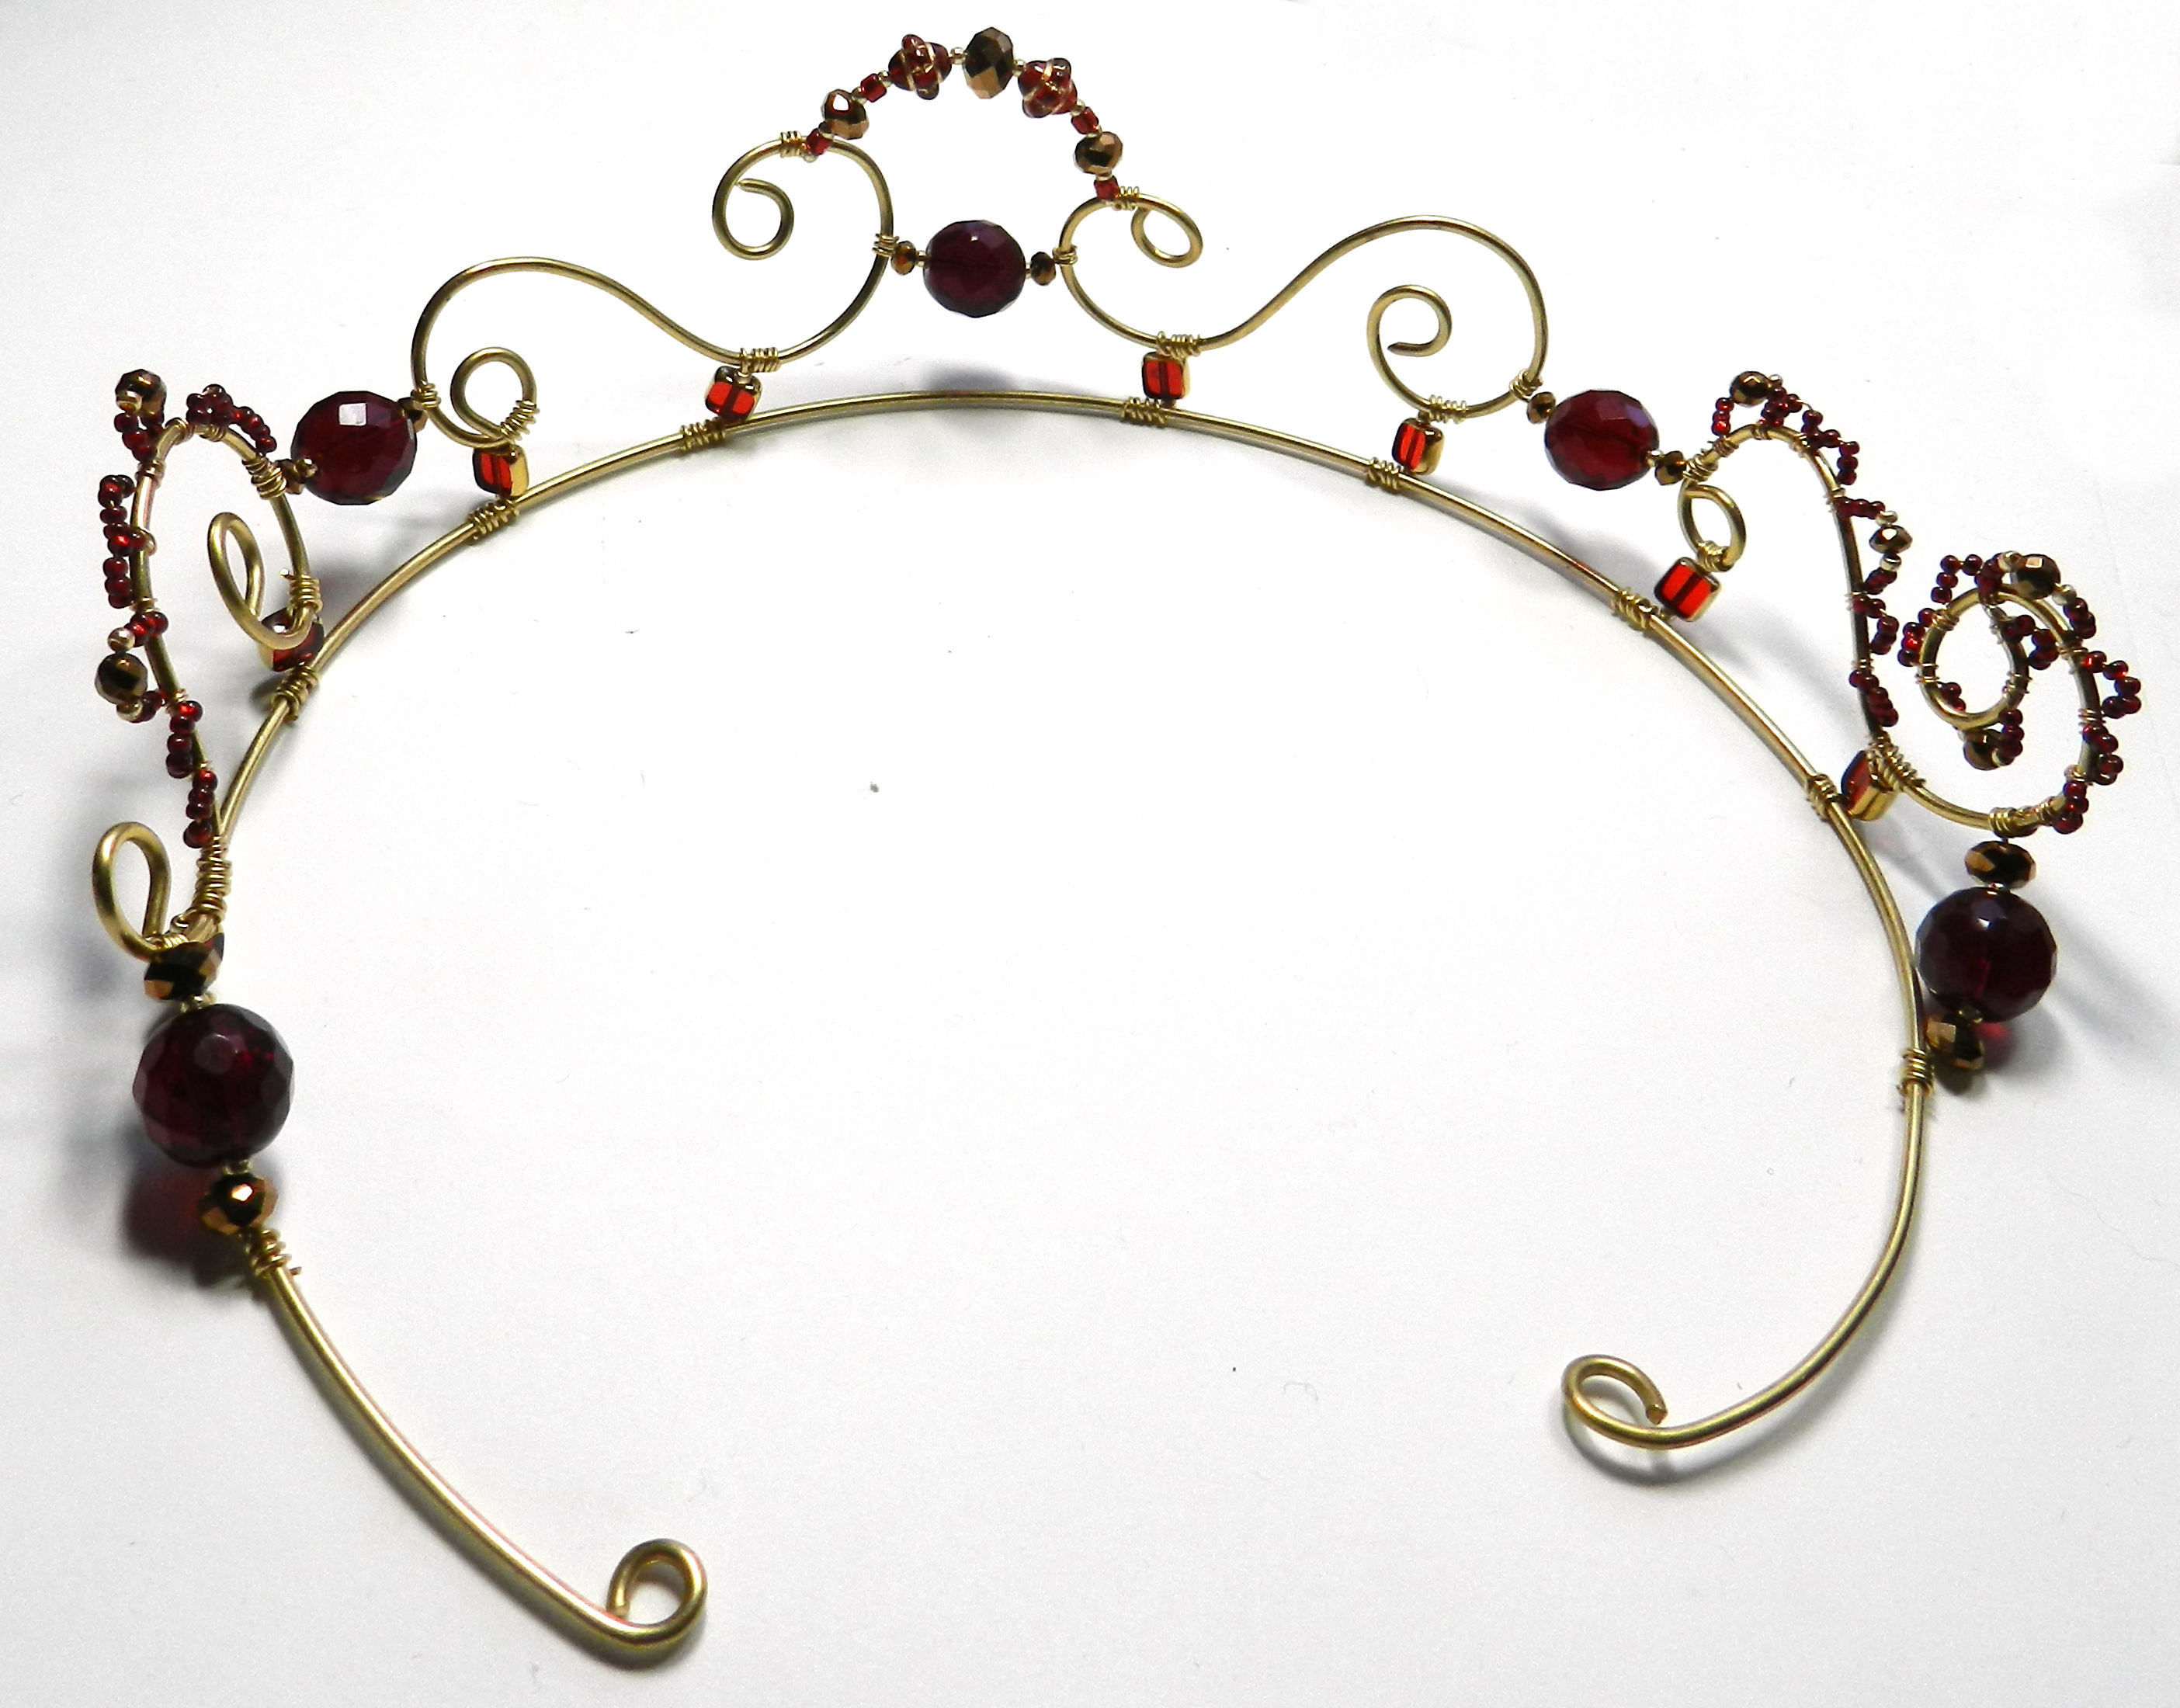
I’ll be teaching in the upcoming year 2020, including a class making wire and beads crowns at Bead Cache in Ft. Collins, Colorado! Here’s one design sample made with brass wire, and a selection of ruby red glass beads along with sparkling bronze glass crystals and golden metal accent beads.
Aug 18, 2019

I’ve got new metal and more to show and sell at a 24 hour event in the One Sweet Bead Market on Facebook, coming right up on Tuesday, August 20th. This is a great group, and one of three I sell through on Facebook. I’ve closed my Etsy store, and opened my own shop here at Creative Connections. I’ll be putting new work up in sales on Facebook, and then stocking the digital shelves here in my shop!
Aug 5, 2019
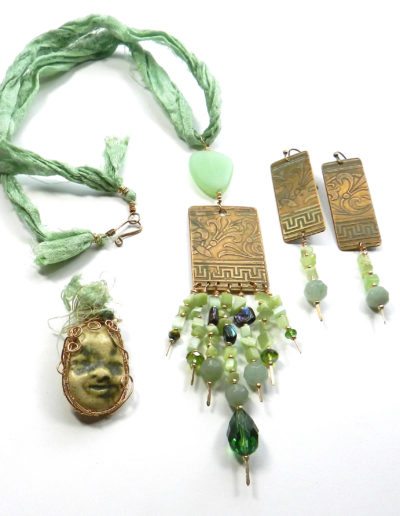
In my previous post, I showed the components and green, pearl and ivory beads I picked out for putting together a necklace and earring set or two. I got them made up, and its time to show them off! The first necklace is a chain of beads that are in a harmonious color grouping–a great way to use up beads that are not enough for an entire necklace by themselves. I like the collector’s mode best anyway–a few of these, one or two of those…
The second image shows the etched brass pendant and earring set made up into a set with some hand dyed sari sil ribbon and a hand-formed bronze wire hook and eye clasp. I also wire wrapped a ceramic face with some bronze wire and a bit of the silk fiber fluff–now it is a pendant just waiting for a ribbon or chain.
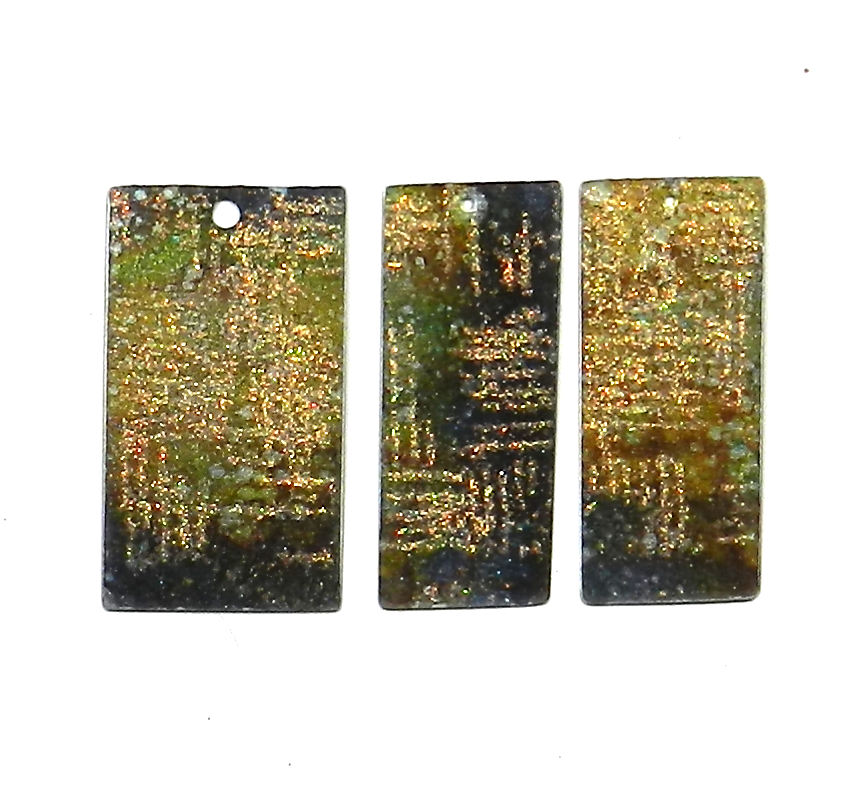
The third image shows another necklace, made with etched brass using images of vintage foreign stamps. this one also has a hook and eye clasp–very sturdy and easy to make. All these lovely cool greens were fun to bring together. Now I think I will move on to some blues!
Jul 19, 2019

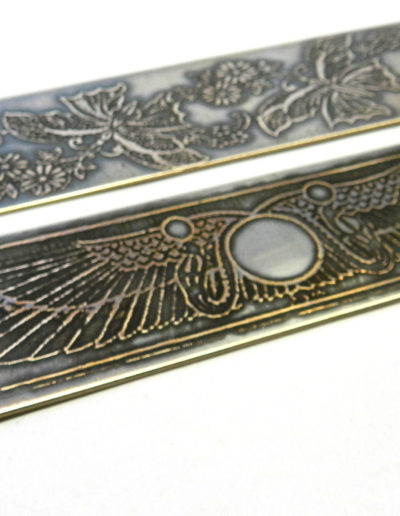
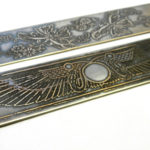
I’ve been packaging up the etched and patina metal sets from the most recent batch, and they turned out so well that I had to keep a few things for myself. Electrically etched versions of vintage foreign postage stamps in green, and a lovely brass set in a Renaissance design caught me, and I set them aside for a bit of beading fun. I already had a lunch tray with beads in that soft green, and one in ivories and pearls. When you work in colors you like, things go together, and there are often leftovers from projects. Two or three beads are enough to become part of a brand new design, and a color coordinated display.


I like taking an eclectic group of beads and seeing how they can dance together—that’s more fun for me than one kind of bead repeatedly strung in a row. I’m using metal, polymer clay, shell, glass and crystal, rocks and pearls. Chain lengths made with wire segments are a great way to use up a lot of beads in small groupings. I am using 22ga bronze wire to make this necklace, which will feature an etched central pendant piece with fringe—eventually! I think the stamps will be another necklace, or maybe a charm bracelet…

Of course, there needs to be a pair of earrings; since I started with one of my 3 piece metal earring pendant sets, that makes it easy to get that going too! This project is coming together a little at a time, as I take breaks from the work of the week. Gotta have those creativity breaks, especially when it is hot outside and the computer needs a rest.

Jun 28, 2019
We’ve been very busy indeed, getting a big new batch of electro-etched metals finished, putting inks or patinas on aluminum, brass, bronze, copper and nickel silver. Now that warm weather is here, we are gearing up to do more textiles, more polymer clay…and work in the digital world continues too. I’m putting my online shop together here at Creative Connections, and filling it up with jewelry, components, kits and more. I also have a page for my POD (print on demand) artwork on wearable items and accessories as well as home decor. I put up more items in the shop here every day, and will continue in and around the other projects—gotta make ’em before you can show ’em off!
I’ve started making bracelets out of a thicker gauge of metal, and the results are lovely. 22ga for bracelets and 24-26 gauge for earrings and pendants works out very nicely with a better heft to the bracelets and less weight for ears. I’ll be adding bracelets and more to the shop next week–do please stop back and see.
Nov 5, 2018
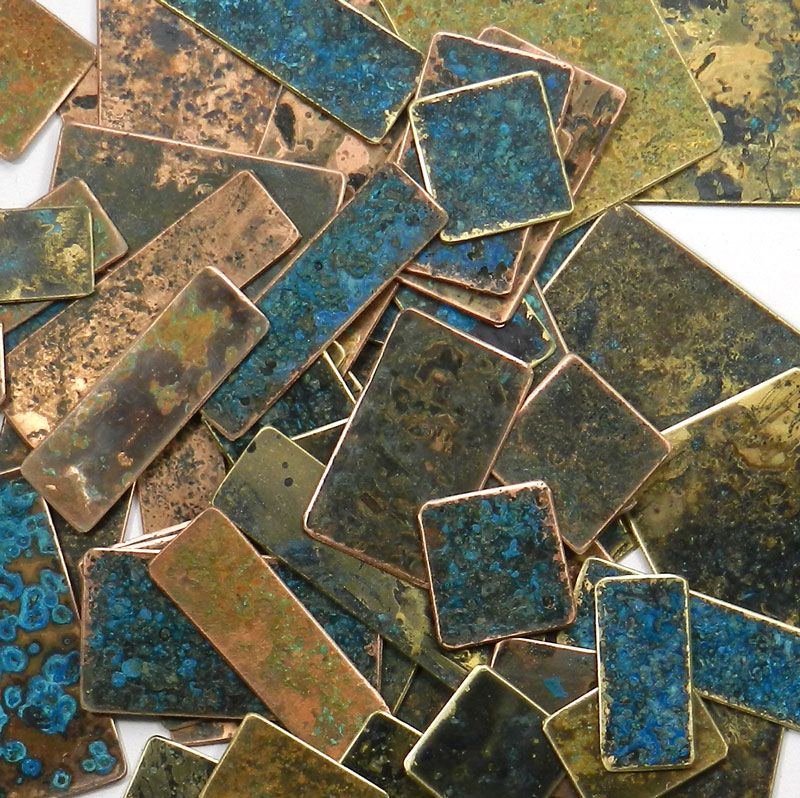
Every time I open the boxes where metal patinas are forming on the pieces of brass and copper, it is like Christmas. You never know exactly how they will turn out, and its a lot of fun to be surprised by beauty. I cut the metal up and ground down the edges and gave everything a coat of Renaissance Wax to seal the finish. I cut up pieces to make bracelets, pendants and earrings.

As soon as we finish the details like putting in holes I’ll be selling some as jewelry making components and making some up to sell in galleries, online, and at shows like the upcoming Laramie Holiday Market on Saturday 9-4 November 30th at the University of WY Buchanan Center for the Performing Arts.
I’ll be there with Camille Rendal and Shelley Leonard, local Laramie artists themselves. We’ll have earrings pendants and bracelets, belt buckles, handwoven scarves, and more!
Camille and I are also starting an online store using the shopify platform. We are presenting art we make and also our art printed onto a variety of clothing, accessories and household decor. We’ve just started things going and will have a Grand Opening later this month. I’m creating new POD designs and uploading new products to the store every day. Check back often to see what’s new!
Sep 15, 2018
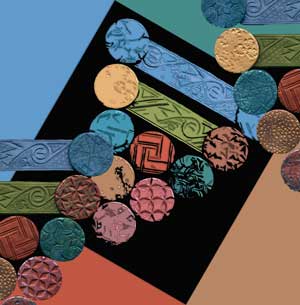
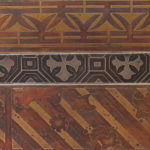
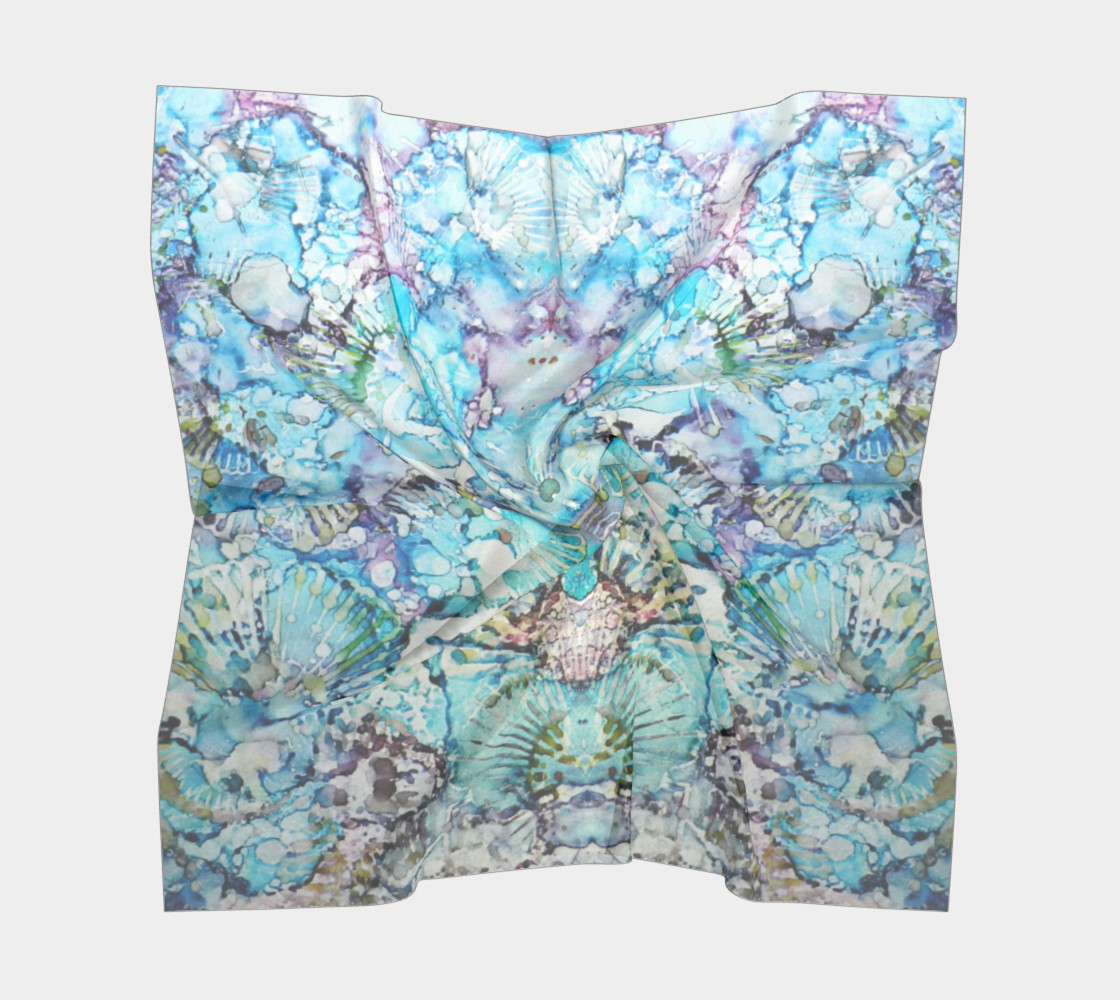
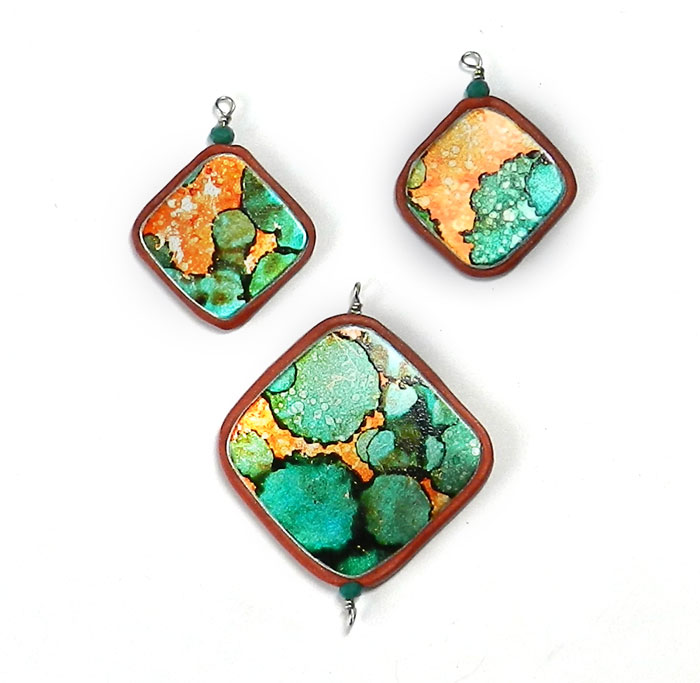
 Well this certainly is fun! I took a 3 Inch by 6 inch piece of metal (seen at right) and painted it with alcohol ink and gave it several coats of Rustoleum Varathane, Then did the back of the metal with a design in a simpler but co-orrdinating color design. After that I took pictures, and now I can use the pictures to create POD (Print On Demand) products. Right now you can buy through their website, but I am in the process of putting my own store together with Shopify.
The original art is seen at right. Below in the gallery are the pieces and the POD items
These particular items, a scarf, yoga leggings, a draped kimono, tote bag and zipper carry call are all from Art For Where in Montreal Canada.
They mill their own fabric, print it, cut and sew and drop ship the orders. Then I cut up the metal, ground down the edges, and got the pieces ready to make into jewelry!
Oct 16, 2017
 We’ve been spending the past few months digging in with creative endeavors here in our new place. We’re producing new art, music, writing, and also preparing for winter. (We’ve already had snow three times!) I’ve been putting major efforts into metal work that has been languishing unfinished or unsorted for a while. I had a pile of etched metal and metal with beautiful patinas as well as decorative ways with inks. Now I have quite a few trays filled with earring parts, pendants, cuff bracelets, and sets. I’m selling components to other jewelry designers and having fun seeing what they do with them.
I’m reaping a bonanza harvest of brass, bronze, nickle silver, copper, tin and aluminum components for making earrings, pendants and charms. I’m selling on Facebook groups and also wholesale to stores. Plus, when the winter days keep me indoors, I’ll have plenty to choose from when making jewelry.

Aug 3, 2017
 I love the vivid colors and fun effects that are obtainable with alcohol inks on metal. For my first art experiments in my new home state of Wyoming, I got all my inks and my embossing powders out for several days of summertime fun! I’ve wanted to see how the inks and powders held up to cutting and filing for some time, but life in Colorado and then moving kept nudging project days to the side. But here in my new studio spaces (I have several now–indoor, outdoor, and a shed, all with power and lights!!) I’m finding it much easier to get some art time.
 My experiments started with cutting up some 30 gauge aluminum and getting it cleaned up and ready for the inks. After having lots of fun with color, all the pieces were carefully heated to help further set the inks permanently, and then sprayed with two coats of polyurethane.
After that, I cut up the pieces, making 2″x4″ rectangle pieces for my embossing experiments, and 4″x4″ squares, and a larger piece that will get played with later and cut up to make decorative parts for boxes, mobiles, and jewelry. Some for now, some for another time! I want to do some that incorporate other elements too, like metal leaf.
In the course of our recent move, I got to see all my art supplies, and now they are out where I can see them all the time, motivating me to actually use them. While accumulating tools and supplies is a lot of fun itself, I’ve pared down to the ones I want to use, and it is very satisfying to use them. I love seeing how the different things go together.
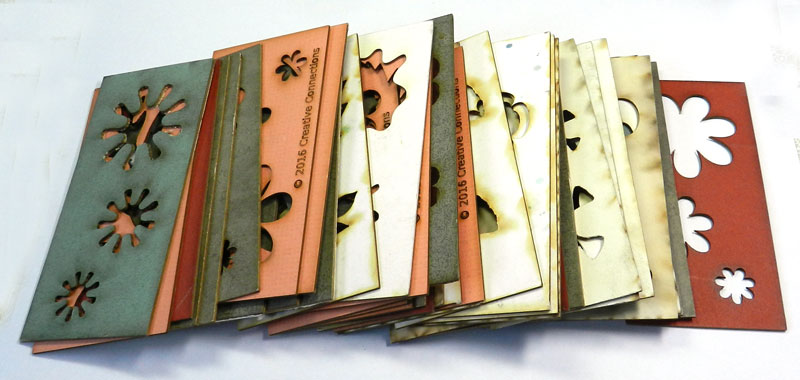
Once I have the prepared metal pieces, I like to cut them up further and make things like jewelry components or inserts for decorative boxes. For jewelry use, I use a large metal shear to cut straight across, disc cutters to make circles, and metal shears to cut more complex shapes. In order to easily duplicate shapes, I made myself some laser cut templates of shapes that I like. I used a Open Source program called Inkscape to create my shapes and then used them with the laser cutter at Tinkermill, the makerspace in Longmont Colorado. Makerspaces are great hubs of creativity, and I hope to see more of them established.
Here are the templates I cut, with all sorts of shapes, flowers, leaves, and more. I use them in metal, paper and textile work a lot. The set on the right is particularly useful for making earring pairs and pendants or pins. Now I have a lot of different pieces and can try a variety of different things. I love the freedom to experiment and play with colors and textures. Sometimes I go too far, but I always learn things that inform more pleasing work later.
I cut out shapes and then smooth the edges with a habilis 00 file, some sanding, and then I can pierce holes with the Euro Tool punch, glue pieces to leather or other backings, or embed the pieces in polymer clay to be cured. (Pieces with embossing powder cannot be heat cured–embossing must be done after the baking step.)
The next step for me is to make some finished jewelry, and I’ll be doing that this week; from where I am sitting now I can see just the right beads to make these all up. Check back soon to see how they look when finished, and please do view the results of my ink and embossing experiments as well as other work.
May 20, 2017
 The process of transformation can be fascinating–I love starting with a flat, shiny sheet of copper, brass, bronze or nickle silver and then using electricity, fire, hammers, rollers, and chemicals to change it completely. Each step along the way–patterns, textures, shapes and colors is part of a trail of discoveries. After etching, hammering, cutting, creating a patina, waxing or spraying, grinding, filing and sanding–I have developed a relationship with the metal!
Some pieces I make into earrings, pendants, and bracelets. Cuffs are great because they offer a larger “canvas” to show off the gorgeous colors that are possible with patinas. The processes involved are a mixture of precision and serendipity, and seeing what occurs is a gift that I get to unwrap each time. Sometimes surprising, always fun to explore; each piece is individual.
In addition to metal, wood, ceramics, polymer clay and textiles, I’m changing things around here at Creative Connections as well. I’ve been building up inventory all winter long, and now that the snows have melted and Spring is here, its time to get things out to market.
I am now selling finished jewelry and components for designers who want to use them in their own art. The Store section here at Creative Connections is just getting started, and will continue to grow, so do please check back again soon to see what is new!
Mar 20, 2017

I think everyone would benefit from a having at least one crown. Pageants take up too much time for only one or two crowns, and not everyone is born into families that have a few to pass around. So, making your own is the way to go! I’m hosting a class at Tinkermill to do just that.
It has been such a busy season making things and taking pictures that I have not had much time for posting them here! I’ve been exploring the business side of social media and Facebook, and there is a Creative Connections Facebook page in a beginning state. I’ve found some great groups there with a growing array of artisans displaying their wares to a world wide audience. It’s hard not to spend too much time looking, and so I’ve been at the metals workbench, the dye pots and the laser cutter. I believe there are lots of colorful new things coming up this Spring! A little flower fae told me so. I like how she looks, just playing with the bits and pieces I have around on the workbench well enough to think it would be fun to host an after noon of making these little cuties too. I’ll have to add that to the calendar for later in April!
I’m marketing jewelry, components and digital downloads through several online outlets, galleries and bead stores. I’m also enjoying the luxury of big tables, lights, and cool tools at Tinkermill in Longmont. I’m teaching a wide roster of classes there each month, and I’m about to add some new ones.
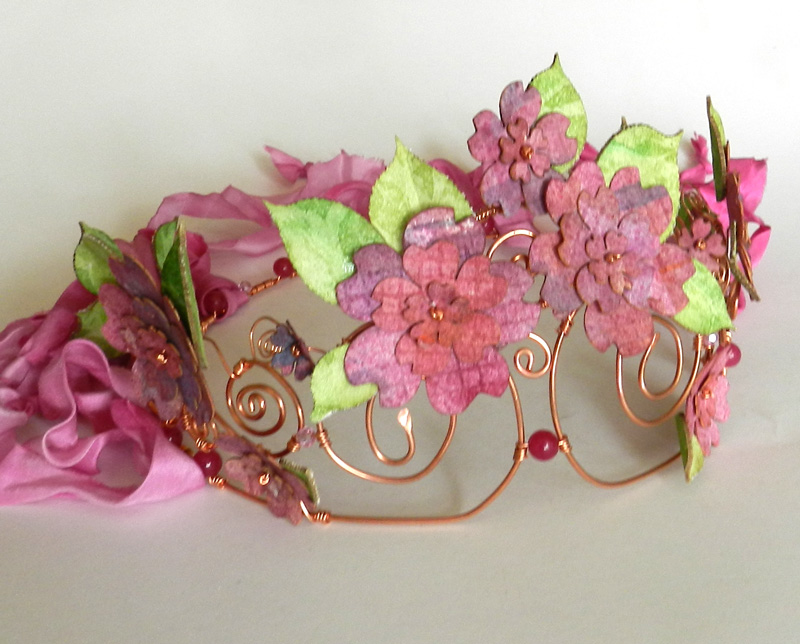
Right now I’m enjoying an infusion of color and flowers for Spring. I Iove being able to bring all sorts of different elements together, like making a spring princess crown of copper coils, carnelians, and hand dyed ribbons, which would be at home in celebrations long ago and far away—and then decorating it with flowers made from handpainted watercolor paper cut with a laser beam! Such an artistic luxury to be able to combine drawing and hand coloring with laser precision. Computers and other great tools are a LOT of fun..particularly if you get to add paint, and dyes, and beads…so many projects comic right up!

Jan 12, 2016
It sure is snowy outside, but I’m growing a fresh crop of flowers (metal), several new classes to put on the calendar, and a brand new membership at Tinkermill in Longmont. Also an educational nonprofit, Tinkermill.org is a creative maker space, filled with all sorts of interesting people with skills–and tools–and space to use them. My family joined, and are eagerly awaiting orientation so as to get to work on projects that are too big for the kitchen table, or require tools I’ve not yet acquired!
Something that really iced the cake for me is the classroom space that is available there. I will be offering classes in the upcoming months both in Gahanna, Ohio and in Longmont, Colorado in the upcoming weeks, so sign up for the newsletter if you’d like to be notified when they are on the schedule. Media will include digital, metal, polymer clay, and textiles.
Feb 24, 2013
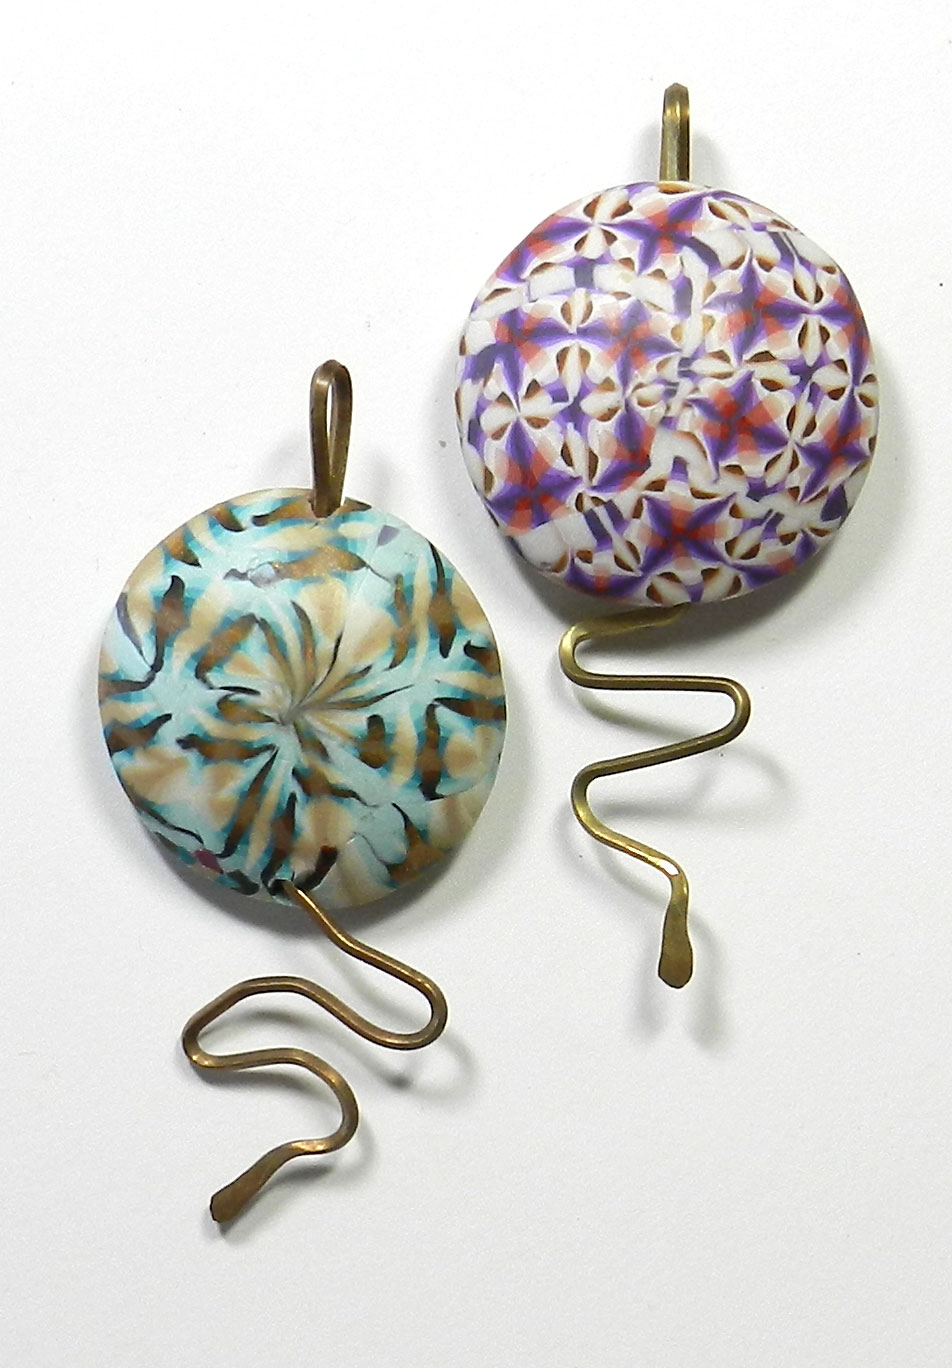
 I’ve been having a lot of fun going through my beads and ribbons and fibers to make lots of kumihimo braids and turn them into necklaces.
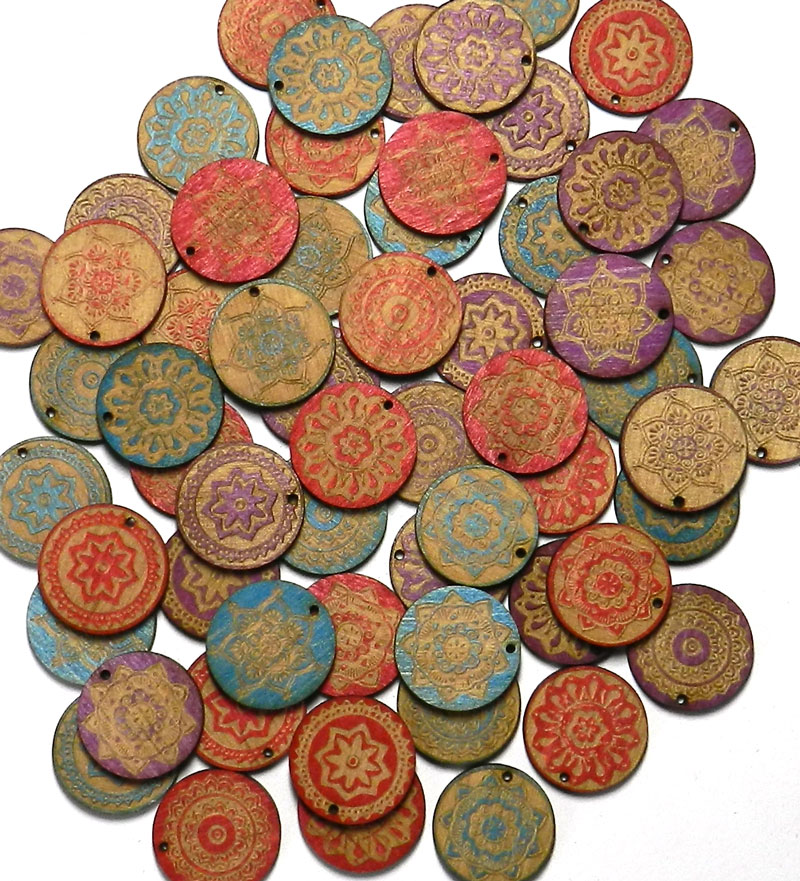
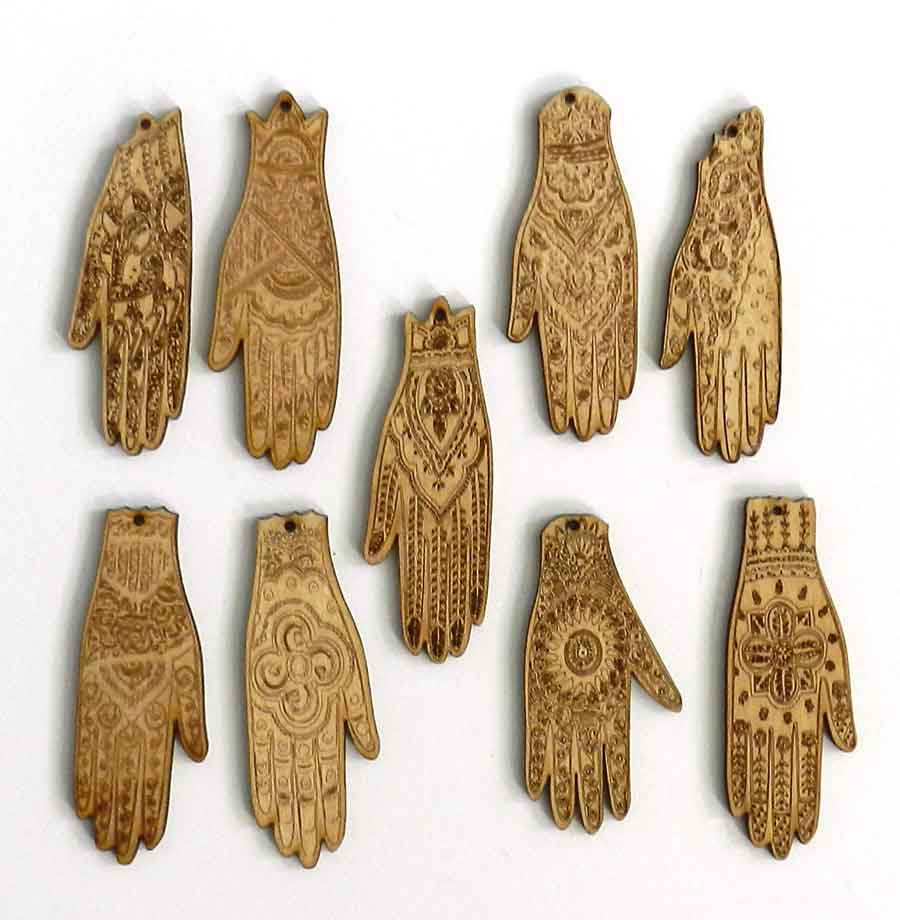
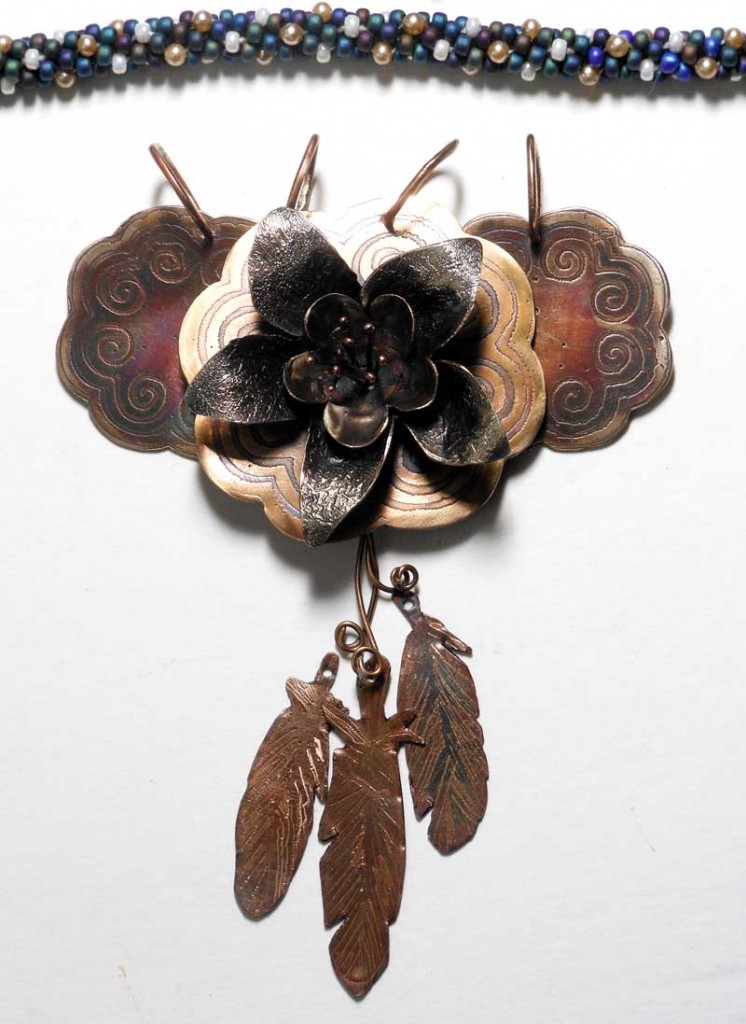
I’m using bronze and copper metal that I’ve etched to make the end caps, and I’ve etched lots of pendants in bronze, brass, copper and even a bit of silver here and there, including mehndi style hands.
There’s been lots of cutting and soldering, filing and sanding going on in the daytime and braiding on the kumihimo wheel at night.You can see some of the endcaps and hand pendants here.
I am making the jump rings from bronze wire, and they will connect pendant pieces to the necklaces once I solder them closed. And file them, and sand them, and patina them and buff them up on the raised spots to a nice shine!
I have another dozen or so of the starfish and shells to cut out, but at least the metal has all been etched, so that necklace is well on the way–a mermaid’s delight with lots of coral and pearls, alabaster and knotted rope.

My goal is 20 necklaces by the 1st week of May, as well as finishing up a collection of anodized titanium earrings and pendants, some of which will be on the kumihimo necklaces.
So much to do–but it comes along if I work on it every day.
Today, I took a few pics of what I did earlier this week and I’m going to do my math homework and then string up another set of bobbins for the next necklace, which will be purples and silver.
I’ve already shopped in my bead drawers and picked out what I need, just need to string up all 8 bobbins and I’ll be ready to go!
Oct 11, 2011
 This semester at Front Range Community College is an extremely busy one! The FRCC Art Club is off to a great start with our Art Concrete | Sidewalk Chalk Event, and we are gearing up for the Student Art Sale in November, which will happen AFTER I get back from the Houston International Quilt Festival at the beginning of November. That’s right after the big Halloween Party (THE social event of the season on my calendar!) and of course in between and all around the preparations is ongoing homework. And lots of it!!
My Jewelry/Metal III class continues to offer all sorts of challenges that go beyond mere trying not to hammer my thumb. Here are oics of my first homework project for this class–fold formed copper pieces. One set has polymer clay accents and was patinaed with ammonia. The other set’s color comes from the fire used to anneal the metal prior to hammering. I do like making jewelry!!