New Ways in the West
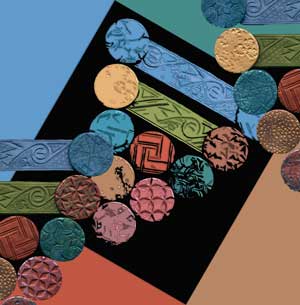
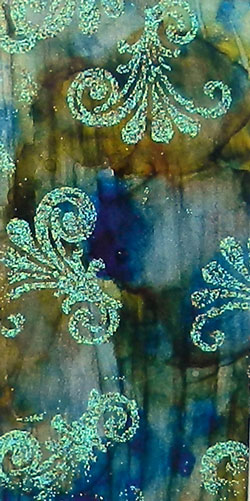 I love the vivid colors and fun effects that are obtainable with alcohol inks on metal. For my first art experiments in my new home state of Wyoming, I got all my inks and my embossing powders out for several days of summertime fun! I’ve wanted to see how the inks and powders held up to cutting and filing for some time, but life in Colorado and then moving kept nudging project days to the side. But here in my new studio spaces (I have several now–indoor, outdoor, and a shed, all with power and lights!!) I’m finding it much easier to get some art time.
 My experiments started with cutting up some 30 gauge aluminum and getting it cleaned up and ready for the inks. After having lots of fun with color, all the pieces were carefully heated to help further set the inks permanently, and then sprayed with two coats of polyurethane.
After that, I cut up the pieces, making 2″x4″ rectangle pieces for my embossing experiments, and 4″x4″ squares, and a larger piece that will get played with later and cut up to make decorative parts for boxes, mobiles, and jewelry. Some for now, some for another time! I want to do some that incorporate other elements too, like metal leaf.
In the course of our recent move, I got to see all my art supplies, and now they are out where I can see them all the time, motivating me to actually use them. While accumulating tools and supplies is a lot of fun itself, I’ve pared down to the ones I want to use, and it is very satisfying to use them. I love seeing how the different things go together.
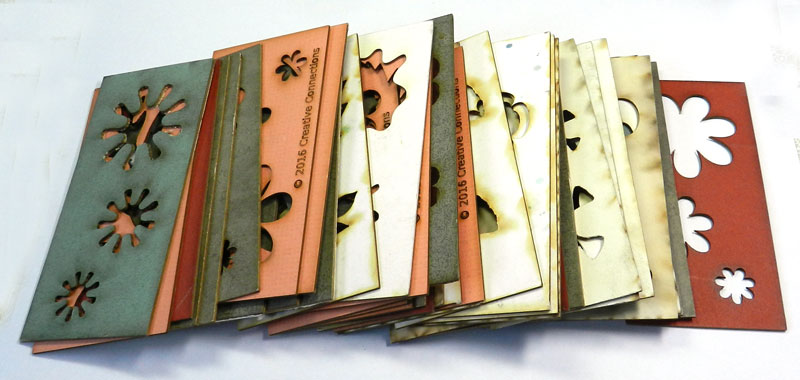
Once I have the prepared metal pieces, I like to cut them up further and make things like jewelry components or inserts for decorative boxes. For jewelry use, I use a large metal shear to cut straight across, disc cutters to make circles, and metal shears to cut more complex shapes. In order to easily duplicate shapes, I made myself some laser cut templates of shapes that I like. I used a Open Source program called Inkscape to create my shapes and then used them with the laser cutter at Tinkermill, the makerspace in Longmont Colorado. Makerspaces are great hubs of creativity, and I hope to see more of them established.
Here are the templates I cut, with all sorts of shapes, flowers, leaves, and more. I use them in metal, paper and textile work a lot. The set on the right is particularly useful for making earring pairs and pendants or pins. Now I have a lot of different pieces and can try a variety of different things. I love the freedom to experiment and play with colors and textures. Sometimes I go too far, but I always learn things that inform more pleasing work later.


I cut out shapes and then smooth the edges with a habilis 00 file, some sanding, and then I can pierce holes with the Euro Tool punch, glue pieces to leather or other backings, or embed the pieces in polymer clay to be cured. (Pieces with embossing powder cannot be heat cured–embossing must be done after the baking step.)


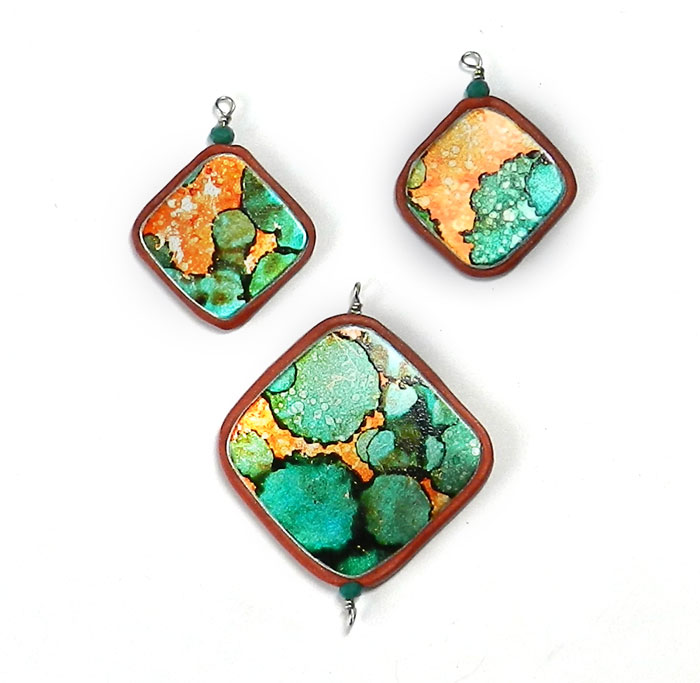

The next step for me is to make some finished jewelry, and I’ll be doing that this week; from where I am sitting now I can see just the right beads to make these all up. Check back soon to see how they look when finished, and please do view the results of my ink and embossing experiments as well as other work.
 I’m a happy font-fiend right now, because I found a wonderful (and FREE!) program called The Font Thing at

