Oct 31, 2022
I’ve been putting together all sorts of kits for making art dolls, some with premade bodies, some with faces and all with lots of colorful cotton, rayon and silk. Big dolls, little dolls, shadowboxes, icons or fabulous wearable jewelry or bags…these kits are great starting points to projects.
Recently I’ve put together 48 deluxe kits, turning out the bins and boxes to add fabrics and embellishments.
Each kit contains hand dyed kona cotton, silk gauze, a silk handkerchief, ribbons, plus vintage sari silk ribbons, angelina fiber, and a specially selected mix of sequins and beads. I’ve also included 5 millefiore style polymer clay faces (slightly curved for dollmaking ease) and my own patterns for making a variety of dolls. Click here to download the .pdf file
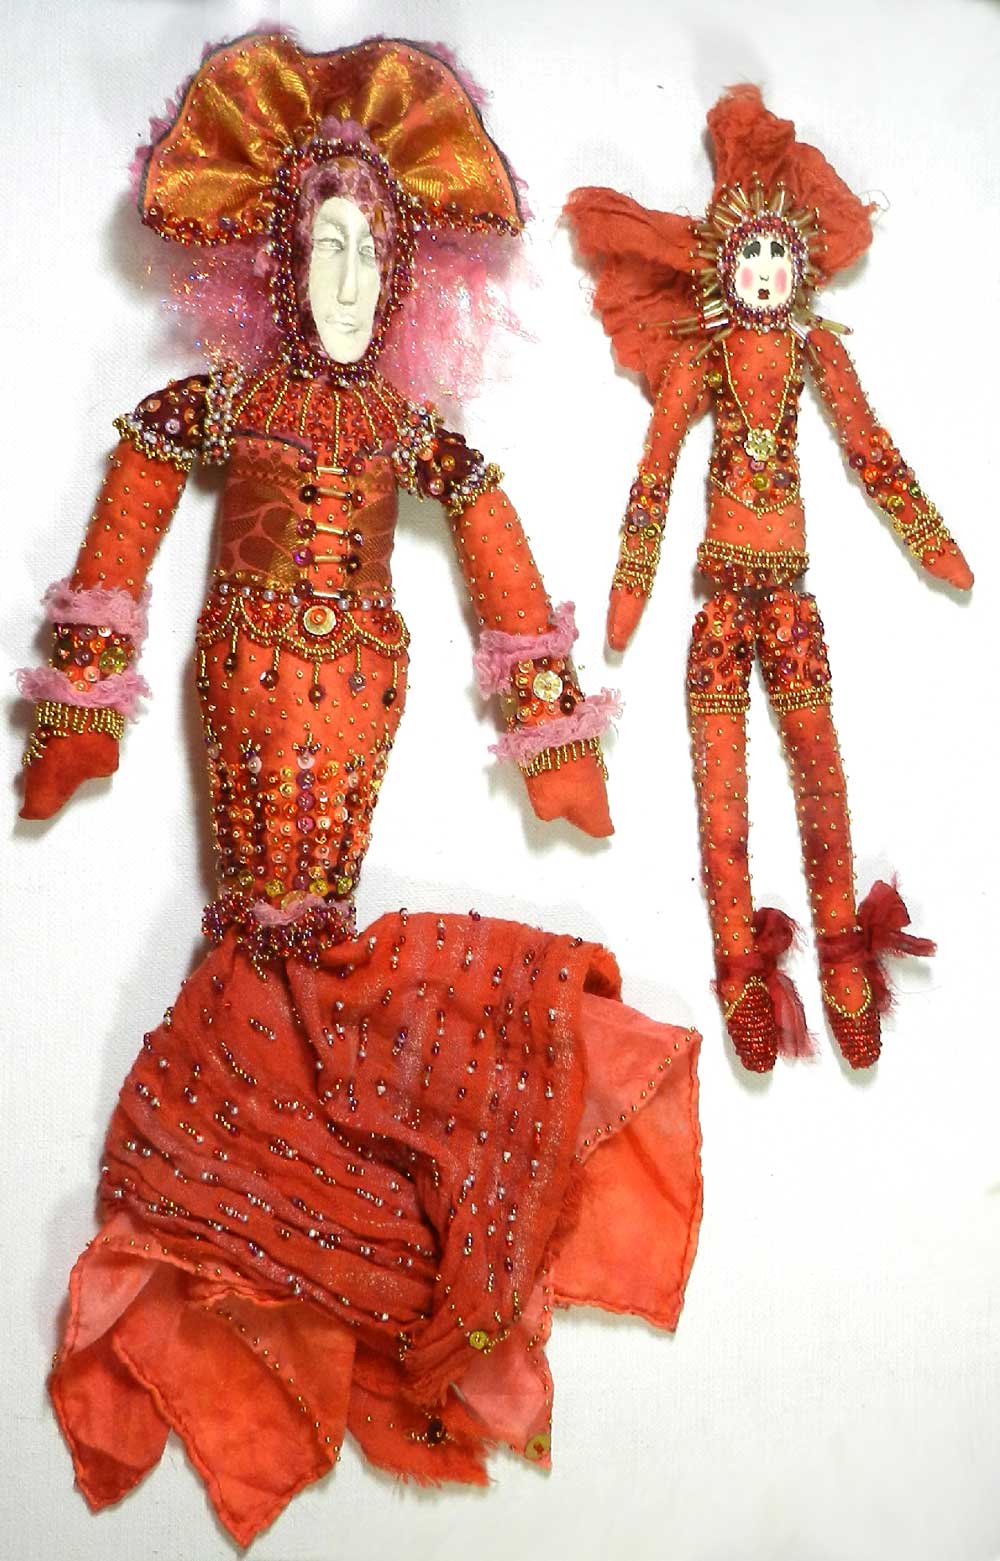
The smallest person or mermaid is about 3.5 inches when made up. The middle sized person sews up into a 10 inch doll. This one also has a mermaid tail option. The mannequin style is 9″ but you can also easily add a mermaid tail as I did in the sample shown here.
I used to buy premade cotton 3″ doll bodies and dye them, but they have not been available for years, so I drafted some patterns.I print them on cardstock, cut them out and trace them onto the fabric, then stitch. THEN cut out the pieces–that’s the secret to working with small parts! The fabric in the kits, when folded double, makes several dolls as shown here.
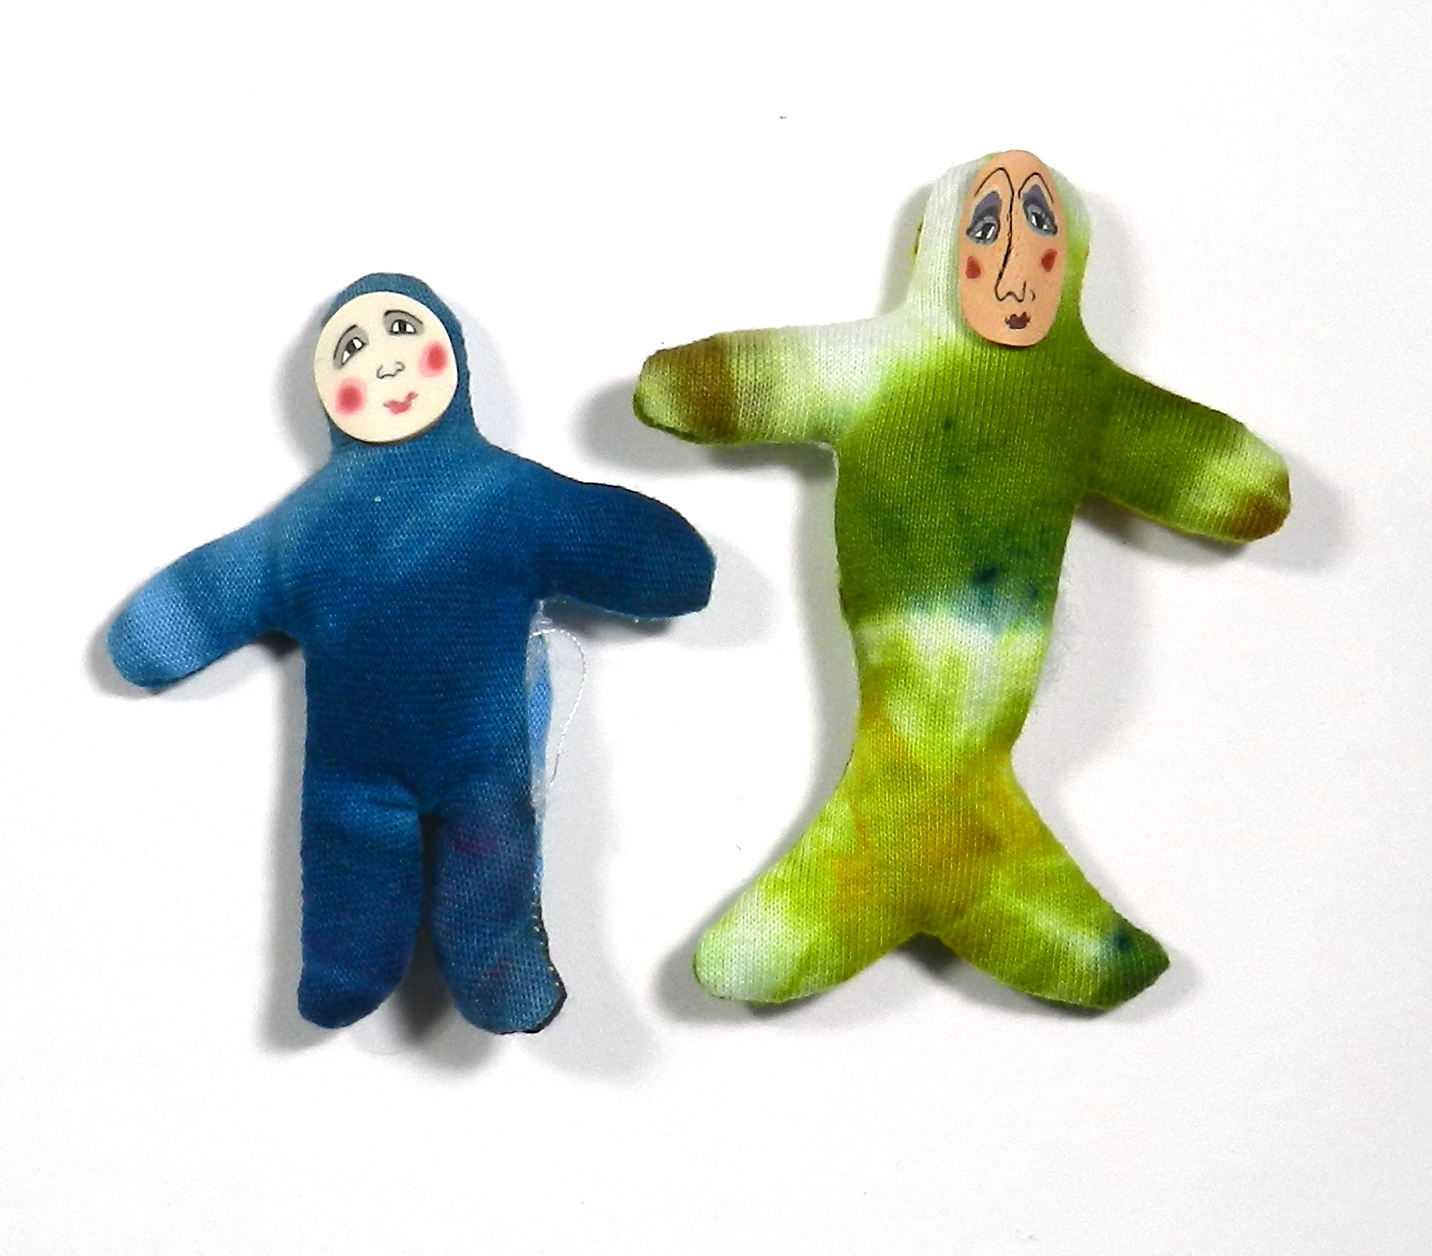
I made some up in dyed kona cotton, and some in tiedyed cotton jersey. Both worked up very nicely into samples that I embellished with ribbons, beads, sequins…I started with what was gathered into the kits, and then added more beads.
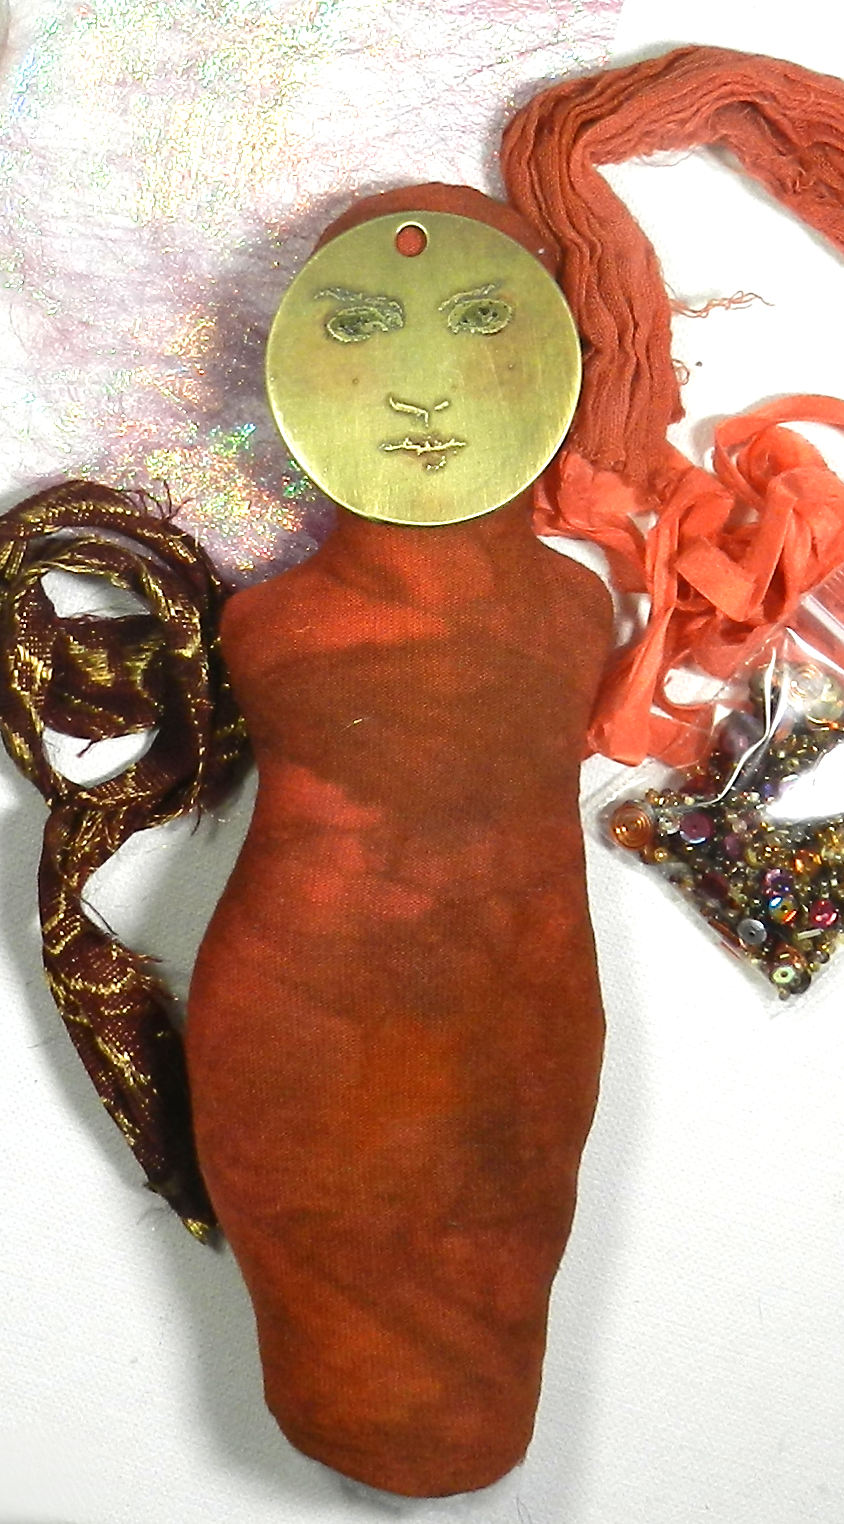
The 3.5 orange doll sample hasnt been embellished yet, nor has the green mermaid. One has a millefiore style face, and one is sculpted. The ones that come in kits are not attached, and I also have sets of 5 face canes in a variety of styles. That’s in addition to a wide array of sculpted polymer clay and ceramic faces.
I’m updating my shop here with kits, faces and even some finished dolls.
I’ll be adding more available inventory to my shop here and also sell on Facebook,
Mar 13, 2020
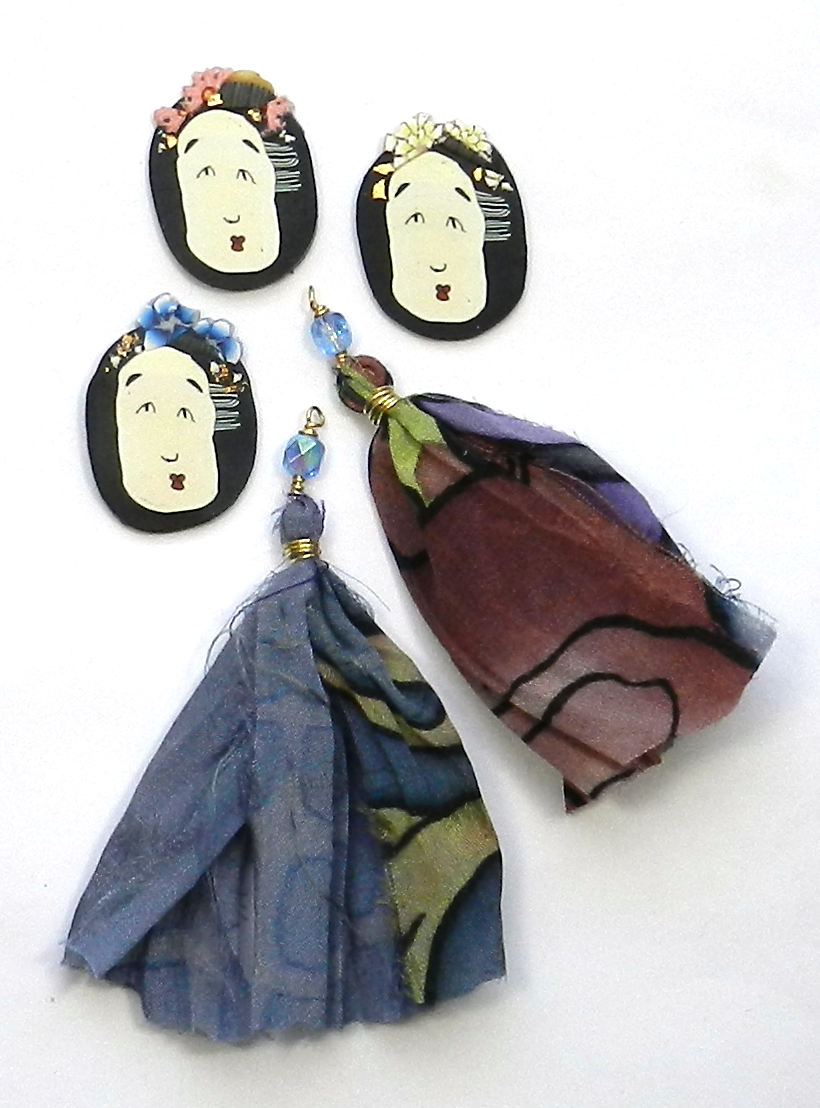
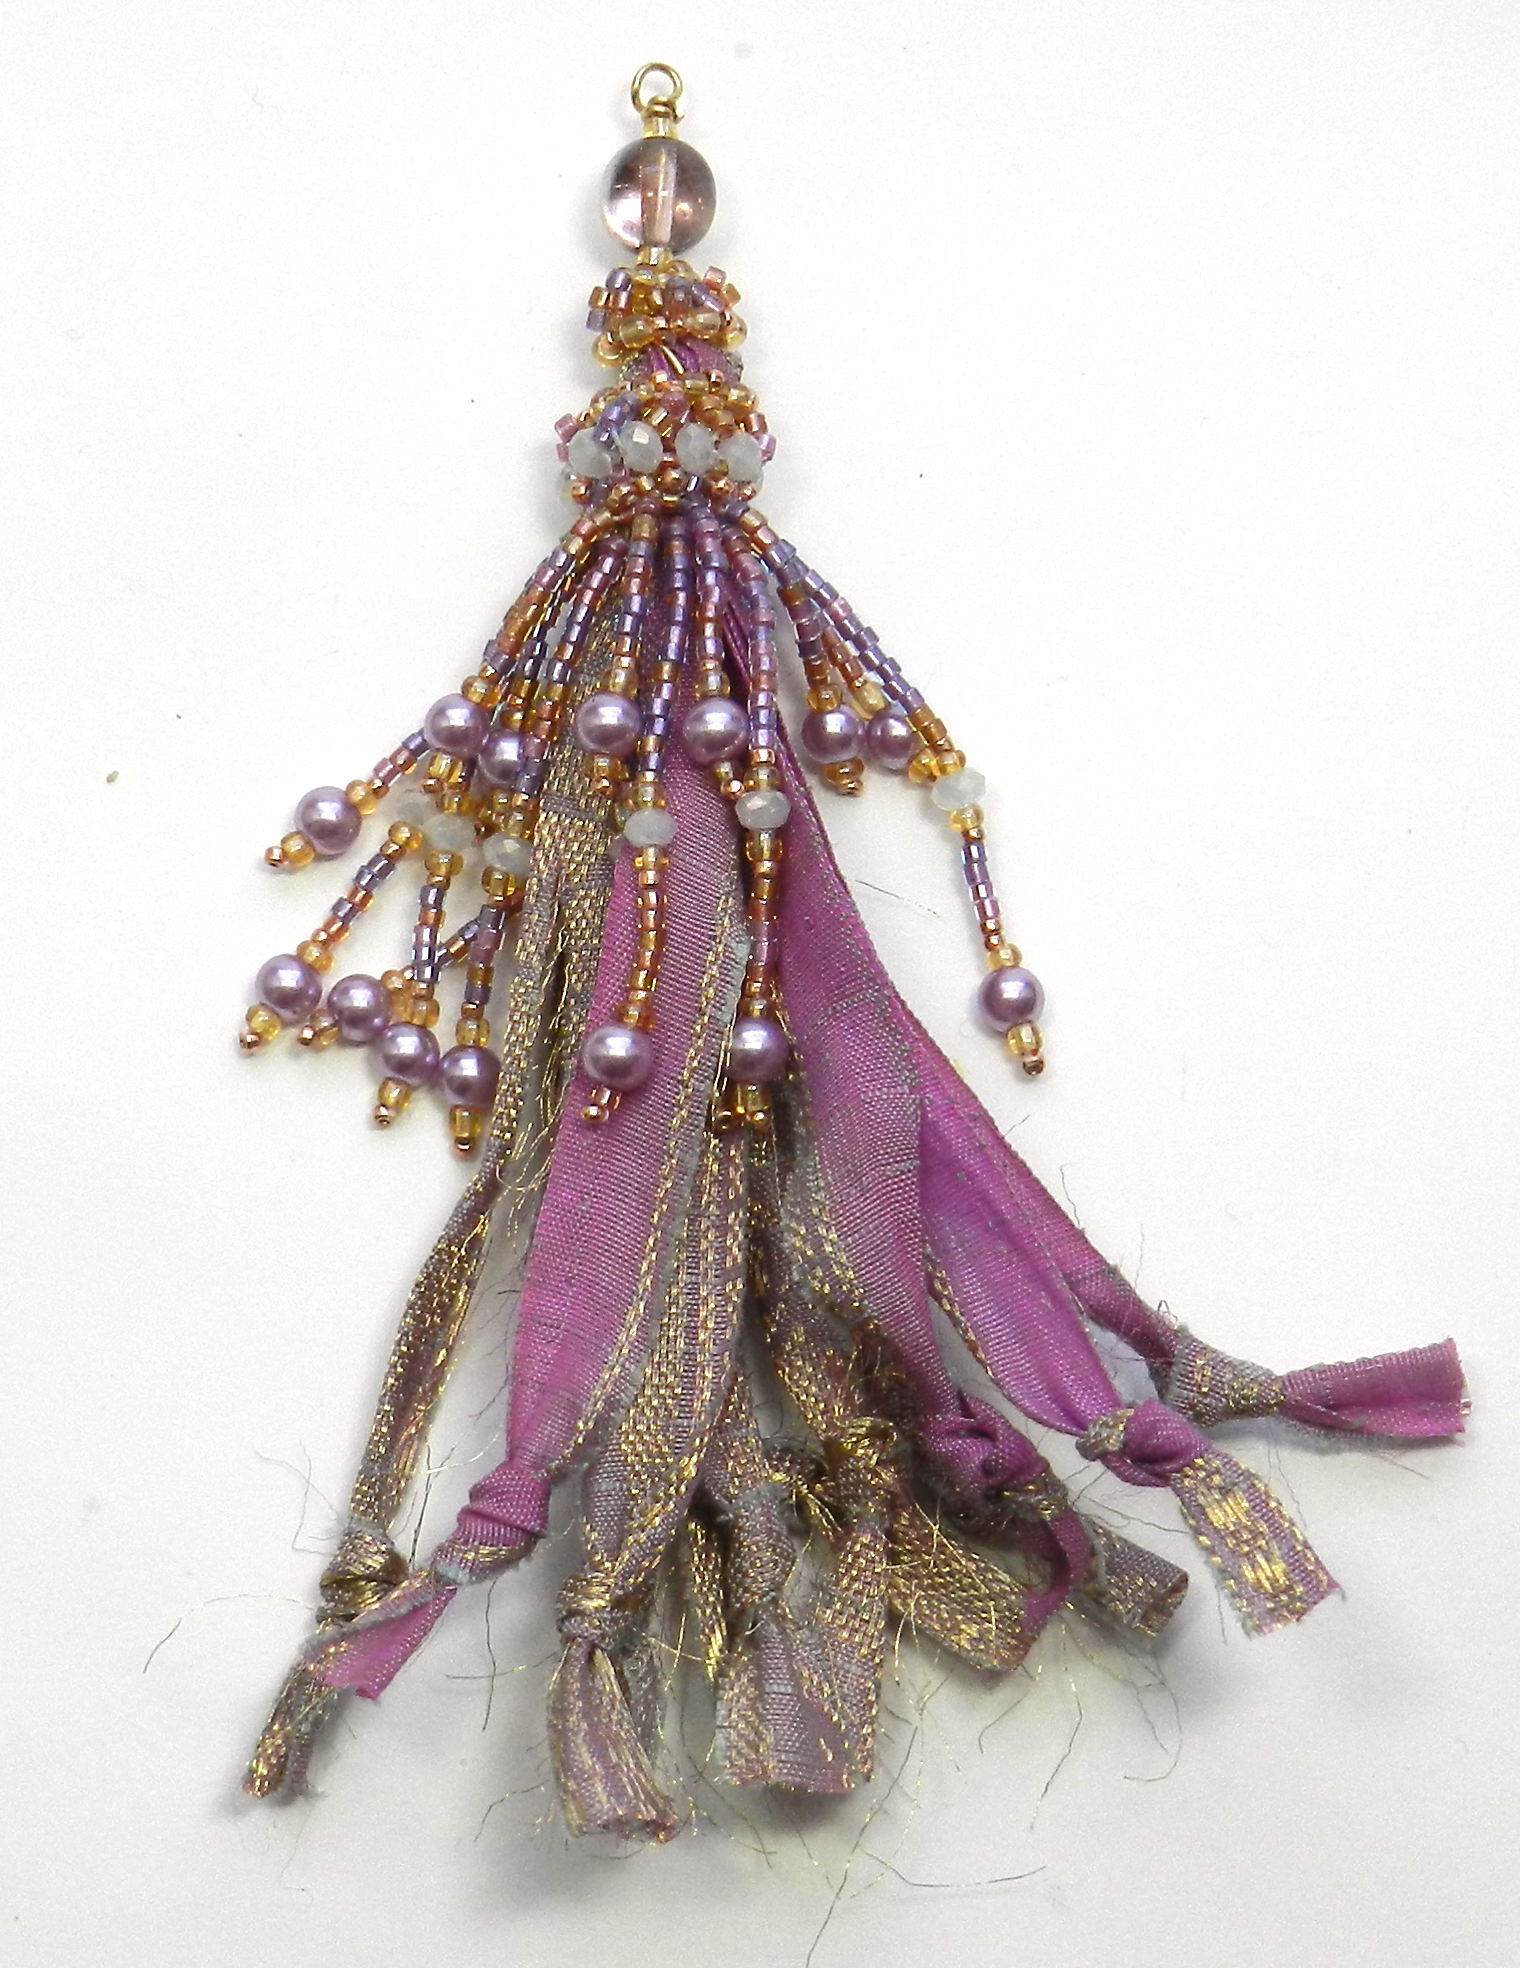
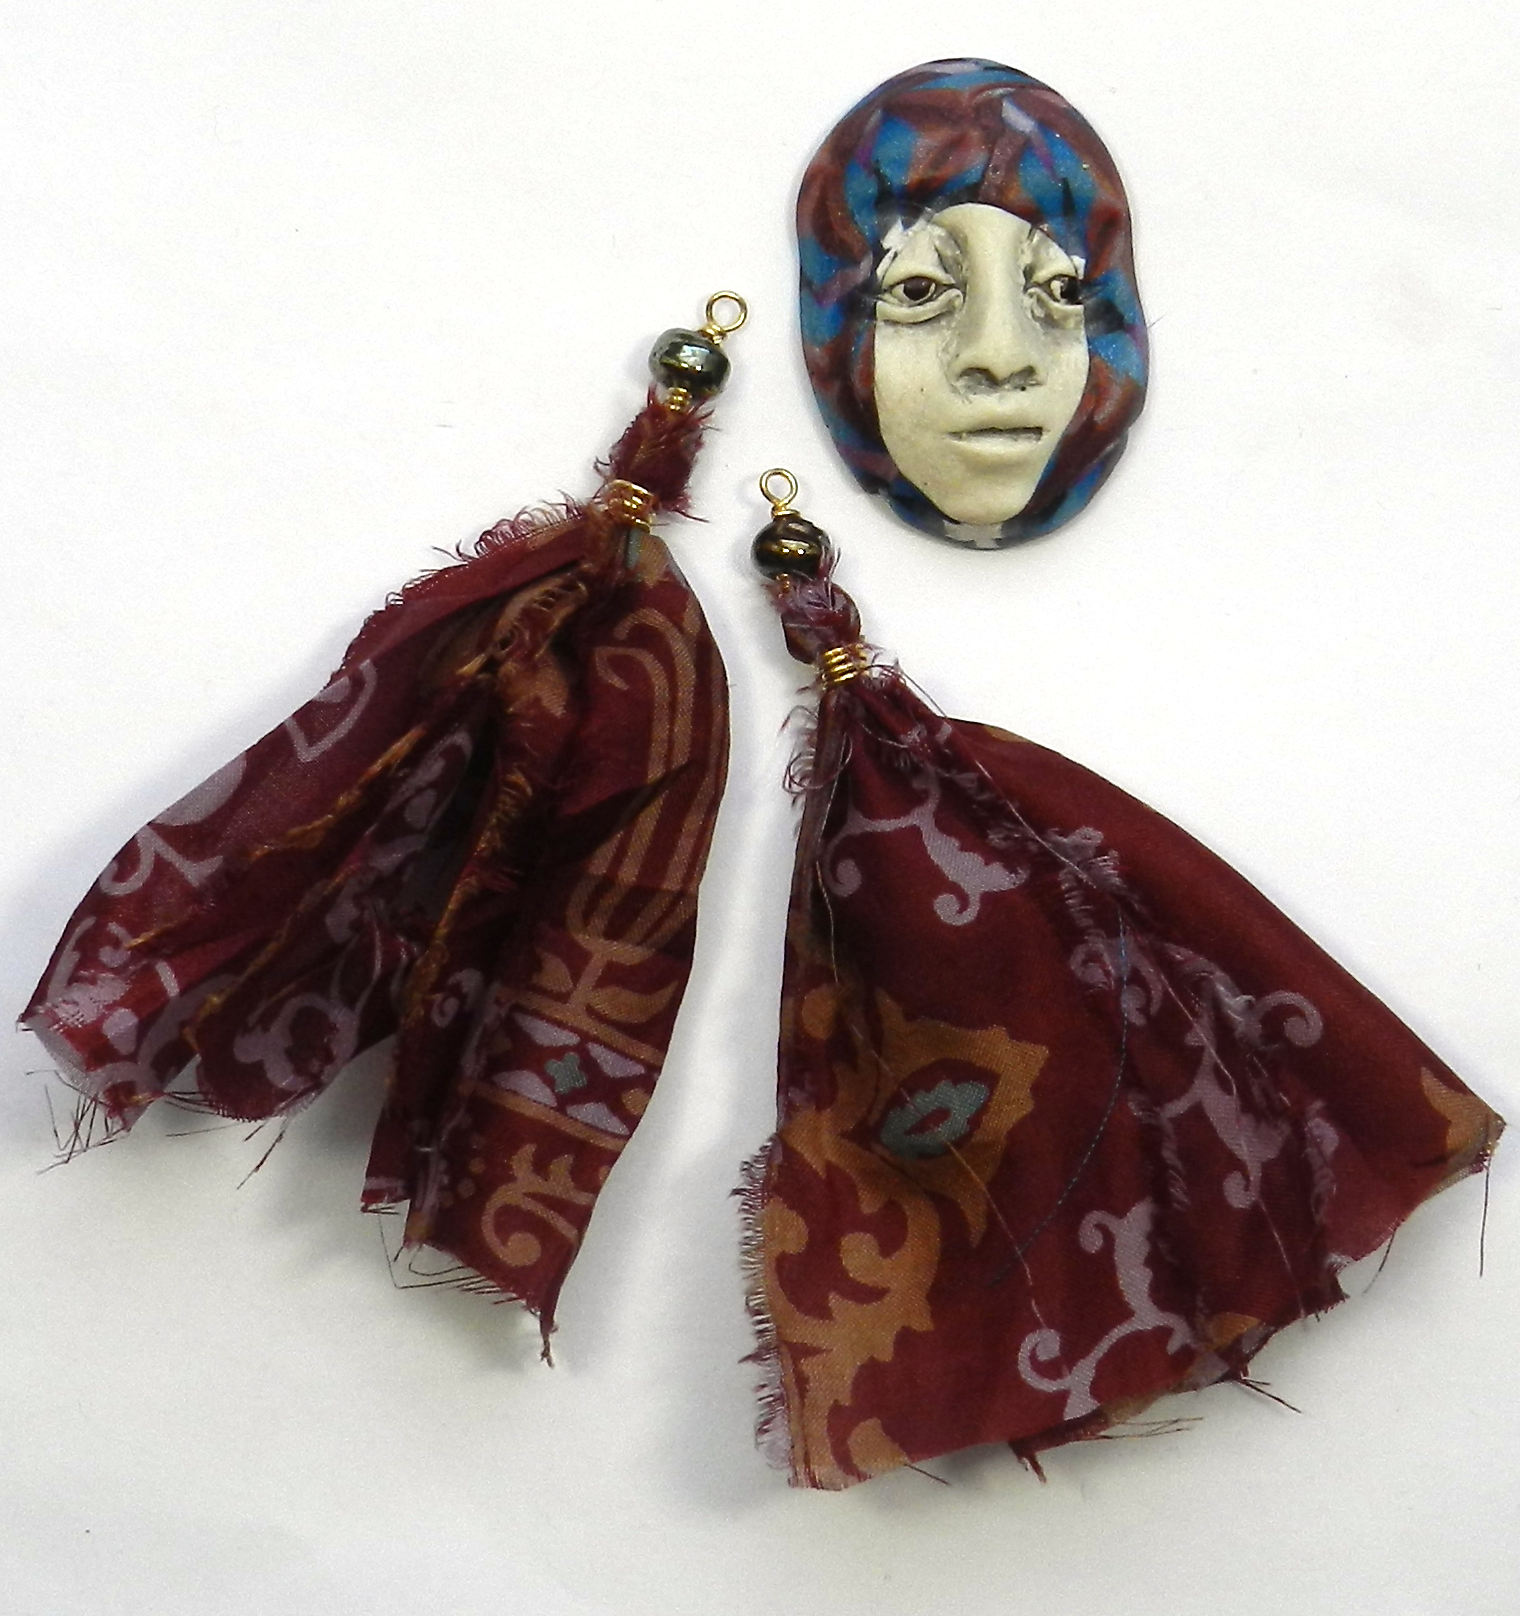
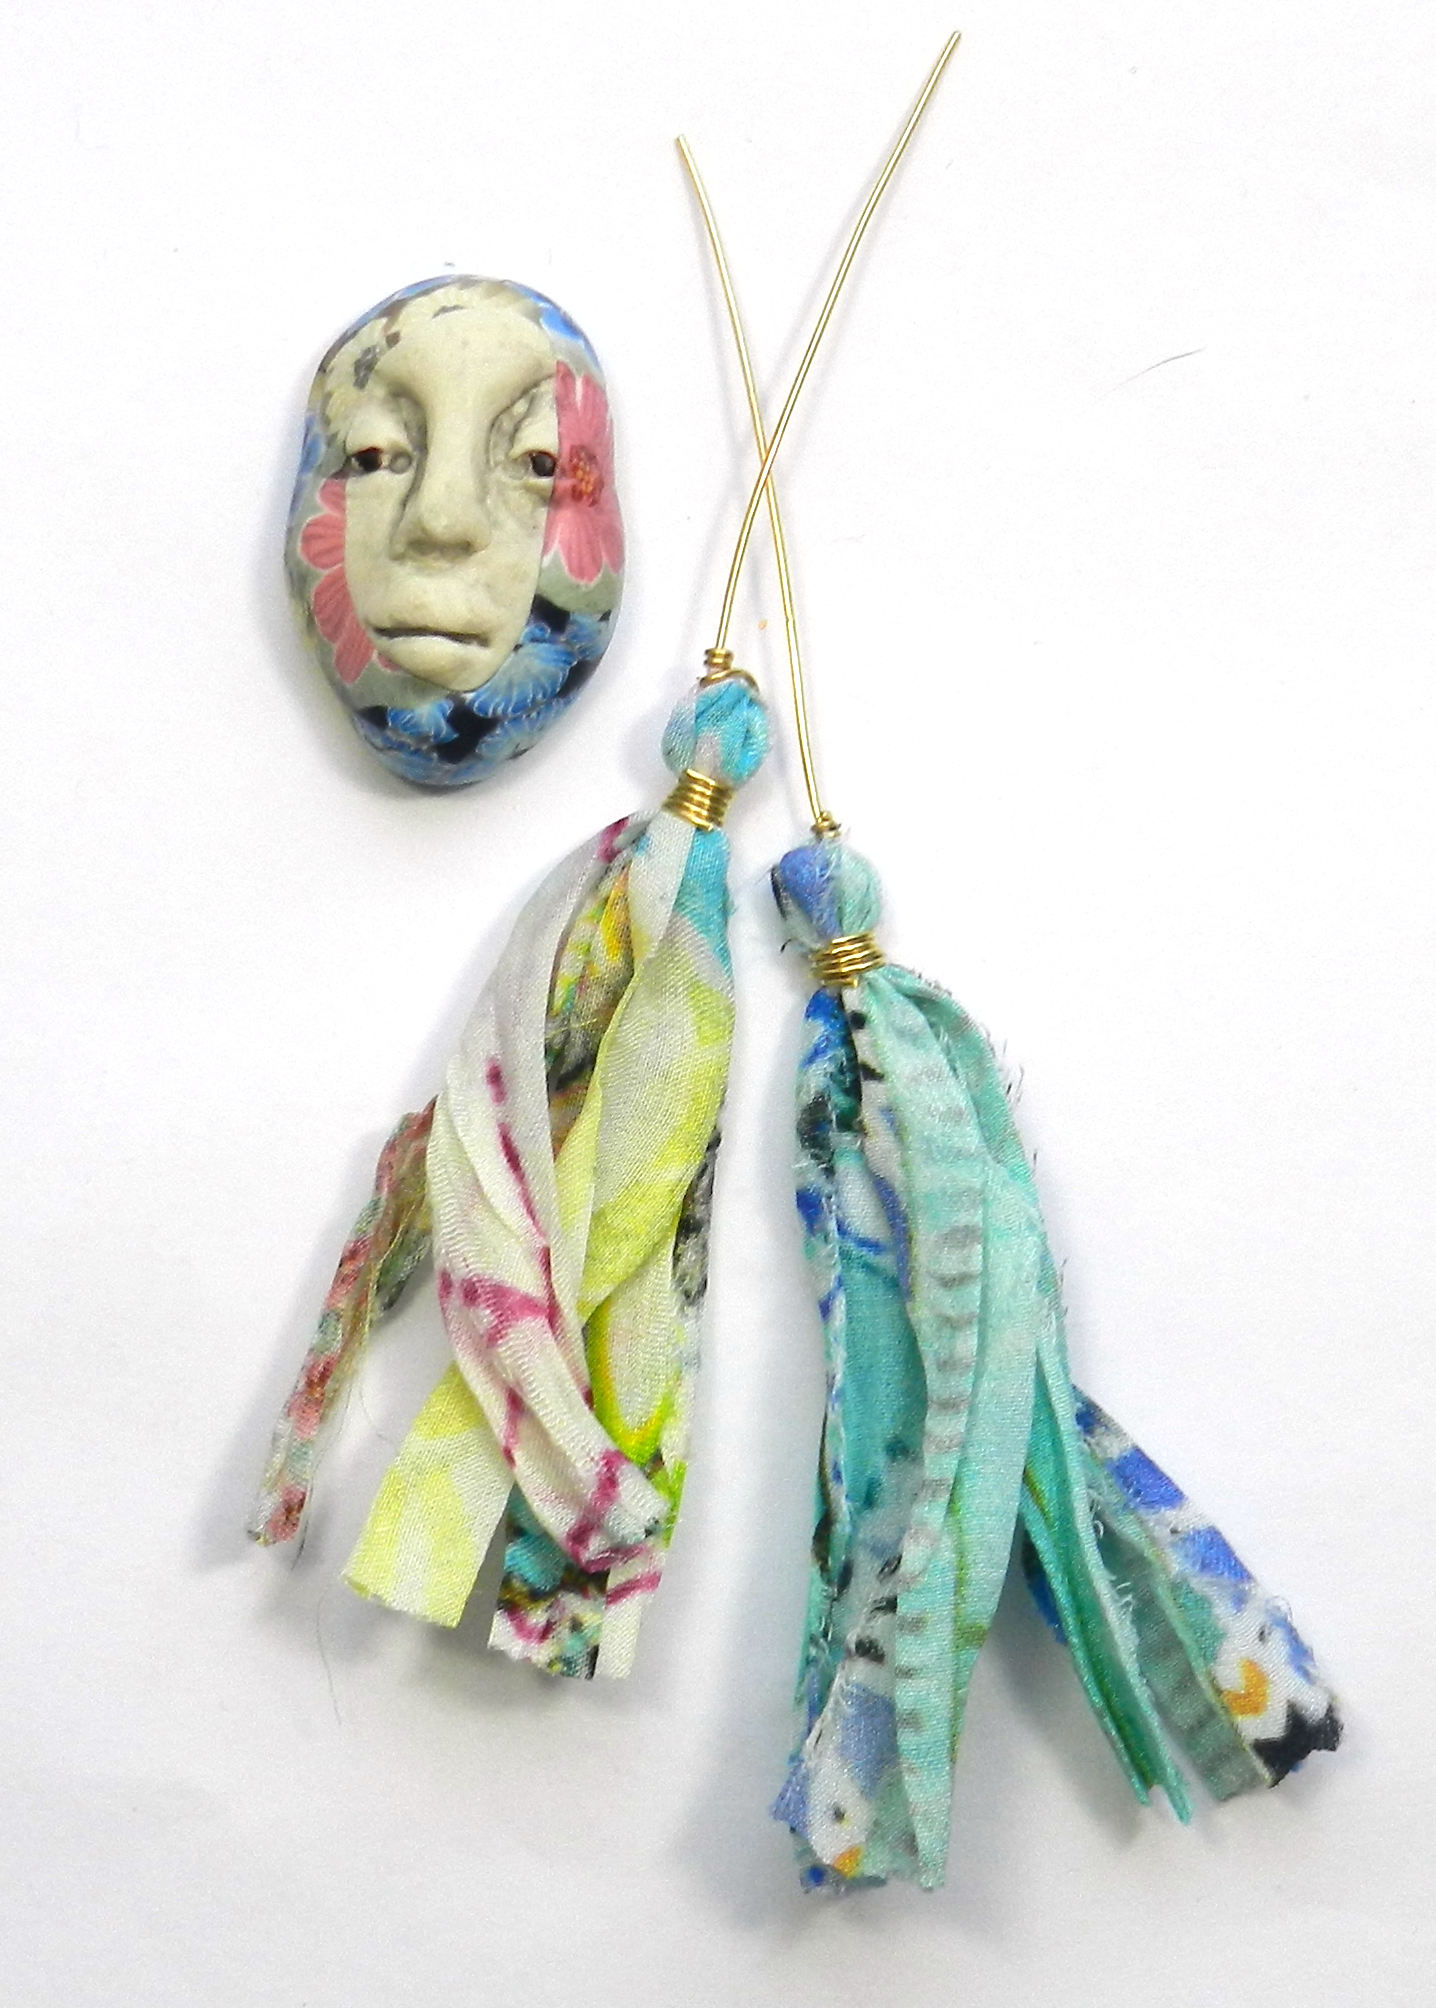
I purchased some beautiful vintage silk sari ribbons recently, and I got two kinds–sari silk chiffon prints, and sari trim with woven metallic threads. Both are beautiful bursts of color and pattern. I spent a few snowy afternoons turning ribbons into tassels with 22g brass wire.
Now I’m having a great time pairing them up with beads for earrings, or with polymer clay faces, destined to be focal elements in bead embroidery, jewelry, collage…
I want to do some bead embroidered pendants next. I love how the colors of the textiles and the polymer clay or ceramics go so well together, and of course, beads will also be involved.
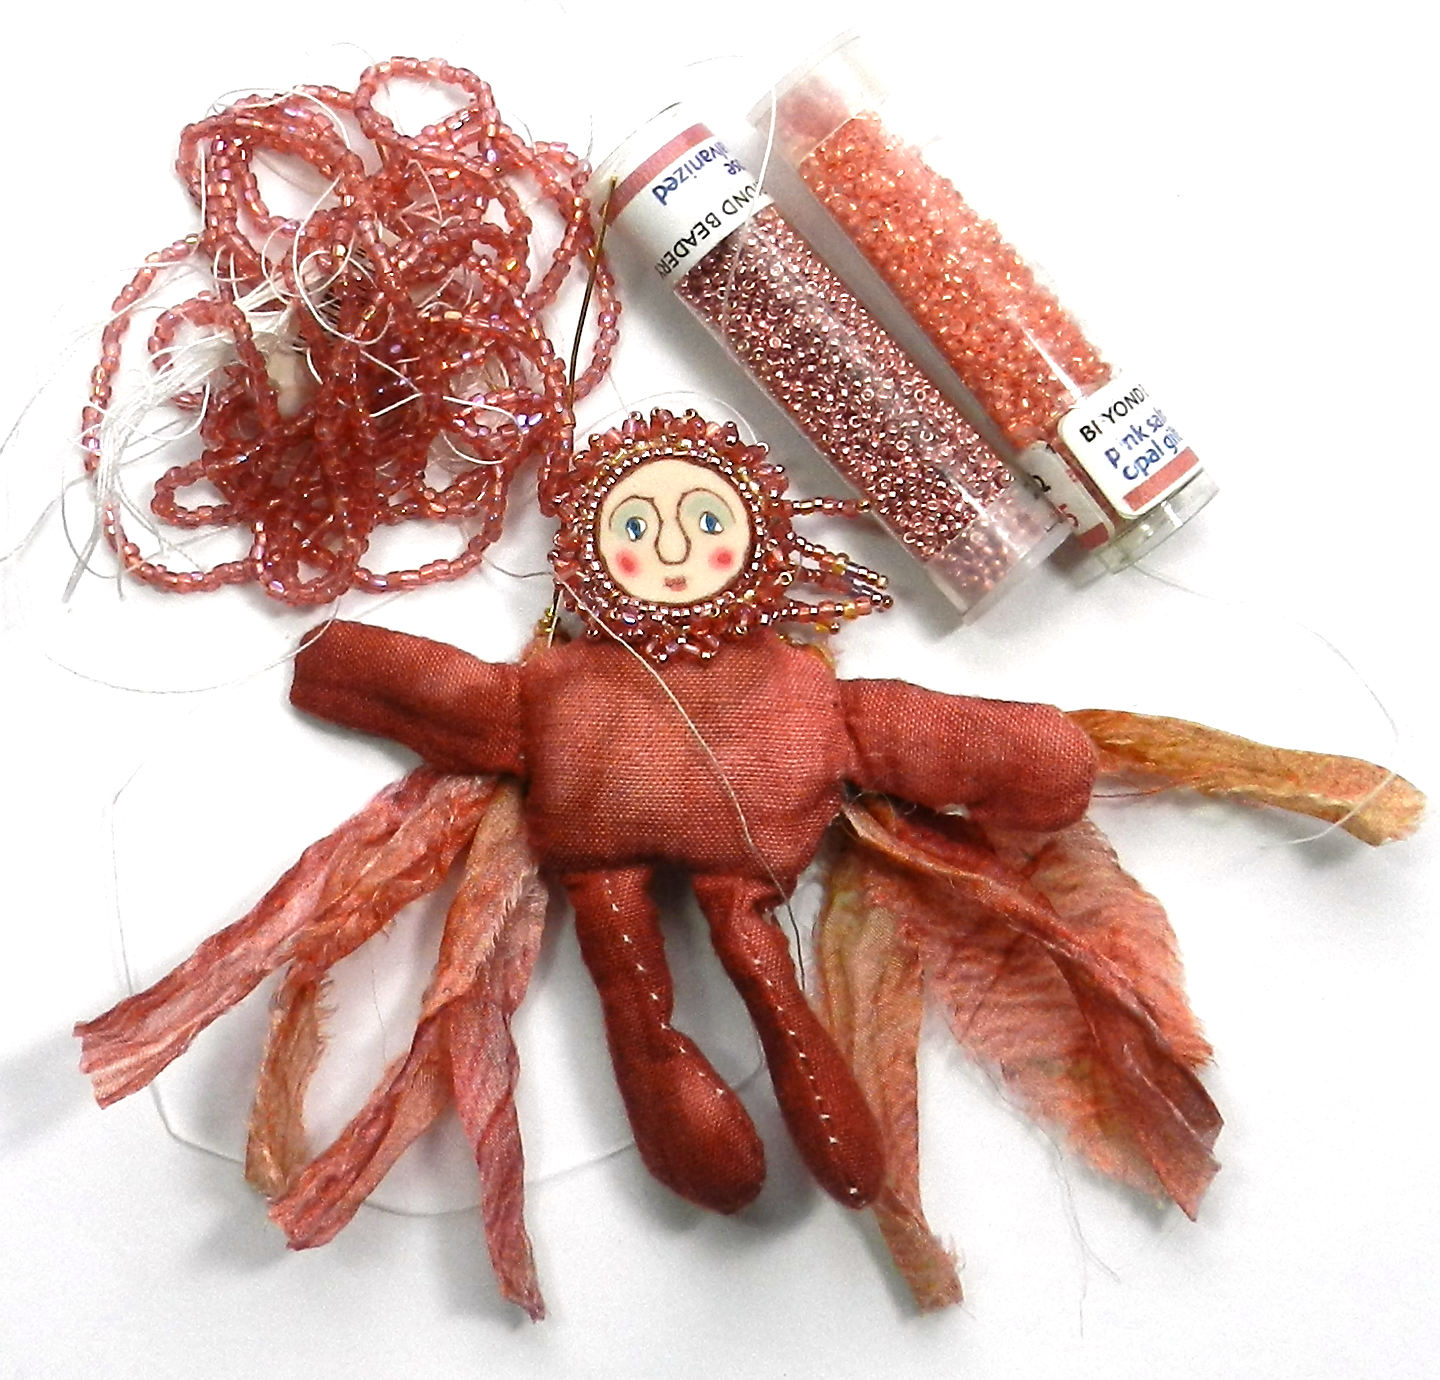
I’ve made some into art dolls, and they are a lot of fun to create! This pink 3 inch hand dyed doll is getting lots more beads, and will have silk chiffon tassels for wings draped down her back.
Nov 19, 2019
 Art Dolls are particularly fun projects for me because I love costuming and dress up, as long as I get to remain in comfy clothes and shoes–so with dolls I can indulge. Making art dolls can be a way of expressing and working though strong feelings, of pleasurably and creatively spending time by yourself or with like minded friends. Some dolls I make from cloth, paper or clay from my own patterns, but I also enjoy staring with a pre-made cloth body and dressing it up. I like the portability of these small projects. You can do a lot in a few hours or continue to add more and develop their style.
I’ve spent many years dyeing natural fibers with Procion MX Series cold water dyes, and built up a lovely cache of cottons, silks, and rayon. So, I put together kits with fabric, lace, ribbons and 3,5,and 8 inch cotton dolls. Then to some I added goodies like sequins, beads, Angelina fibers, dyed feathers, polymer clay or ceramic faces and vintage silk sari trim ribbon. I had a wonderfully colorful time adding ingredients to each kit, and now it is time to share the fun, so art doll kits are going up for sale in my shop here. I’ll be adding more all month!
Shown here is an art doll made from a 5″ art doll kit. I used scissors, a needle and thread, and some E-6000 to affix the polymer clay face to the body. I put a small heavy box on her as a weight as the glue dried to get a good bond. I used everything in the kit except a dozen beads or so. She looked great, but I wanted more..so I added some size 11 gold glass seed beads and size 15 glass purple beads. Much better! She still needs a bit of glitter, some feathers, some paper flowers…but I will come back to her another day. That’s my favorite way to play with dolls! In the meantime, I get to make up samples from the 3 and 8 inch doll kits next. Stay tuned!
-

-
3 and 5 inch dolls
-

-
5 inch doll kit
-

-
front
-
-
back
-

-
with more-front
-

-
with more-back
Jul 19, 2019

I’ve been packaging up the etched and patina metal sets from the most recent batch, and they turned out so well that I had to keep a few things for myself. Electrically etched versions of vintage foreign postage stamps in green, and a lovely brass set in a Renaissance design caught me, and I set them aside for a bit of beading fun. I already had a lunch tray with beads in that soft green, and one in ivories and pearls. When you work in colors you like, things go together, and there are often leftovers from projects. Two or three beads are enough to become part of a brand new design, and a color coordinated display.


I like taking an eclectic group of beads and seeing how they can dance together—that’s more fun for me than one kind of bead repeatedly strung in a row. I’m using metal, polymer clay, shell, glass and crystal, rocks and pearls. Chain lengths made with wire segments are a great way to use up a lot of beads in small groupings. I am using 22ga bronze wire to make this necklace, which will feature an etched central pendant piece with fringe—eventually! I think the stamps will be another necklace, or maybe a charm bracelet…

Of course, there needs to be a pair of earrings; since I started with one of my 3 piece metal earring pendant sets, that makes it easy to get that going too! This project is coming together a little at a time, as I take breaks from the work of the week. Gotta have those creativity breaks, especially when it is hot outside and the computer needs a rest.


May 20, 2017
 The process of transformation can be fascinating–I love starting with a flat, shiny sheet of copper, brass, bronze or nickle silver and then using electricity, fire, hammers, rollers, and chemicals to change it completely. Each step along the way–patterns, textures, shapes and colors is part of a trail of discoveries. After etching, hammering, cutting, creating a patina, waxing or spraying, grinding, filing and sanding–I have developed a relationship with the metal!
Some pieces I make into earrings, pendants, and bracelets. Cuffs are great because they offer a larger “canvas” to show off the gorgeous colors that are possible with patinas. The processes involved are a mixture of precision and serendipity, and seeing what occurs is a gift that I get to unwrap each time. Sometimes surprising, always fun to explore; each piece is individual.
In addition to metal, wood, ceramics, polymer clay and textiles, I’m changing things around here at Creative Connections as well. I’ve been building up inventory all winter long, and now that the snows have melted and Spring is here, its time to get things out to market.
I am now selling finished jewelry and components for designers who want to use them in their own art. The Store section here at Creative Connections is just getting started, and will continue to grow, so do please check back again soon to see what is new!
Jan 12, 2016
It sure is snowy outside, but I’m growing a fresh crop of flowers (metal), several new classes to put on the calendar, and a brand new membership at Tinkermill in Longmont. Also an educational nonprofit, Tinkermill.org is a creative maker space, filled with all sorts of interesting people with skills–and tools–and space to use them. My family joined, and are eagerly awaiting orientation so as to get to work on projects that are too big for the kitchen table, or require tools I’ve not yet acquired!
Something that really iced the cake for me is the classroom space that is available there. I will be offering classes in the upcoming months both in Gahanna, Ohio and in Longmont, Colorado in the upcoming weeks, so sign up for the newsletter if you’d like to be notified when they are on the schedule. Media will include digital, metal, polymer clay, and textiles.
May 31, 2015
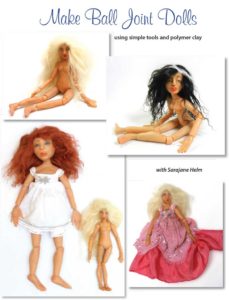 Some months there is just too much to do–too many projects and not enough time or energy to do them all. Still, that’s a far better problem than being bored, and I can thankfully say that I am never bored. During May of 2015, lots of projects moved along tremendously.
I worked on websites for clients using new templates and sliders, and branched out with a new website of my own that features my dolls and miniatures titled “Its the Little Things.”
 I put a new cover on the Ball Joint Doll print tutorial .pdf showing all three sizes of the bjd’s made so far. I am also editing the 11 part video tutorial of the same and will be finished with that next week. I am promoting the Polymer Clay Adventure wherein these two tutorials are exclusively available, along with how-to projects from more than 20 other polymer clay artist instructors.
I’m also continuing to find the occasional odd hour or two (often on the bus) to do some knitting. I’ve learned to add beads to the yarn and to reduce and increase stitches. I’ve tried knitting with 4 needles, and made a scarf and hat for my doll Aurora Rose, along with a little beaded purse.. I’m working on a tunic for myself, with beads on the sleeves and front section, and it is about half done, and will likely be just in time for fall, if I keep at it!
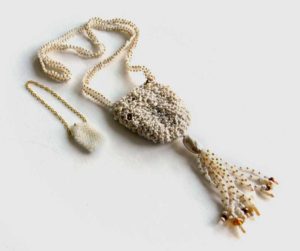 Also coming along is the work to make Creative Connections a Non Profit Organization that will allow me to expand the reach of what I do, bringing classes and mentoring to emerging artists in schools, community groups, and organizations. Stay tuned for more about that this summer!
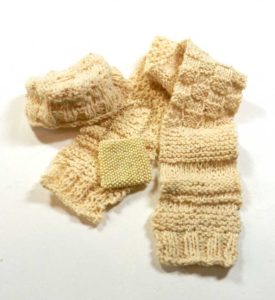
Jan 12, 2014
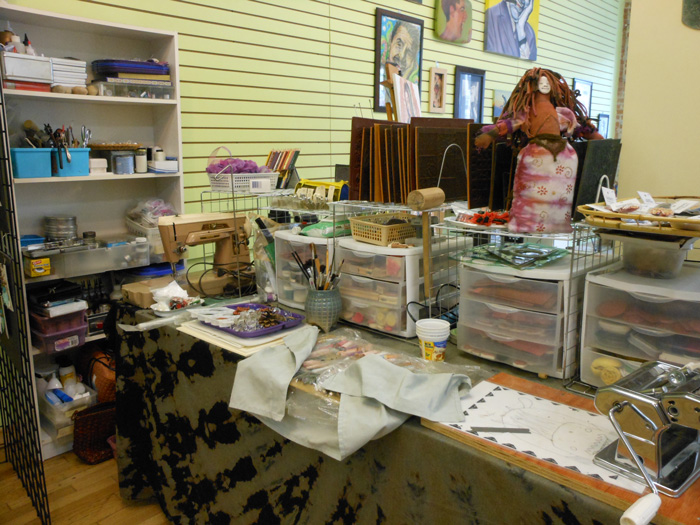
 I graduated from Front Range Community College with my Media Graphic Design degree, and I’m going to continue taking ceramics, jewelry, and other art class as I can afford them. We have some GREAT classes and instructors there, and I will stay on as a student or community member of the FRCC Art Club. We are seeking new officers there, as Josh and I are no longer full time students on this campus.
One of the things I’m doing in this new year is new art and instruction in a new studio space. Located at 364 Main Street in Longmont, the Kay Carol & Priscila | Gallery and Working Art Studios is home to 4 artists in residence, instructors, art groups and community organizations who meet there, and a gallery plus meeting/classroom/workshop space. I’m very fortunate to be there, and I have started a website there with a calendar and a page that lists upcoming classes and events.
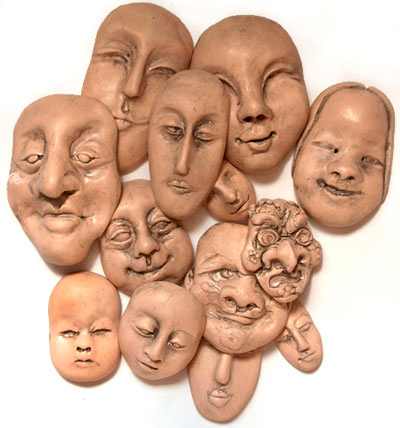
I’ve already had fun with several Spirit Doll sessions, and here you see the new faces and molds I made during the polymer clay face sculpting class. I’m looking forward to using them with polymer, ceramic, bronze and silver in the upcoming months. They’ll be useful in the upcoming Miniature Mask Swap, and in the month long exhibit of masks and art from my PolyMarket Press books in June. That may sound like a long way off, but as I have so many things to make and write about for upcoming books as well as hundreds of masks to mount into large frames, fabric to paint, jewelry to finish and more, it seems like only a few weeks away. However–now I have a workspace in which to do it!
Please do come see me there during open gallery hours 10:40am-4pm Fridays and Saturdays. Or, book a class with a friend or a group. Individual instruction is available as well–we are dedicated to spreading the creativity around.
Jun 20, 2013
 I’ve made great progress on projects this Spring, and I’m celebrating the Summer Solstice working on more.
I’ve learned a lots recently–from odd count peyote stitch and right angle weave beading to making my first ball jointed doll in polymer clay.
Meet Aurora Rose! I really like how she turned out; not bad for the first try. Of course, I’ve made a few dolls of various sorts before…but I also know that each one gives you experience in new things, and she certainly did.
I rearranged my living room and laundry room to provide more work space and access to all my fabric and my sewing machine. After a good cleaning and oiling, it runs like a champ, and its been doing so since 1960. I just love my heavy old Singer, and wouldn’t trade it for the newer models.
I got patterns for her clothing from Matisse Fashions (Brenda is an incredible seamstress/designer) and found that I remembered how to sew pretty well but will no doubt improve with more practice this summer. Lots to do!
She’s show here in a variation of the pleated chemise and drawers patterns. I didn’t add the waistband, and left it a bit long to be a set of cool cotton pj’s made of fine cotton lawn and embroidered with peach roses and teal green leaves.
Dharma Trading Co. carries cotton lawn and many other wonderful fabrics for use in doll making and clothing too.
See more info and pictures of how Aurora Rose came together here.
Nov 11, 2012
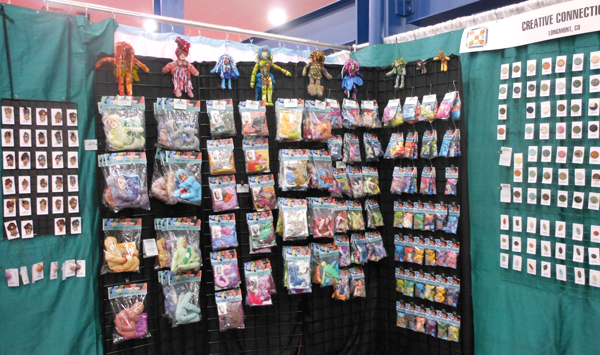
I’m home from Houston, after another wonderfully colorful and inspirational Quilt Festival. What fabulous things people can make with fabric and fibers of all kinds!
With an eye towards historical, vintage and cutting edge (literally; there are several booths selling scissors and sharp tools and pointy things of all sorts) textiles and fiber arts, there is so much to be seen at the George R Brown Convention Center that you just can not do it all in one day. It is as large as 9 football fields, with over 1000 vendors–and I was one!–plus amazing exhibits of quilts, textiles from around the world, art dolls and more.
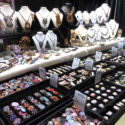
I had a wonderful time and came home inspired, as always, with how to change my booth display ( more grids–they work really well for me, pare things down and keep back-stock), what to make for next time (more of the Painted Face Bags and more polymer clay Victorian Hands, more of my dyed fabric in wearable form that goes with more colorful jewelry!
But that’s next year…. now its time to finish up final projects at school and get little rest over the upcoming holidays. Maybe I’ll have time to learn how to learn to use the kumihimo braiding wheel my friends got for me at the show!
Aug 27, 2012
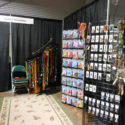
Laura Humenik of Lands Glory Artisan Jewelry and I had a booth at the Rocky Mountain Quilt Festival this year. I saw lots of beautiful quilts while there, and the dolls from the Hoffman challenge too. While sales were slow, it was good to get out and try my new grid display and new ways of presenting things in the booth. It’s also a great way to see what is popular in this area and what I need to make more of before the next upcoming shows. All in all, we were glad for a chance to try and new venue and see how everything looked set up in this configuration! I really do like my new grid displays. This time I have them set up like a folding screen. Here are some pics from the show–click the image to see a larger version.
Aug 5, 2012
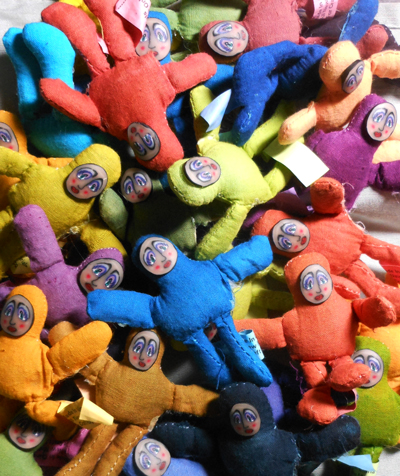 Quilters, beaders, and textile artists are some of the most colorful people I know!
There will be a lot of us–and a lot of color going on–at the Rocky Mountain Quilt Festival coming up this August 17-18-19 in Loveland, Colorado.
Please come see me and Laura Humenik at our booth #LL and see all the hand dyed scarves, ribbons, textiles, and Spirit Doll Kits. Shown here are some three inch tall colorful babes that are hand dyed cotton with polymer clay faces attached, all ready to decorate. Now I have to finish packing them up with sequins, and dyed feathers, ribbons, fabric and other trims! The colors are all a result of our Annual Dyeing Days color marathons.
We’ll have beads, cabochons, buttons, and all sorts of beautiful, colorful wearable art, and art-parts!
Title: Rocky Mountain Quilt Festival
Location: The Ranch | 5280 Arena Circle Loveland, CO 80538 Booth #LL
Link out: Click here
Description:
Fri. August 17, 2012 10 am – 5 pm
Sat. August 18, 2012 10 am – 5 pm
Sun. August 19, 2012 10 am – 4 pm
Start Date: 2012-08-17
End Date: 2012-08-19
Oct 11, 2011
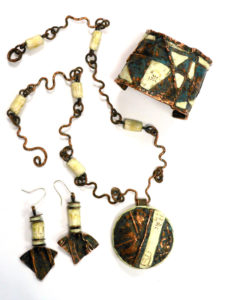 This semester at Front Range Community College is an extremely busy one! The FRCC Art Club is off to a great start with our Art Concrete | Sidewalk Chalk Event, and we are gearing up for the Student Art Sale in November, which will happen AFTER I get back from the Houston International Quilt Festival at the beginning of November. That’s right after the big Halloween Party (THE social event of the season on my calendar!) and of course in between and all around the preparations is ongoing homework. And lots of it!!
My Jewelry/Metal III class continues to offer all sorts of challenges that go beyond mere trying not to hammer my thumb. Here are oics of my first homework project for this class–fold formed copper pieces. One set has polymer clay accents and was patinaed with ammonia. The other set’s color comes from the fire used to anneal the metal prior to hammering. I do like making jewelry!!

Jan 30, 2011
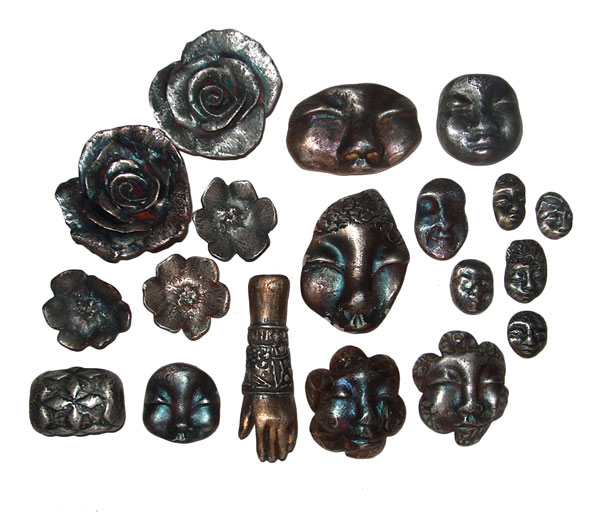 In addition to teaching classes in polymer clay use through Front Range Community College’s Continuing Education Department, I’m also still taking classes there. I love learning, no matter which side of the flow I may be on at any given moment! This semester I’m taking advanced classes in Adobe Illustrator, Ceramics and Metal/Jewelry. I’m starting to cross the lines from studio to studio now– like using polymer clay originals to make plaster molds for use with ceramics that I then cover with glazes, acrylic paints, polymer clay, or even metal! Or like using PMC (Precious Metal Clay) made into a liquid slip to coat ceramic flowers or faces that I have made by hand forming or by using silicone molds that I made from polymer clay originals…you can see how the lines are beginning to blur!
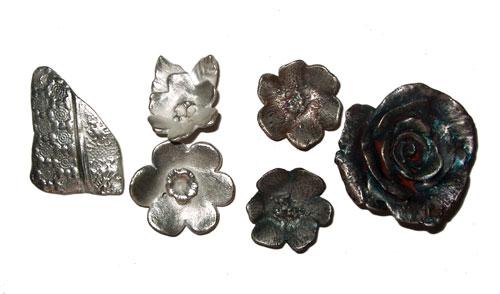
The items shown here are made with ceramics and PMC silver, and then I use Liver Of Sulfur to give them a patina. You can see the difference between the silver finish that has not been given a patina and those pieces that have been treated here. I much prefer the antiqued effect and the colors that you can get when treating the silver with LOS. Both are pretty darn cool though, and by putting the PMC over ceramics I save a LOT of weight and still get the finish of real silver.
Jan 1, 2011
 Happy New Year to all!
Last year was certainly busy–so chock full of Things To Do that I see I haven’t had time to blog since August.
I continued taking classes at Front Range Community College, and as part of that I learned more about ceramics, metal work and jewelry, WordPress and Drupal and other Open Source Code solutions, and finished the layout of my new book in Adobe InDesign. (The new title from Polymarket Press is “A Collection Of Polymer Clay Masks” and it is available now! Click here to order an autographed copy)
There are some GREAT classes to be had at community colleges, and I’m getting a lot of value out of the ones I take as a student.
Beginning in 2011, I’ll also be teaching 4 classes in polymer clay there through the FRCC Continuing Education program. Click here to see the listings.
I’m also excited to be an instructor at the fourth annual Cabin Fever Clay Festival in Laurel, MD. This year’s line up includes many wonderful instructors, and they are also honoring Judith Skinner for her contribution of the Skinner Blend and her work throughout the years. Having written “Adapting Quilt Patterns To Polymer Clay“ with her, I know first hand what a very talented and lovely person she is, and I’m very happy to see her recognized in this way. She’ll be teaching a class about ways to use the Skinner Blend, and I’ll be Making Faces! Teaching a class in sculpting faces, that is, and in making molds. We’ll even be shrinking our faces from the molds to make smaller versions–learn how at the CFCF this February 18-23. Click here for the Registration Form.
Jul 2, 2010
 A summer time face pendant with a flowered babushka head wrap and beaded embroidery shows off luscious fringe in beautiful shades of berries and teal with long crystal twist is a great example of the fun can that come from collaborations. I made the face from polymer clay, and Laura Humenik of LandS Glory Artisan Jewelry did the yummy bead work. She has amazing patience, a wonderful sense of color, and has collected an amazing variety of beads. Her beautiful pieces are wonderful–do take a look at the the LandS Glory gallery page. Laura creates all sorts of things that are better with beads–pendants, necklaces, Spirit Dolls and more plus dyed textiles that showcase more of her love of color!
I’m making lots more polymer faces in the same “babushka” style with lots of different millefiore cane patterns for the headwraps right now, and I will show them off in the next few weeks. Between the silver and bronze metal clays, ceramic clay, and polymer clay, (even painted textile faces!) I’m making hundreds of faces, and each one a bit different. Be sure to check back in the next few weeks to see more!

Apr 9, 2010
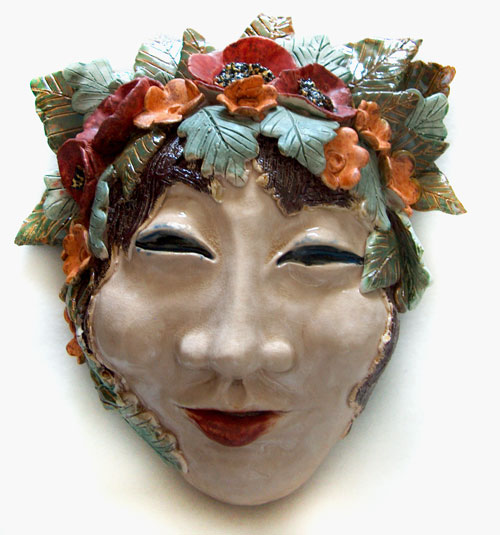 That’s a line from an old Cowsill’s song, an early Family Band that doesn’t get as much nostalagia air time as say, the Osmond or Jackson Family does now that everybody is all grown up. “She was the flower girl–well, I don’t know just why, she simply caught my eye….”
And here’s my own flower girl, a life-size ceramic mask glazed with cone-06 low fire glazes. I might have to do some more of these big masks as they are indeed fun, though pretty heavy compared to the miniature ceramic masks I make more often. And speaking of those, I am now arranging my summer schedule, and THIS year I’m taking the summer off from school to finish photos and editing for my new book “A Collection Of Polymer Clay Masks”. It is on-track for release this Fall. That’ll keep me busy, and I’ve also scheduled a trunk show and classes at Nomad Beads in Boulder where I’ll be selling miniature ceramic and polymer faces, beads, and more! Come see all the goodies on display Mother’s Day weekend, May 8-9 at Nomad Beads, 1909 9th in Boulder Colorado, and say hi; I’ll be there creating beaded Spirit Dolls and jewelry.
Feb 14, 2010
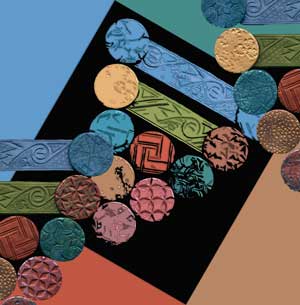
 I’ve been working with ceramic clays lately in addition to all that I do using polymer clays, and there are also precious metal clays in bronze and silver, and now there is even glass clay, made using frit. I enjoy working with them all, and will continue to show off what can be done with them at my website Sarajane’s Polyclay Gallery.
I’ve been re-doing the pages there and just finished the brand new page on making millefiore canes using polymer clay.
I LOVE making canes, and this is a technique where polymer clay has all sorts of advantages over other kinds of clays. Not all polymer clay artists use caning as a technique–some sculpt, paint, texturize and do all sorts of things without ever create these little packets of pattern.
Other artists do nothing BUT make canes and sell them to others to use. Many artists use their own canes to create fabulous jewelry, sculpture, objets d’art, and even illustrations for books and magazines.
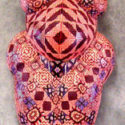
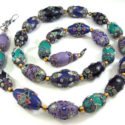
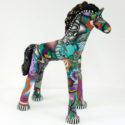
Here’s a horse covered with millefiore canes made by Judy Summers. Jewelry artist Klew made the gorgeous necklace and pendants using her cane slices applied to other shaped pieces of polymer clay. Carolyn Potter’s curvaceous goddess is also covered with quilt block style canes.
These are only a few of the incredible artists using canes in their work.
Aug 14, 2009

On our PolyMarket Press side of things, work is progressing on new books. In 2010 we will see the debut of two new books from me–
Making Faces, Molds & Forms and The Art of Polymer Clay Masks. Learning a lot more about using programs like Adobe Photoshop, Illustrator and InDesign has been keeping me very busy this year, and now I’m focusing on using them to produce new books. I’ve assembled a fabulous array of hundreds of images from polymer clay artists who create masks, and I am looking forward to sharing them all in print.

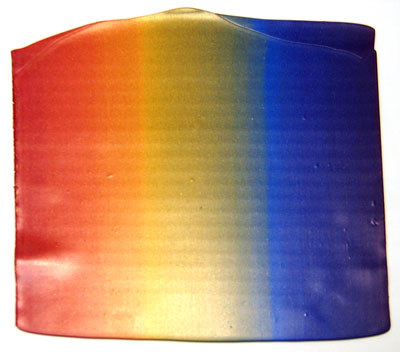 Judith Skinner is also beginning work on her new book about the Skinner Blend, the variations of it and the many uses it has for polymer clay. There is a tentative publication date set for Fall 2010. If you are a polymer clay artist who uses this technique and you’d like to submit images for consideration, contact me at sarajane@polyclay.com Judith is seeking the best that’s out there with high resolution images (300ppi) in a size format to fit within a 9″x7″ pages. Submission deadline is March 2010, which gives you all some time to get pics of your best pieces that make use of the Skinner Blend technique. Contact the email above and I’ll respond with the full information letter.
Images will be edited as needed to fit. Each artist will be credited by name so include that along with information as to the size and listing of all media used. Since it was first developed and shared with the polymer clay community, artists around the world have been using this color gradation technique in amazing ways. Just wait till you see the variety gathered into one great book!
Aug 1, 2009
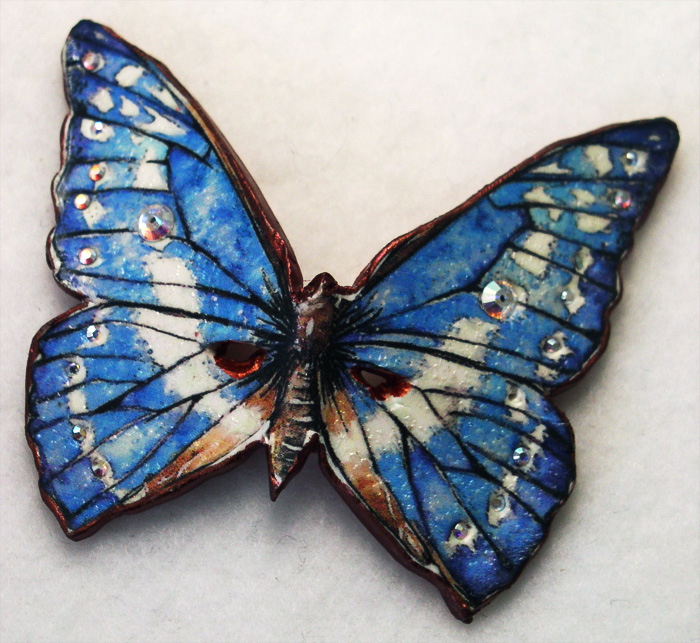 In the most recent polymer clay miniature mask swap (an annual event prized by all who participate) I not only traded my own masks for a collection of 100 wonderful miniatures made by others, I also received some great goodies as gifts!
Patty Barnes did an entire collection of vibrant butterfly masks and all ten were different.
 She’s using a transfer technique and embellishing with sequins and swarovski crystals. It was very hard to choose, by my efforts were rewarded with not just one, but an additional butterfly mask as a gift. It made it easier to let the others fly on to their new homes!
Rebecca Wells- Stout sent an additional mask as well, and I love the extruded red hair on this one! She’s beautifully fierce. Rebecca has used slices of canes and crystals to dress her up.
Rev. Byrd Tetzlaff sent along this colorful character that she calls “Charlie Chaplin on acid” and I can see exactly why she’d say that! I’m told the man had a great deal of energy and was a colorful character himself but not as much as this version, which I like very much!
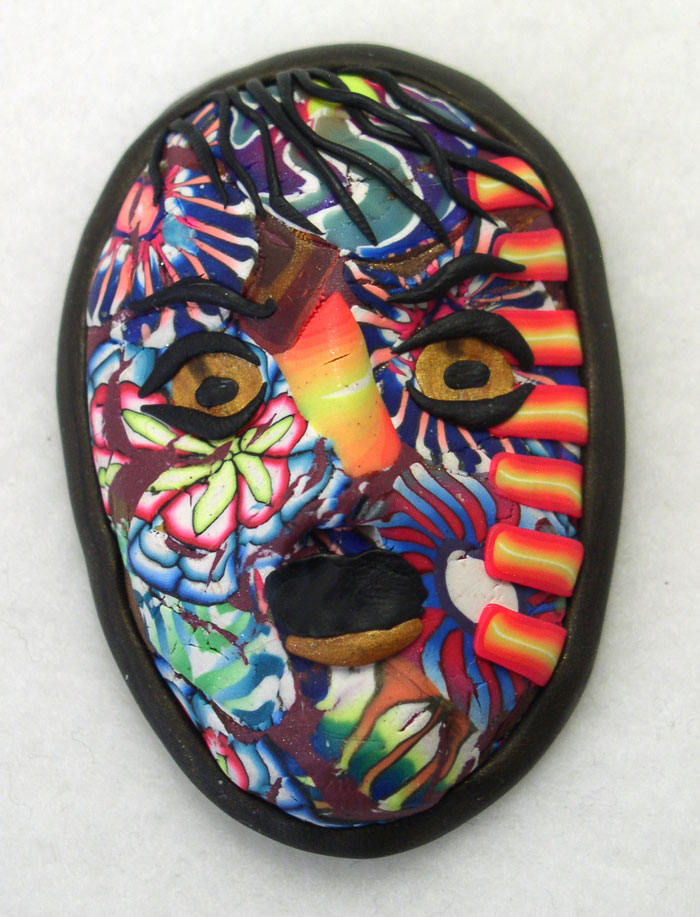 These are only a few of the hundreds of masks that I’ve collected from my years of making and swapping miniature polymer clay masks. Next up for Fall semester at college I’ve arranged an independent study course to combine my Adobe InDesign, Photoshop and Illustrator classes and skills into creating new books, and the mask book is one of the projects involved. So after having a delay of more than a year, I’ve got the tools and the skills and (hopefully) the time all coming together to allow me to work on this long awaited project!! Stay tuned for more developments as they happen.
Jul 20, 2009
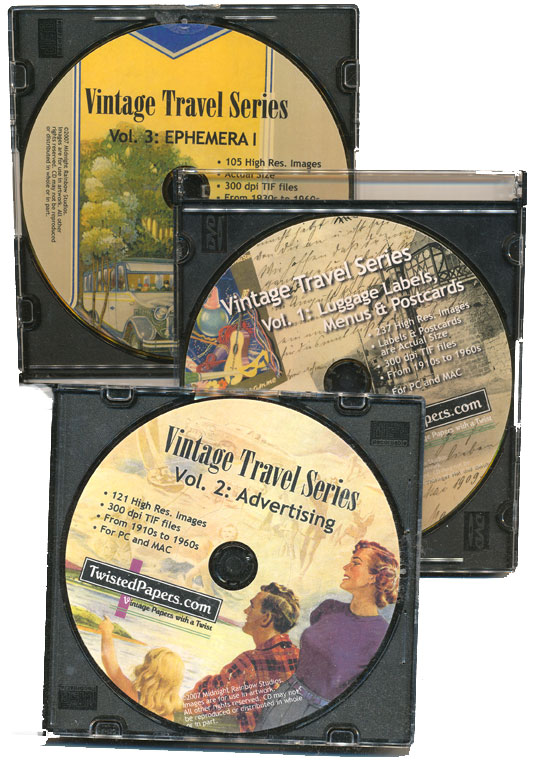 and never leave the farm!” is the way I recall that refrain. What song its from is a little hazy, but thats the way summertime and songs ’round the camp fire can be. This year we’re embarking on a World Tour while staying cozy right at home, thanks to the fine folks at TwistedPapers and their fabulous cds! Stan and Russell have put together outstanding collections of all sorts of vintage and original art that can be used in all sorts of creative ways. Shown here are three cds from their Vintage Travel Ephemera Collections. Tickets, maps, menus, hotel brochures, cruise line posters and an incredible array of advertising art from long ago and far away are reproduced in high quality, full color, high resolution files. Thumbnails are easy to view, and you have your choice of file formats too. My husband is using them as part of his musical “world tour” and I have plans to print out a sheet of these little beauties to decorate some vintage luggage for Aunt Acid, and also a charm necklace or bracelet–these images are perfect for printing at a smaller size on photo paper and using liquid polymer clay to create transfers. The collection of vintage perfume, soap, and beauty product labels is another of my favorites. Many thanks to Stan and Russell for creating and selling these fabulous resources. Take a look at their site and see what YOU could do with these vintage graphic goodies! (I just went there now, and they’ve added new vintage art and reduced their prices too!!! What a deal!)

Jun 22, 2009
 Click the pic to see a larger version.
These whimsical wonders are 10 more miniature polymer clay masks from the 2009 Internet Mask Swap. Created by Ellen Bellenot Rumsey, these little works of art are each small enough to fit in a three inch square. She’s used an amazing array of textures and colorful pearl-ex powders. The mica in the powders and in the gold polymer clay give it all incredible glowing lustre.
I’m taking a few hours away from my school work to catch up on taking pictures from the Mask Swap and from the Dyeing Days. These are two huge annual events that take around a week to put together and somehow managed to both happen within a month of each other this year, and along with going back to school full time. We got tremendous amounts done and both events went very well, but I havent had any time to chronicle and share the results.In fact, the massive amount of reading and computer time I put in for the 4 classes I’m taking leave my eyes feeling as though they look very much like the ones in these masks.
I’m going to play hooky from homework once in a while and get some pictures up, so look for more soon! IS it playing hooky to take pics and edit them in photoshop when your classes are in digital photography and photoshop2? hmmm, perhaps I should take an ethics class and see if my homework there answers the question there…
May 16, 2009
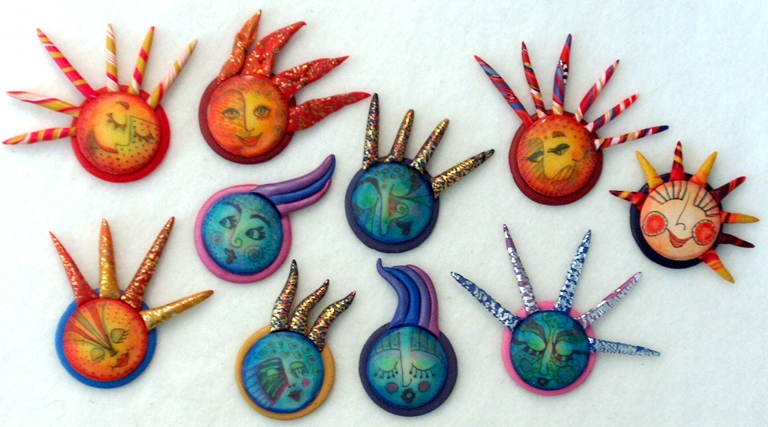
Whew! What a huge undertaking, and what wonderful, amazing small rewards! I mean small as in “miniature”, or specifically “fits inside a three inch square” (more or less). Several years ago I was invited to take part in a Polymer Clay Miniature Mask Swap by Sherry Bailey. I was in one of the several groups, and sent in my masks. Shortly thereafter I got my box of goodies, and kicked myself all around the room for not having been in every group—there were pictures included and I missed out on some real gems. I vowed never to repeat THAT mistake! And also to be in another mask swap ASAP. I ended up taking over the job and expanding the number of participants (my artistic greed knows little about bounderies or sensible work loads in some areas…)
So for the last few years, there’ve ben annual swaps that attract wonderful artists who ALSO want collections of these minimarvels. When announced, interested parties sign up for one, two, or three groups of ten. The SwapMistress (thats me, in this case) keeps track of who signs up, and fills the groups. We do a total of ten groups of ten people. For each group, the participant sends in ten masks, all signed/with a card and bagged. When they are all here, my husband and I alphabetize the incoming boxes for easier finding, and then start filling up Group Bags by lining up the brown paper lunch bags. Starting with 10 bags marked “A” we check the All Powerful List and take out each participant’s set one at a time–If Mary is in group A, we put one of her masks in each bag, and the same with the other 9 participants. At the end, each person in Group A will get a Group A bag mailed back to them, containing one of their own and one of each of the other 9 people’s masks. Sounds fairly simple, right? It kindof is…except then we do it for B, C, D, E, F, G, H I and J groups. This generally takes a full day–there are a thousand little masks. Then, the next day, my dear sweet hubby and I start packing boxes. If Mary was in Group A, D and F, we pull an A, D and F bag and put it aside for her in a grocery bag marked with her name and the groups (cross checking is pretty important!! ) with the mailing lable and postage she sent. This also takes a day or so…and then there’s the packing and sealing of the boxes, and three hours or so at the Post Office.
I, being the SwapMistress and therefore In Charge, get to violate the “three groups” thing and be in ALL ten groups. This is great because I get to keep one from every person in every group–no more missed gems!! Except of course for the people that make it harder to choose by sending ten that are all different for their sets. Then I still only get to keep one, but I DO have the opportunity to unbag and photograph them all, then rebag before putting them into the group bags. So I say it again—its a huge undertaking, but OH-so-worth-the -effort. I end up making and giving away 100 miniature masks, and getting 100 masks to keep. All are individual works of art showing a vast array of techniques. All have miniature size and polymer clay in common, and “masks” as a theme, but all are astoundingly different interpretations of that theme. I will be photographing the collection that I have gathered over this decade, and putting them in a book, but I’ll share a few of them here on this blog, and you can see some masks from previous years here.
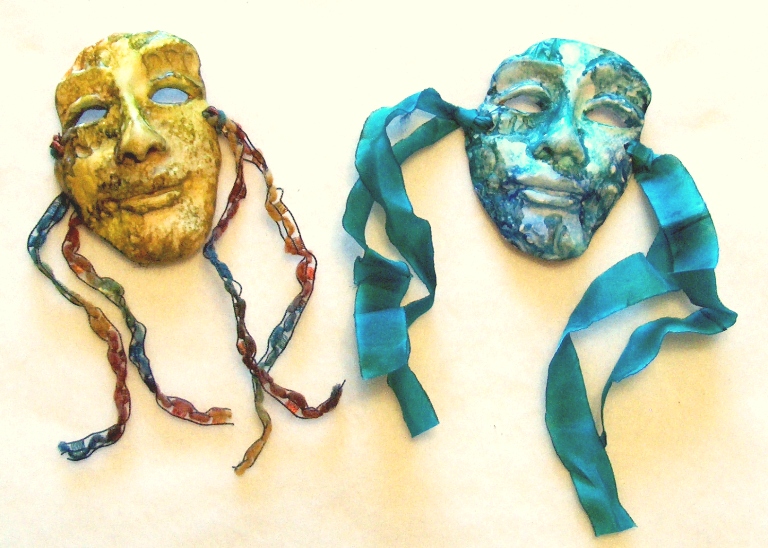
The group of ten Warm and Cool Masks shown above was sent in by Karen Cowles. The two masks below made using the alcohol inks on polymer clay were sent in by Nina Owens. The light was fading and I only had time to take a few pics. I took more the next day, so watch for future posts! You can also see more at other participants’ blogs like these by Laurel Steven and Tonja . Click the pics to see them larger.
Apr 11, 2009
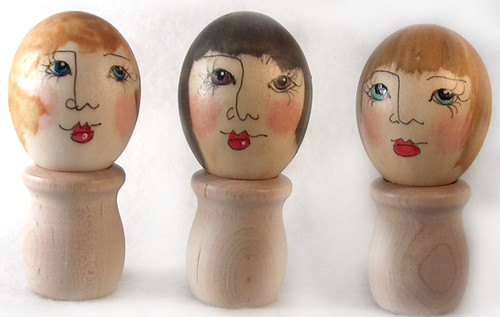
eggladies1, originally uploaded by sarajane helm.
These ladies are made from blown eggs that have been painted with three layers of Liquid Polymer Clay and baked in between each application.
Each one was then given a hand-drawn face using a Micron Pen (this brand is compatable with the clay). Acrylic paints supply facial coloring, and the hair is more liquid polymer clay–it comes in gold, silver, black, and other colors.
The eggs are incredibly light weight, and can still be crushed if not packaged carefully but they are much stronger than untreated eggs.
Its fun to further decorate them with Easter Bonnets or Christmas Finery and use them to decorate a tree or hang from a branch!
Here are some more pages from the PolyClay Gallery about decorating eggs with polymer clay!
Feb 20, 2009
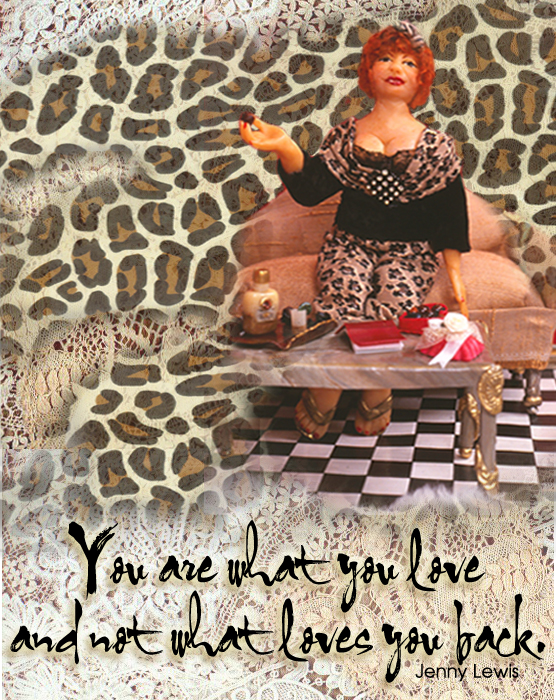
“You are what you love–and not what loves you back”.
That’s so true–and its also part of a line from a song by Jenny Lewis and the Watson Twins from a CD that I really love, “Rabbit Fur Coat”. It is a delightfully witty and beautifully played set of songs. I’ used to love to listen to music and do my homework….Recently I went back to college after a long winter break that lasted 30 some years. I’m enjoying all of my classes, especially learning about Adobe Photoshop and Illustrator. What wonderful tools!! I’m learning a lot of things that I had no clue about in these programs; some of the tools just don’t lend themselves to easy self-discovery. Even reading about them isn’t the same as having someone show you what the tool does and how it works and then practicing it for a while. Oh, the joy of realizing that something you’ve been frustrated at can indeed be done!
Now I am doing something I really love a lot; taking bits and pieces of art that I have and re-contextualizing them in new ways. Collage and mosaics and masks and miniatures and textiles and image manipulation all play a large part of “what do you do?” for me, and its wonderful to be moving into the next layer of “how do you do that?”. School can be really illuminating; and it certainly lights up lots of new creative connections, even in older brains like mine! Using what’s old and making it new again is what creativity is all about. Here’s a recent assignment; a collage that uses Photoshop layers and masks, plus a quote. It features a doll (BonBon Bertie) and her setting that I made with fabric and FIMO polymer clay photographed by Bob Grieser back in 1999, and other images–plus the quote by Jenny Lewis!
You can see more dolls here, and at Aunt Acid’s blog.
Jan 19, 2009
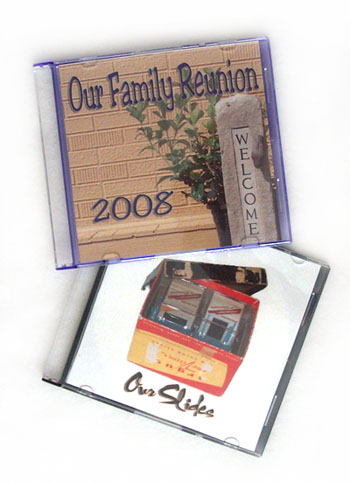
With a CanoScan 8800F scanner in the house for the last month, I’ve been scanning slides and family photos, editing with Adobe Photoshop and making slideshow presentations to burn onto CD’s.
The scanner gives me access to all the slides that always lived in the box at my Grandparents’ house, first cupboard on the left in the living room, top shelf. And if we were good, my sister and I could look at them in the viewer.
Looking at those slides now digitized, thinking of the technology I access now and the technolgy of then–our world (my world) has certainly come a long way since the late 1950’s! And somethings are just the same–I still like to draw. Its just the tools that change, not the joy in the creative connections!
 I’ve done a slideshow for my friend Margie’s family reunion too. (Take a look at her freshly updated glass art webpage here.) Her family brought photos dating back to the 1920’s, and we scanned them right there at the reunion, as well as getting pictures of the event. Later, I put them all on a slideshow cd that she can distribute to the whole family–those that were able to come and those that were not! Its great to be able to better access the past while we still have the memories of those around us available to tell stories about the pictures, and identify the people, times and places.
When I went to school the first time, it was A Very Big Thing to be allowed to learn to use the ELECTRIC typewriter. The mimeograph and ditto machines did not allow for “undo” or editing….
Now I have computers and digital tools available to me, and I am going back to school to learn how to better use them. This will no doubt continue to change how I am able to do my work in the future, and I’m looking forward to it! I’m also looking forward to using slides and pictures of past work and using those new tools to present things in new ways. I’m starting with pictures of Madame & Her Shady Ladies dolls in minature sets that were taken by Bobby Grieser in 1992, before I had my digital camera or computer. Now I can use them! You can see more of them at Aunt Acid’s blog, and there’ll be a page and even a calendar later. I’m looking forward using them alot in this coming year of 2009. Hard to think that we’re more than halfway through that first month already, and so much going on! Here’s a view of one of the ladies. She’s about 8 inches tall, and shown with a paper and epoxy resin fan made by my friend Elaine.

Jan 4, 2009
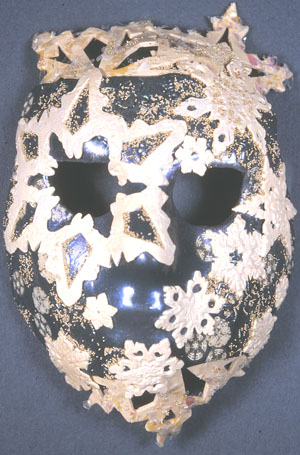
Snow Mask
Do you remember being a kid (or a college student) and learning in school about how January is named after the two-faced god Janus who looks forward and backward in time? It seems very fitting to me that while working towards the future, I’m also having a wonderful wintertime reunion right now with my own past. (I think Einstein was right, about time!)
With the use of a new scanner that is equipped to convert film negatives and slides, I am going through boxes and boxes of prints and slides and getting reacquainted both with my own childhood and my early work. Seen here is a polymer clay mask representing “Winter”. I’ve got a new web page up on how to make snowflakes, click the link to visit and see more! This mask and the snowflakes shown below by Dawn Naylor were both first seen in the book “Celebrations With Polymer Clay”.
My husband and collaborator Bryan has been doing the same review and reformat thing in an auditory way with his pod-cast series “My Life In Sound” which archives the first quarter century of his musical output. He’s been playing guitar, keyboards, drums and synthesizers in musical loops all the while that I’ve been working on polymer clay projects. And we all use the computer in turns, including the children that we somehow managed to beget and raise at the same time everything else was getting done. They are creative too…just imagine!
I’m finishing up or reformatting projects that were started a long time ago too, working in the warmest room of the house and having fun. I’ve gotten family slide shows put together, and added some new pages to the Polyclay Gallery website. I’m also updating existing pages there at the site and getting ready to start school at my local community college to learn more about the programs and tools that will important in web page design and all my upcoming publishing and Internet projects.
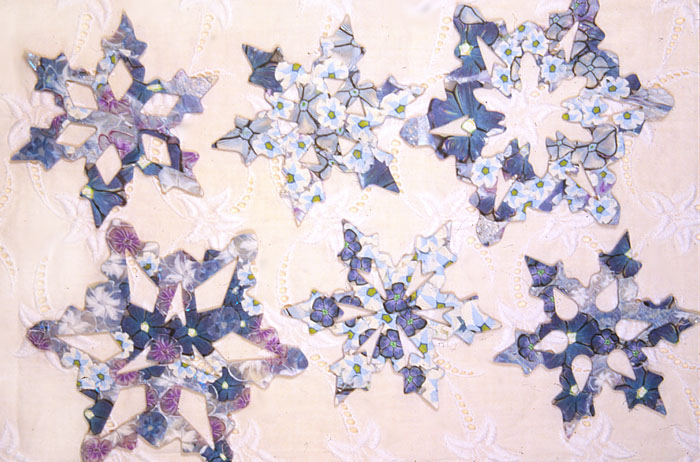
Snowflakes by Dawn Naylor
Like polymer clay, using my other PC requires me to pay attention to what’s been done in the past as well as keep a close eye on the new. New clay formulations, new ways of manipulating the clay, new software and hardware, and ways to improve on using it all are the challenges for the upcoming year. Along with survival and all that too!
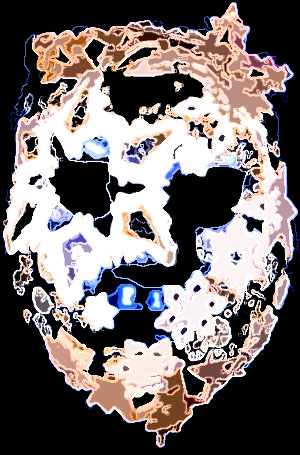
Snow Mask digitally altered
And along the way, I’m enjoying the ways I can use one with the other, polymer clay and personal computer, old work and new work. Sometimes I just let myself play with them, rather than having a fixed idea that I try to achieve.
Here’s an image of the same polymer clay mask, when I play a bit with the file in Adobe Photoshop. Using the filters and experimenting gives me a little experience with what the tools can do. I’m looking forward to my classes in Adobe Photoshop and Illustrator because being self-taught means that there are many areas of the programs I haven’t had anything to do with…yet. Stay tuned to see what sort of effect it all has when I learn more! Learning is always important–no matter where you are on the time line, no matter what the season.
Dec 18, 2008
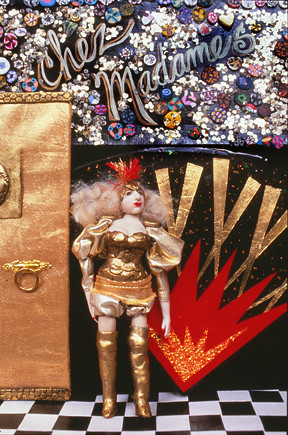
chez Madame’s, originally uploaded by sarajane helm.
A long while back, I made 12 dolls and miniature sets for a photo shoot. Using paper, polymer clay, fabric and whatever was right for the job, I made several different Shady Lady dolls and their environments. Here’s one of the shots! This one is of the petite and buxom bouncer in the Nightclub room. She’s about 9 inches tall. Part of the set is made using an epoxy resin and paper fan made by Elaine Schaeffer.
This is one of the photos taken by Bobby Grieser in 1992. He does wonderful work, and did all the photography in my first two polymer clay books. Unlike my own digital camera work, Bobby’s pictures for me were all done in 35mm film slides. I have several shoe-boxes filled with over a decade’s worth of images. but have had no way to access them for use on the web. Until Now!!!
This year, Santa brought me a new scanner with a slide scanner function, which has been on my list for a long while!!!! (Thank you Santa for making it happen, you know who you are.)
It even came early so that I get to use it in creating some of MY Christmas presents to give in the next week. I’ll be showing off more pics right here too.
Nov 9, 2008
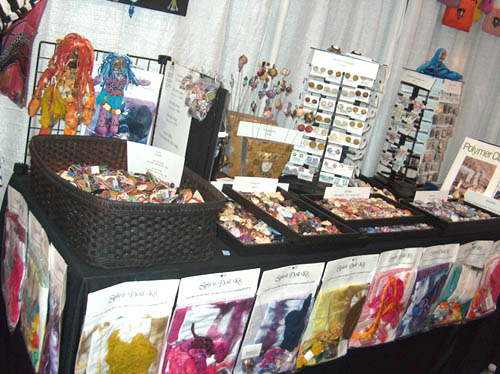 Last week Judith Skinner and I were vendors for our third year at The International Quilt Festival in Houston Texas. The show is the absolute best in the world, and there are more beautiful quilts and amazing wearable art pieces than I could possibly imagine–and I have a VERY good imagination!! We go every year to promote our books, including Adapting Quilt Patterns To Polymer Clay and The Business Of Professional Art as well as to sell our polymer clay jewelry, beads, faces, and Spirit Doll kits. Next year we’ll be bringing new titles as well–I think its time to ship all the books ahead, though. We take all of our booth setup and displays and all merchandise with us, and things are getting heavier the more titles we add! This year we shipped some of the books, and that worked out very well. The Houston Polymer Clay Guild helped out with Receiving and made us welcome at a lovely evening reception too! It is always great to see our friends there again.
 In addition to seeing polymer clay vendors like Jennifer Patterson and Karyn Kozak, we get to explore as much of the show as we can. There are 20 rows of booths, and thats not counting the Quilt Display areas!!
There’s an area in the farthest back block for Embellishments, where you can find us in our PolyMarket Press Booth and many other suppliers of textiles, trims, buttons and beads, and other great stuff.
 Like Glitter! Barbara Trombley was there with her Art Institute Glitter. Not only do she and her sparkly assistant Nancy show off the uses of an incredible line of glitters that are compatible with polymer clay use, Barbara’s line of “Elements” make great inclusions in translucent polymer clay and all the supplies in their booth have possibilities when it comes to mixed media art that is so dear to many, including me!
As a certifiable color addict, I warn you to be careful when looking at her color samples. Many, many colors, in very many sizes–like seed beads and paint chips it can be an occasion for gazing a long time.
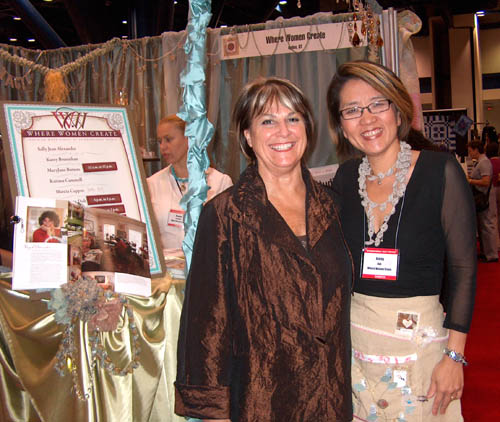
I also had the opportunity to meet Jenny Doh, editor at Belle Armoire magazine. It was lovely to see in person someone with whom I’ve worked well and happily as a writer of the Business Of Professional Arts column there. I rthoroughly enjoy working with talented, creative people, who are very good at what they do.
It was exciting to see the “Where Women Create” booth and to meet her and the other ladies there. WWC is all about the “inspiring work spaces of extraordinary women” to quote their website. Keep an eye out for this newly debuting magazine!
Click here to see more about this exciting show.
Oct 20, 2008
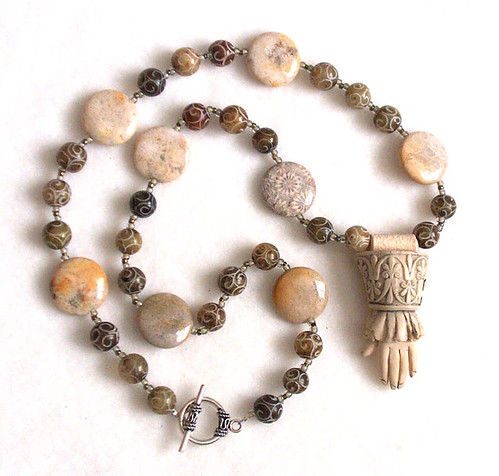
newnecklace2, originally uploaded by sarajane helm.
I’m still busy getting ready for the International Quilt Festival in Houston at the end of October, and I’ve been making lots of new beads, and stringing beads into necklaces too! Here’s one of my favorites with a handbead pendant, and coin shaped beads of fossilized coral as well as other kinds of beads. It features a sterling silver toggle clasp.
You can also click on the gallery pics here to see more new wearable art pieces!










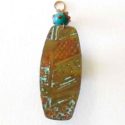
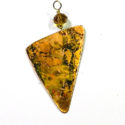


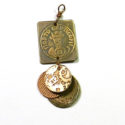
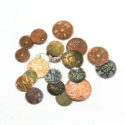




 I’ve been working with ceramic clays lately in addition to all that I do using polymer clays, and there are also precious metal clays in bronze and silver, and now there is even glass clay, made using frit. I enjoy working with them all, and will continue to show off what can be done with them at my website


 and never leave the farm!” is the way I recall that refrain. What song its from is a little hazy, but thats the way summertime and songs ’round the camp fire can be. This year we’re embarking on a World Tour while staying cozy right at home, thanks to the fine folks at


