Jan 14, 2023
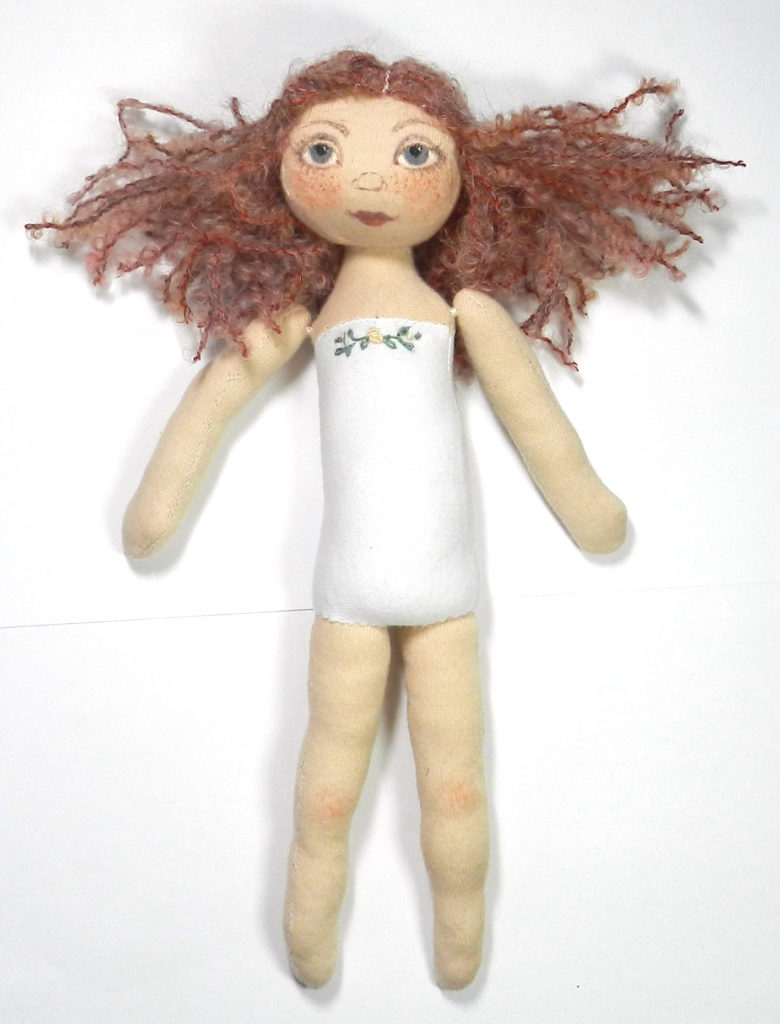
I’ve done several new patterns for art dolls that are decorated directly on the doll form, but I always go back for the fun of dress and undressable dolls with wardrobes. I drafted some new patterns, working on getting a good range of sizes/ages.
I also drew up some patterns for clothes, of course! Now to resize them and make some for each of the 5 prototype dolls; here’s how the first one turned out. I used cotton jersey that I dyed, and shopped for cloth and trims in my stash–it seems I have a lot, and it doesn’t take much to dress a doll.
Oct 31, 2022
I’ve been putting together all sorts of kits for making art dolls, some with premade bodies, some with faces and all with lots of colorful cotton, rayon and silk. Big dolls, little dolls, shadowboxes, icons or fabulous wearable jewelry or bags…these kits are great starting points to projects.
Recently I’ve put together 48 deluxe kits, turning out the bins and boxes to add fabrics and embellishments.
Each kit contains hand dyed kona cotton, silk gauze, a silk handkerchief, ribbons, plus vintage sari silk ribbons, angelina fiber, and a specially selected mix of sequins and beads. I’ve also included 5 millefiore style polymer clay faces (slightly curved for dollmaking ease) and my own patterns for making a variety of dolls. Click here to download the .pdf file
The smallest person or mermaid is about 3.5 inches when made up. The middle sized person sews up into a 10 inch doll. This one also has a mermaid tail option. The mannequin style is 9″ but you can also easily add a mermaid tail as I did in the sample shown here.
I used to buy premade cotton 3″ doll bodies and dye them, but they have not been available for years, so I drafted some patterns.I print them on cardstock, cut them out and trace them onto the fabric, then stitch. THEN cut out the pieces–that’s the secret to working with small parts! The fabric in the kits, when folded double, makes several dolls as shown here.
I made some up in dyed kona cotton, and some in tiedyed cotton jersey. Both worked up very nicely into samples that I embellished with ribbons, beads, sequins…I started with what was gathered into the kits, and then added more beads.
The 3.5 orange doll sample hasnt been embellished yet, nor has the green mermaid. One has a millefiore style face, and one is sculpted. The ones that come in kits are not attached, and I also have sets of 5 face canes in a variety of styles. That’s in addition to a wide array of sculpted polymer clay and ceramic faces.
I’m updating my shop here with kits, faces and even some finished dolls.
I’ll be adding more available inventory to my shop here and also sell on Facebook,
Oct 22, 2020
Since I last posted here, I’ve been spending some time and effort turning textiles and beads I already have into new dolls and wearable art, and exploring new techniques along the way as I go. For months I spent an hour or so most weekdays embellishing dolls with beads, silk ribbons, dyed textiles…I also did some sewing using versions I altered of Patti Culea’s wonderful doll patterns from her books. I had used parts of her patterns before–she designed wonderful hands and feet for her dolls–but I had never made a doll just as it was in her designs.I jump around from instructions on my own curve, but you can miss things that way too. So I made one of my 2020 projects to get out my stash of dyed cotton jersey and try the patterns as given, and THEN mess with them more…
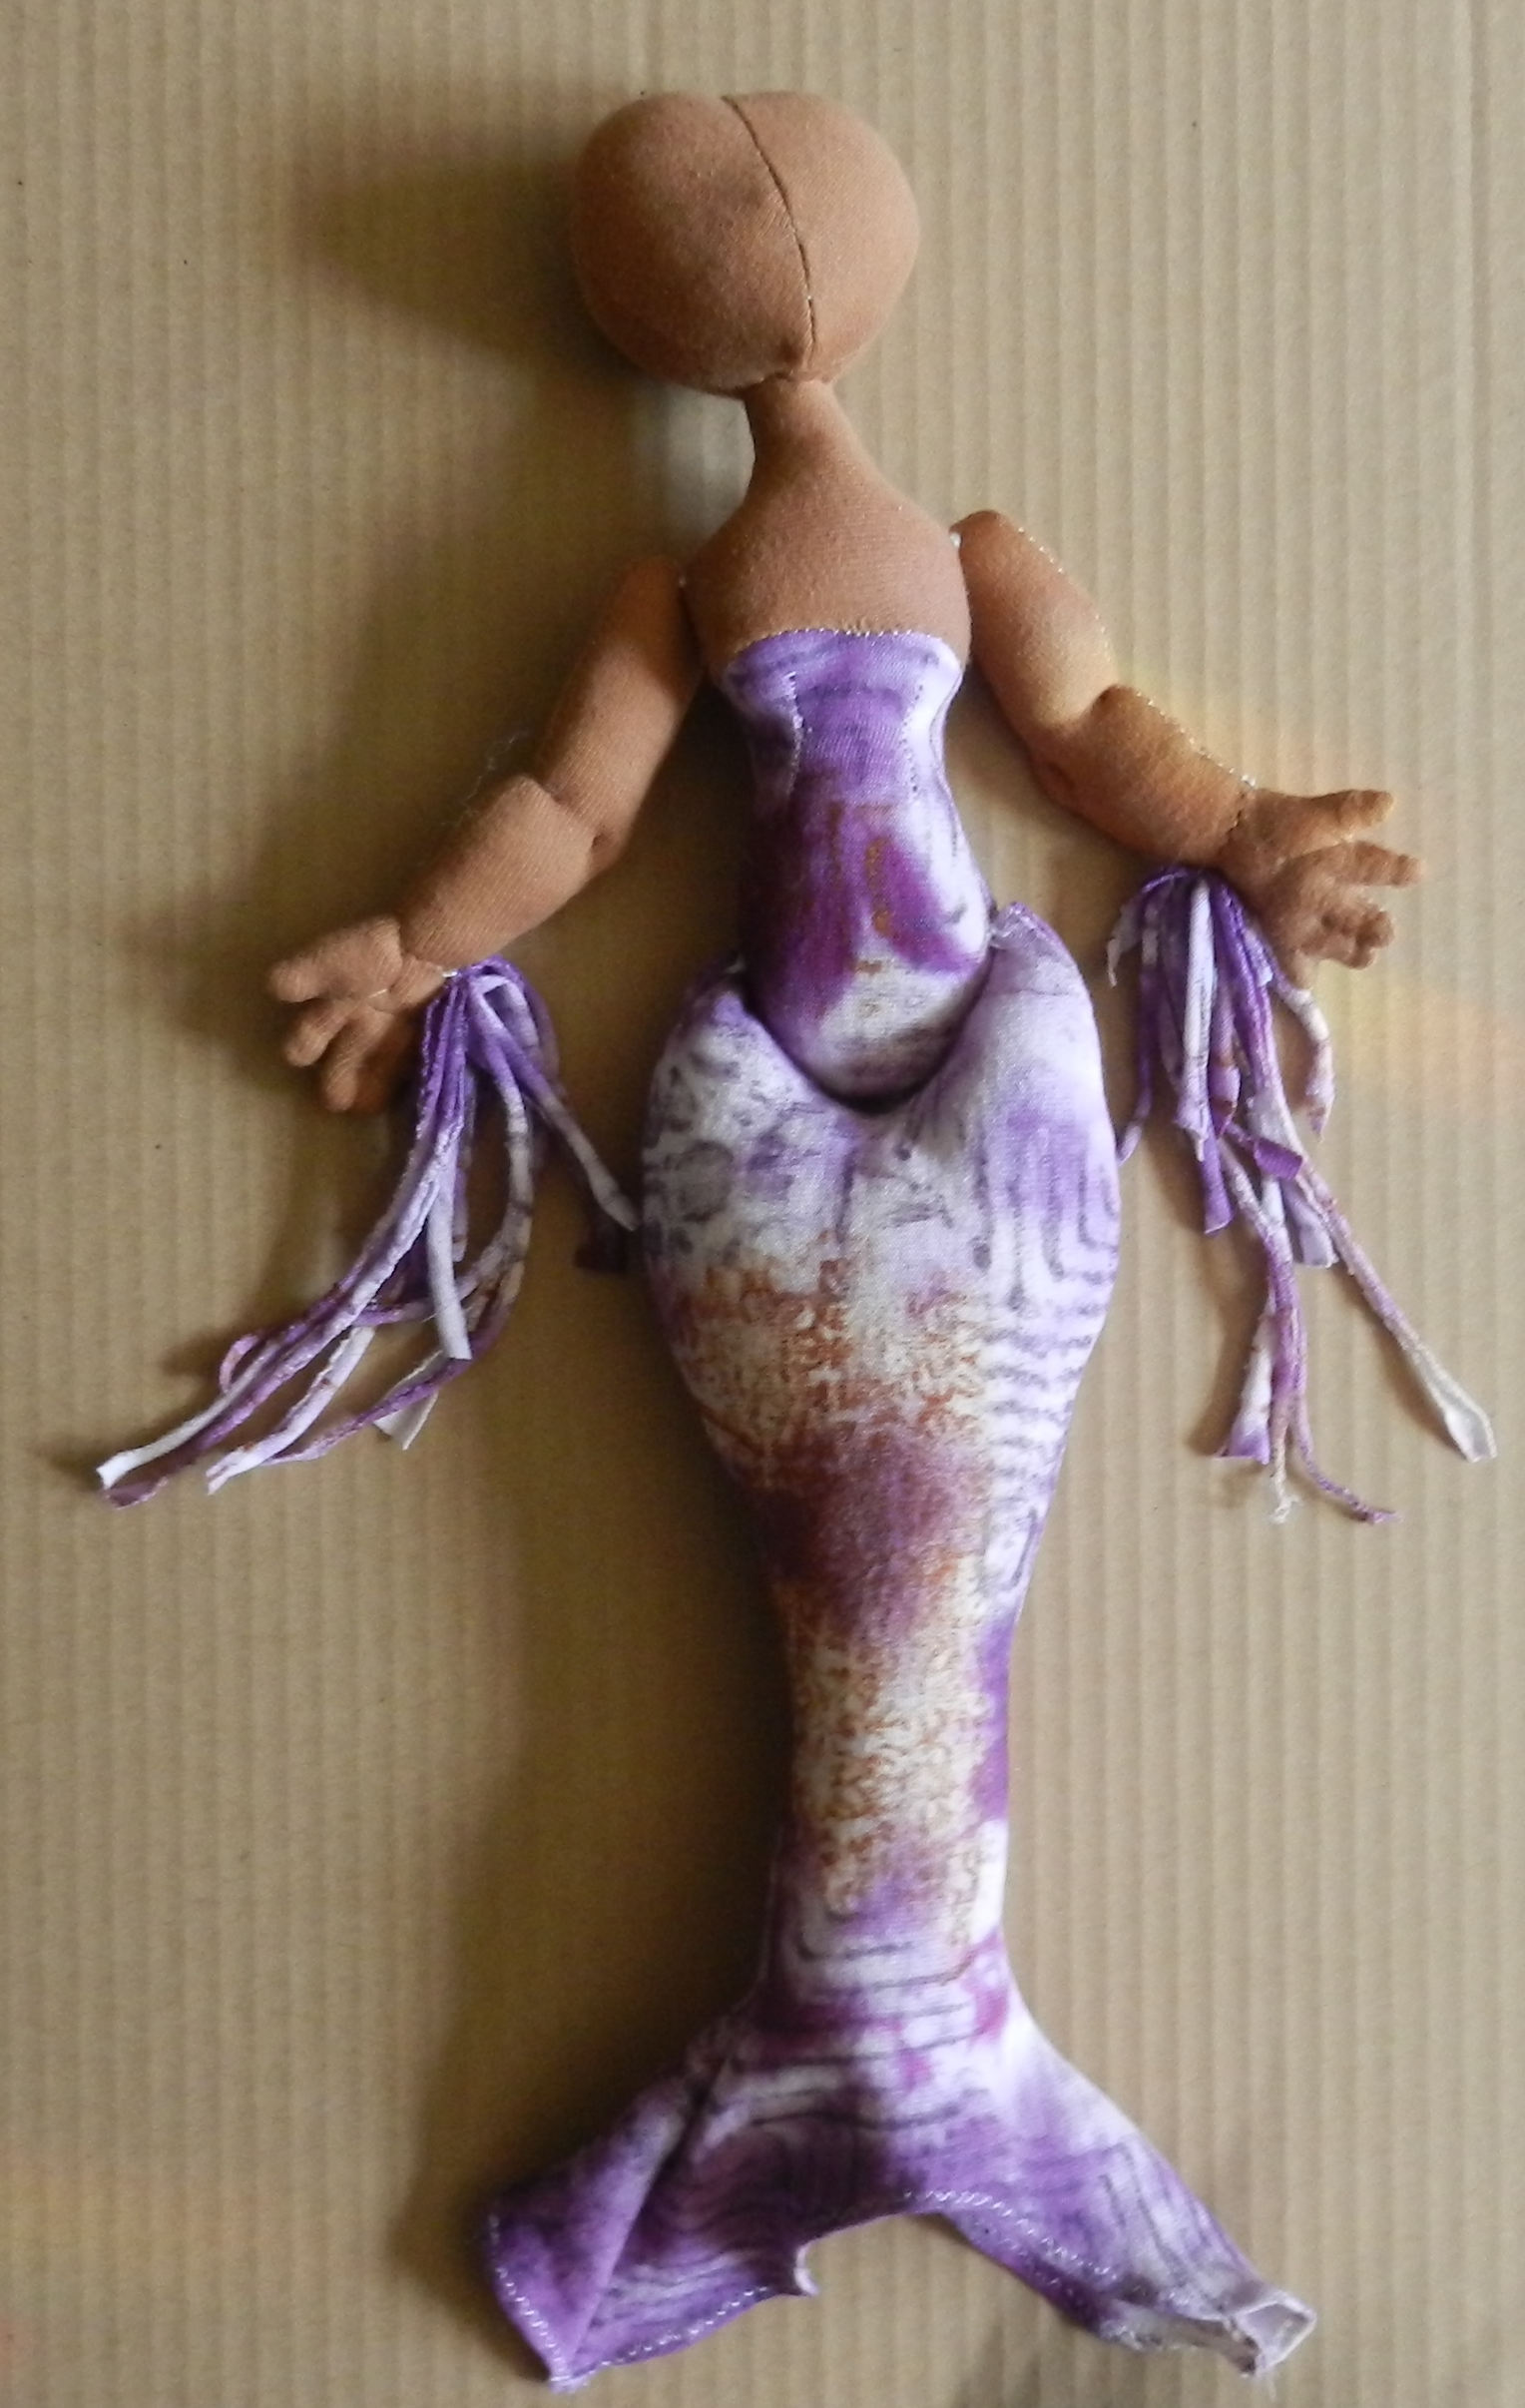
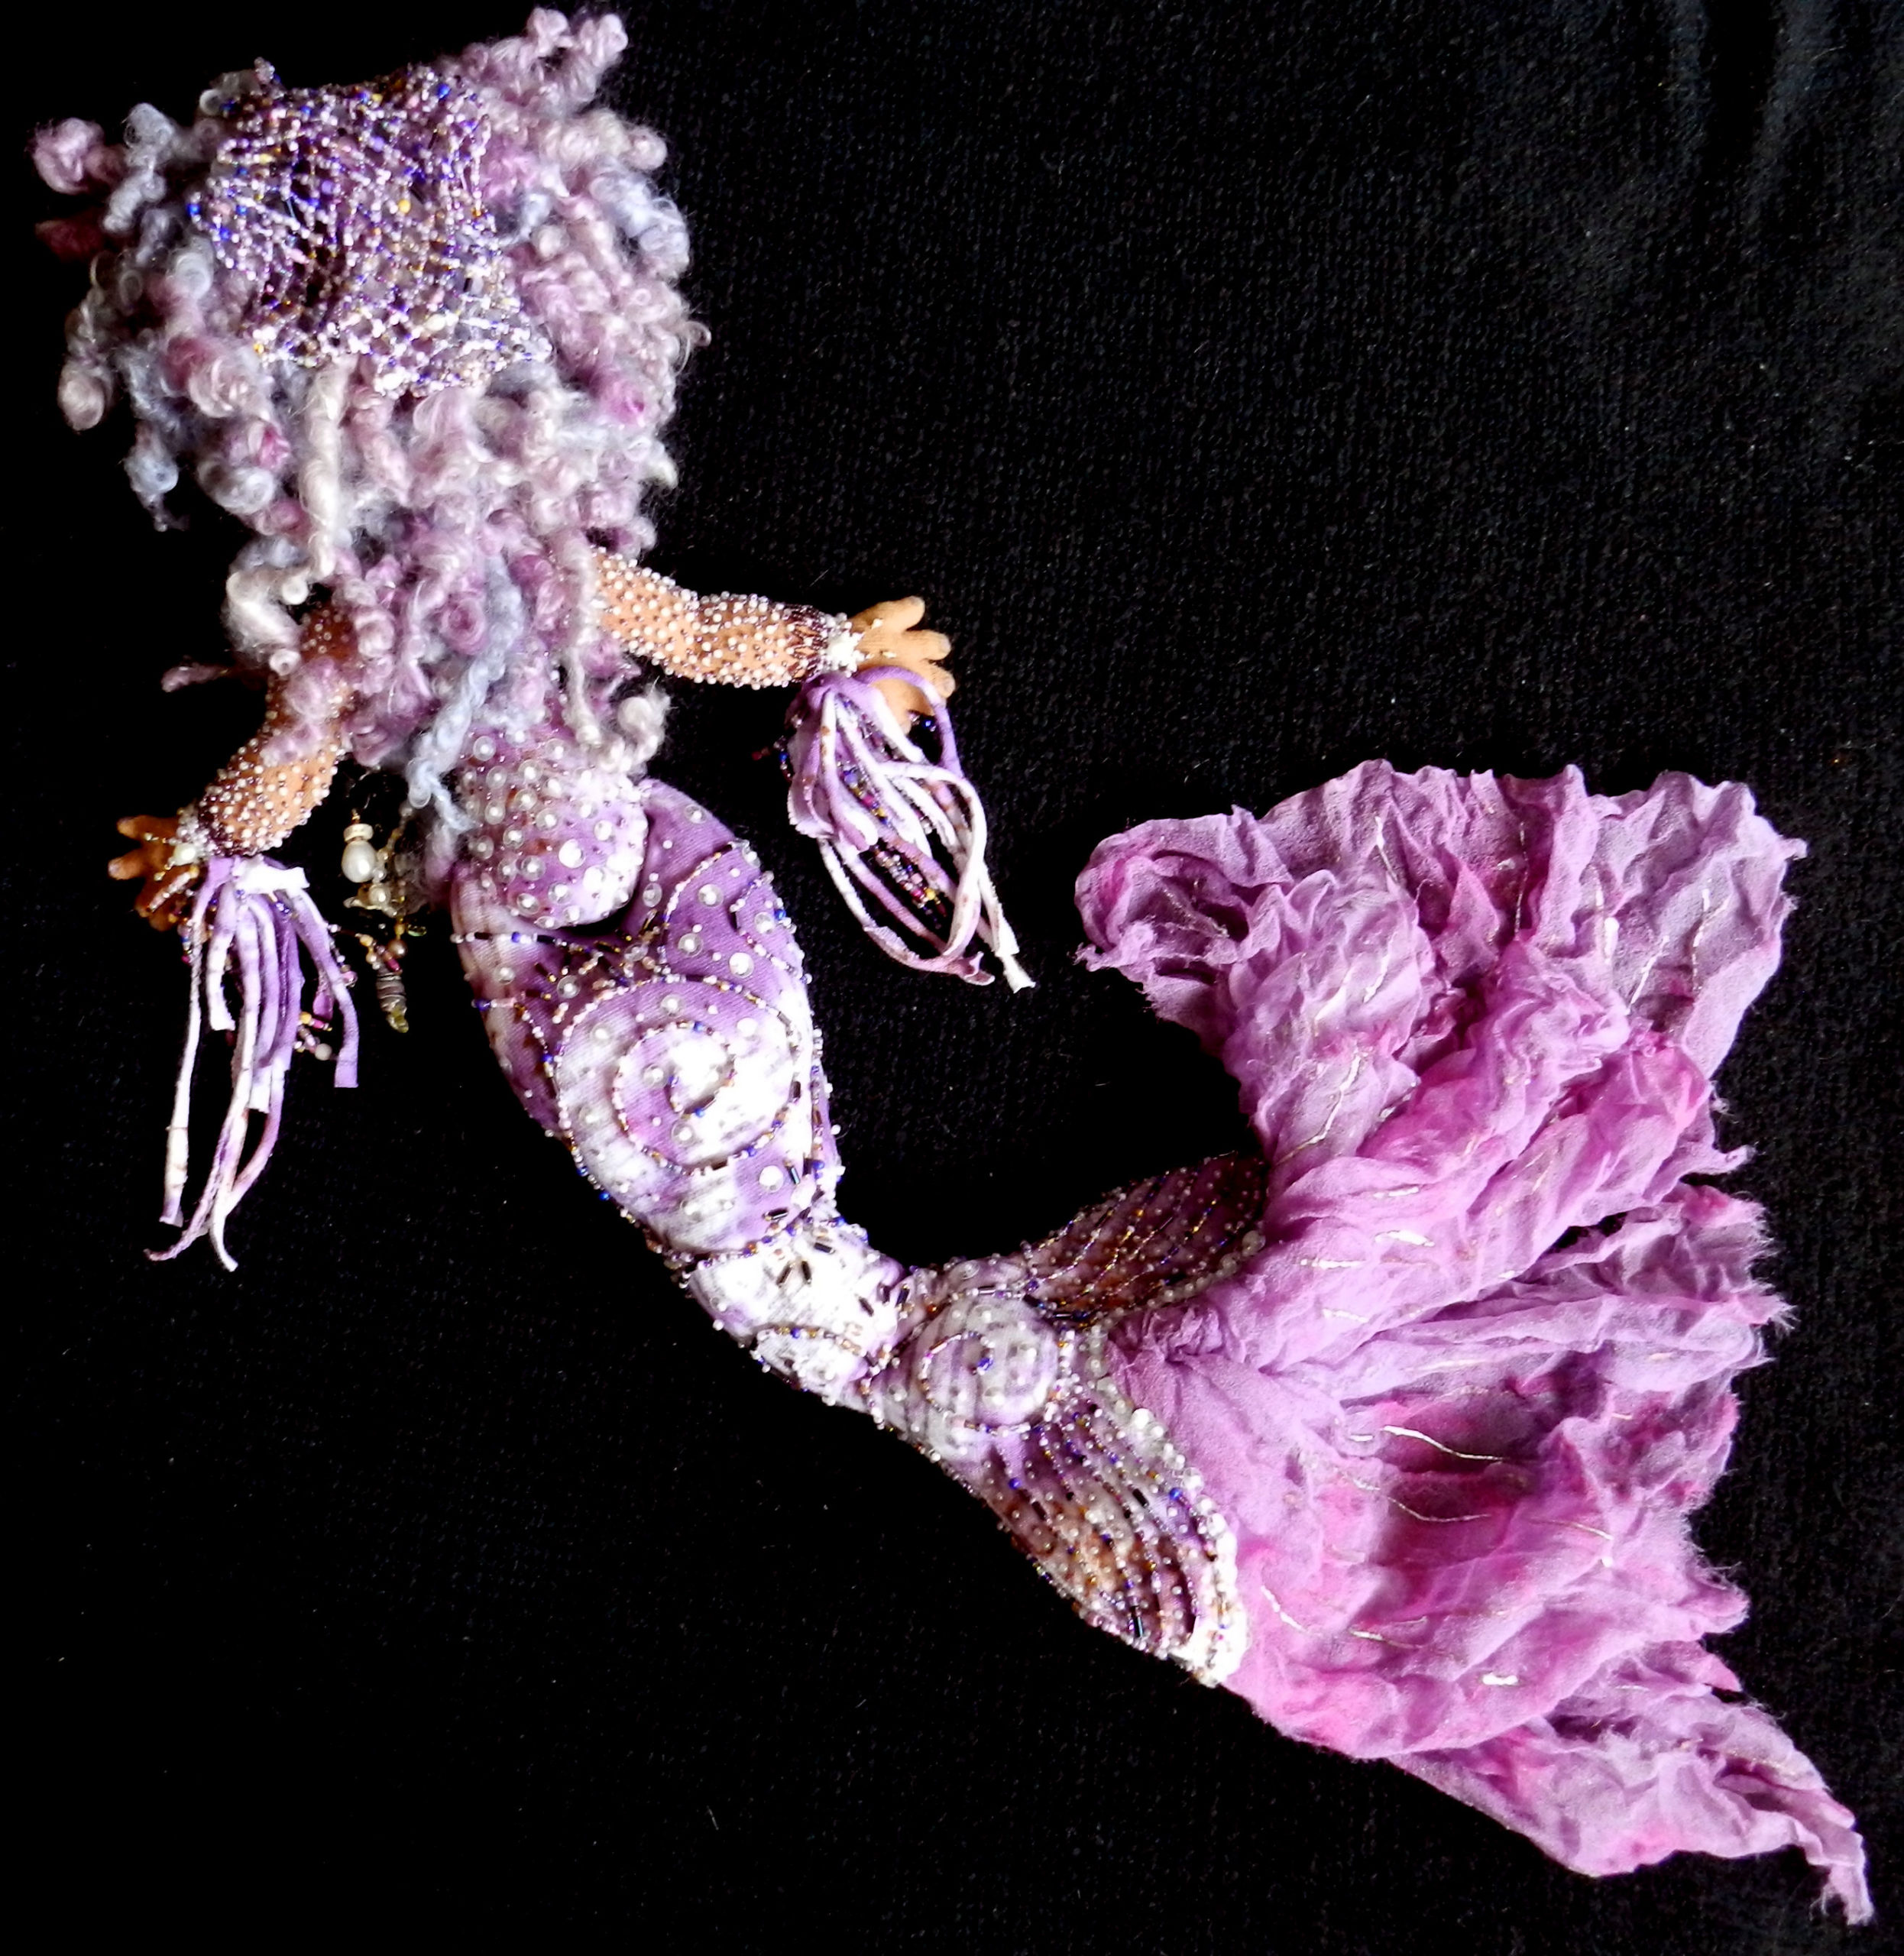
I played with scale and body shape and ended up with 3 dolls that need to have some clothes made for them (coming later this year!) and one that had a mermaid tail instead of legs, with moveable hips and shoulder joints. I used Procion coldwater fiber reactive dyes with some over painting using Shiva Oil paint sticks to give the body and tail fabric some color. Then it was stuffed with polyester fiberfill and wire to create a bendable bottom armature. Dyed silk gauze gives her tail a flowing purple flourish. Her face and nails were painted with acrylics, and I sewed on many sessions-worth of beads and sequins to her body, arms, and tail flukes.
I made her some polymer clay seashells, starfish and black coral, and fashioned her some necklaces, earrings, and hair decorations. Several of these still need to be glued into place in her hair, Her hair is where it all started so it is fitting that that is where she finishes up. Several years ago I was given a skein of beautiful hand dyed and mixed fibers that I knew instantly I wanted to use on a special doll. This one makes great use of it, and I have enough left to wig up a blue fairy as well! But that’s another project. I quite enjoyed this mermaid and would like to make more, but smaller, as the beading took a long while. She is 18″ from head to flukes, and more added for her piled up hair and gauzy tail! I’d like to get the pattern tweaked to about half that. After all, I have lots more fabric, sequins, and beads, and this seems like a good time for more fairies, mermaids, dolls and divas. I’m happier doing some beautiful distractions along with the realities.
mermaid-lower-body-detail
Mar 13, 2020
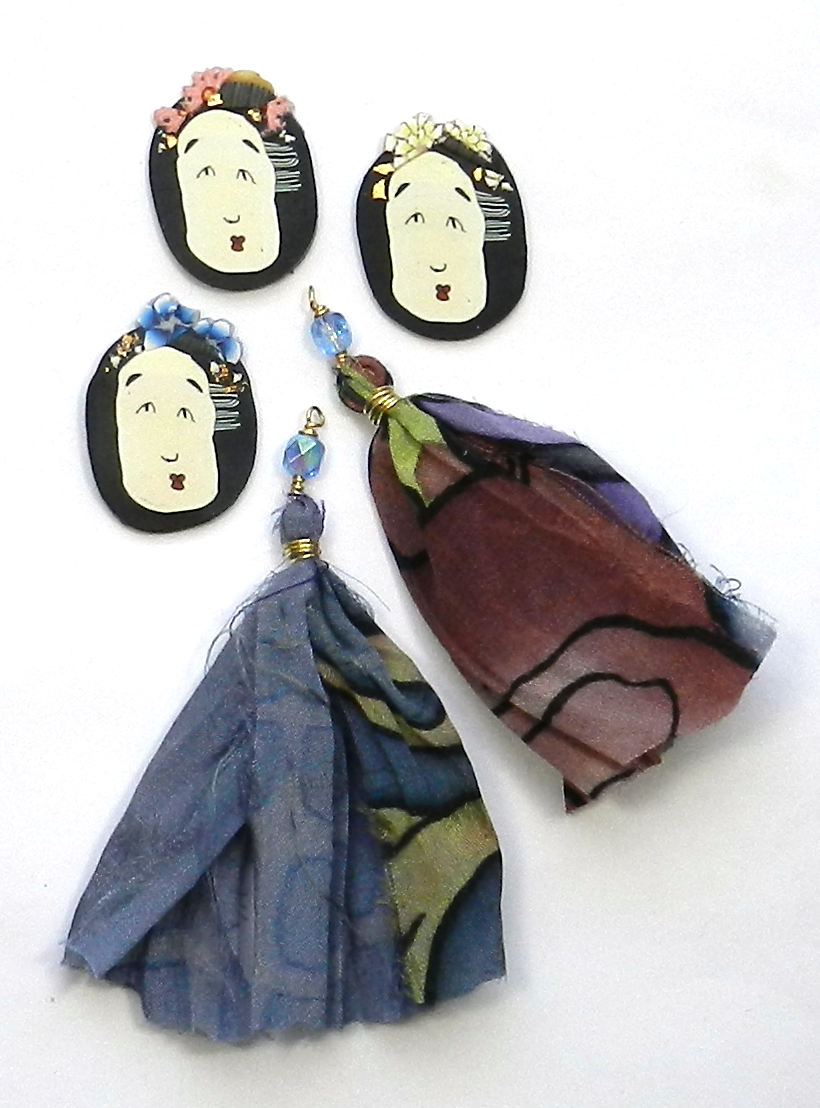
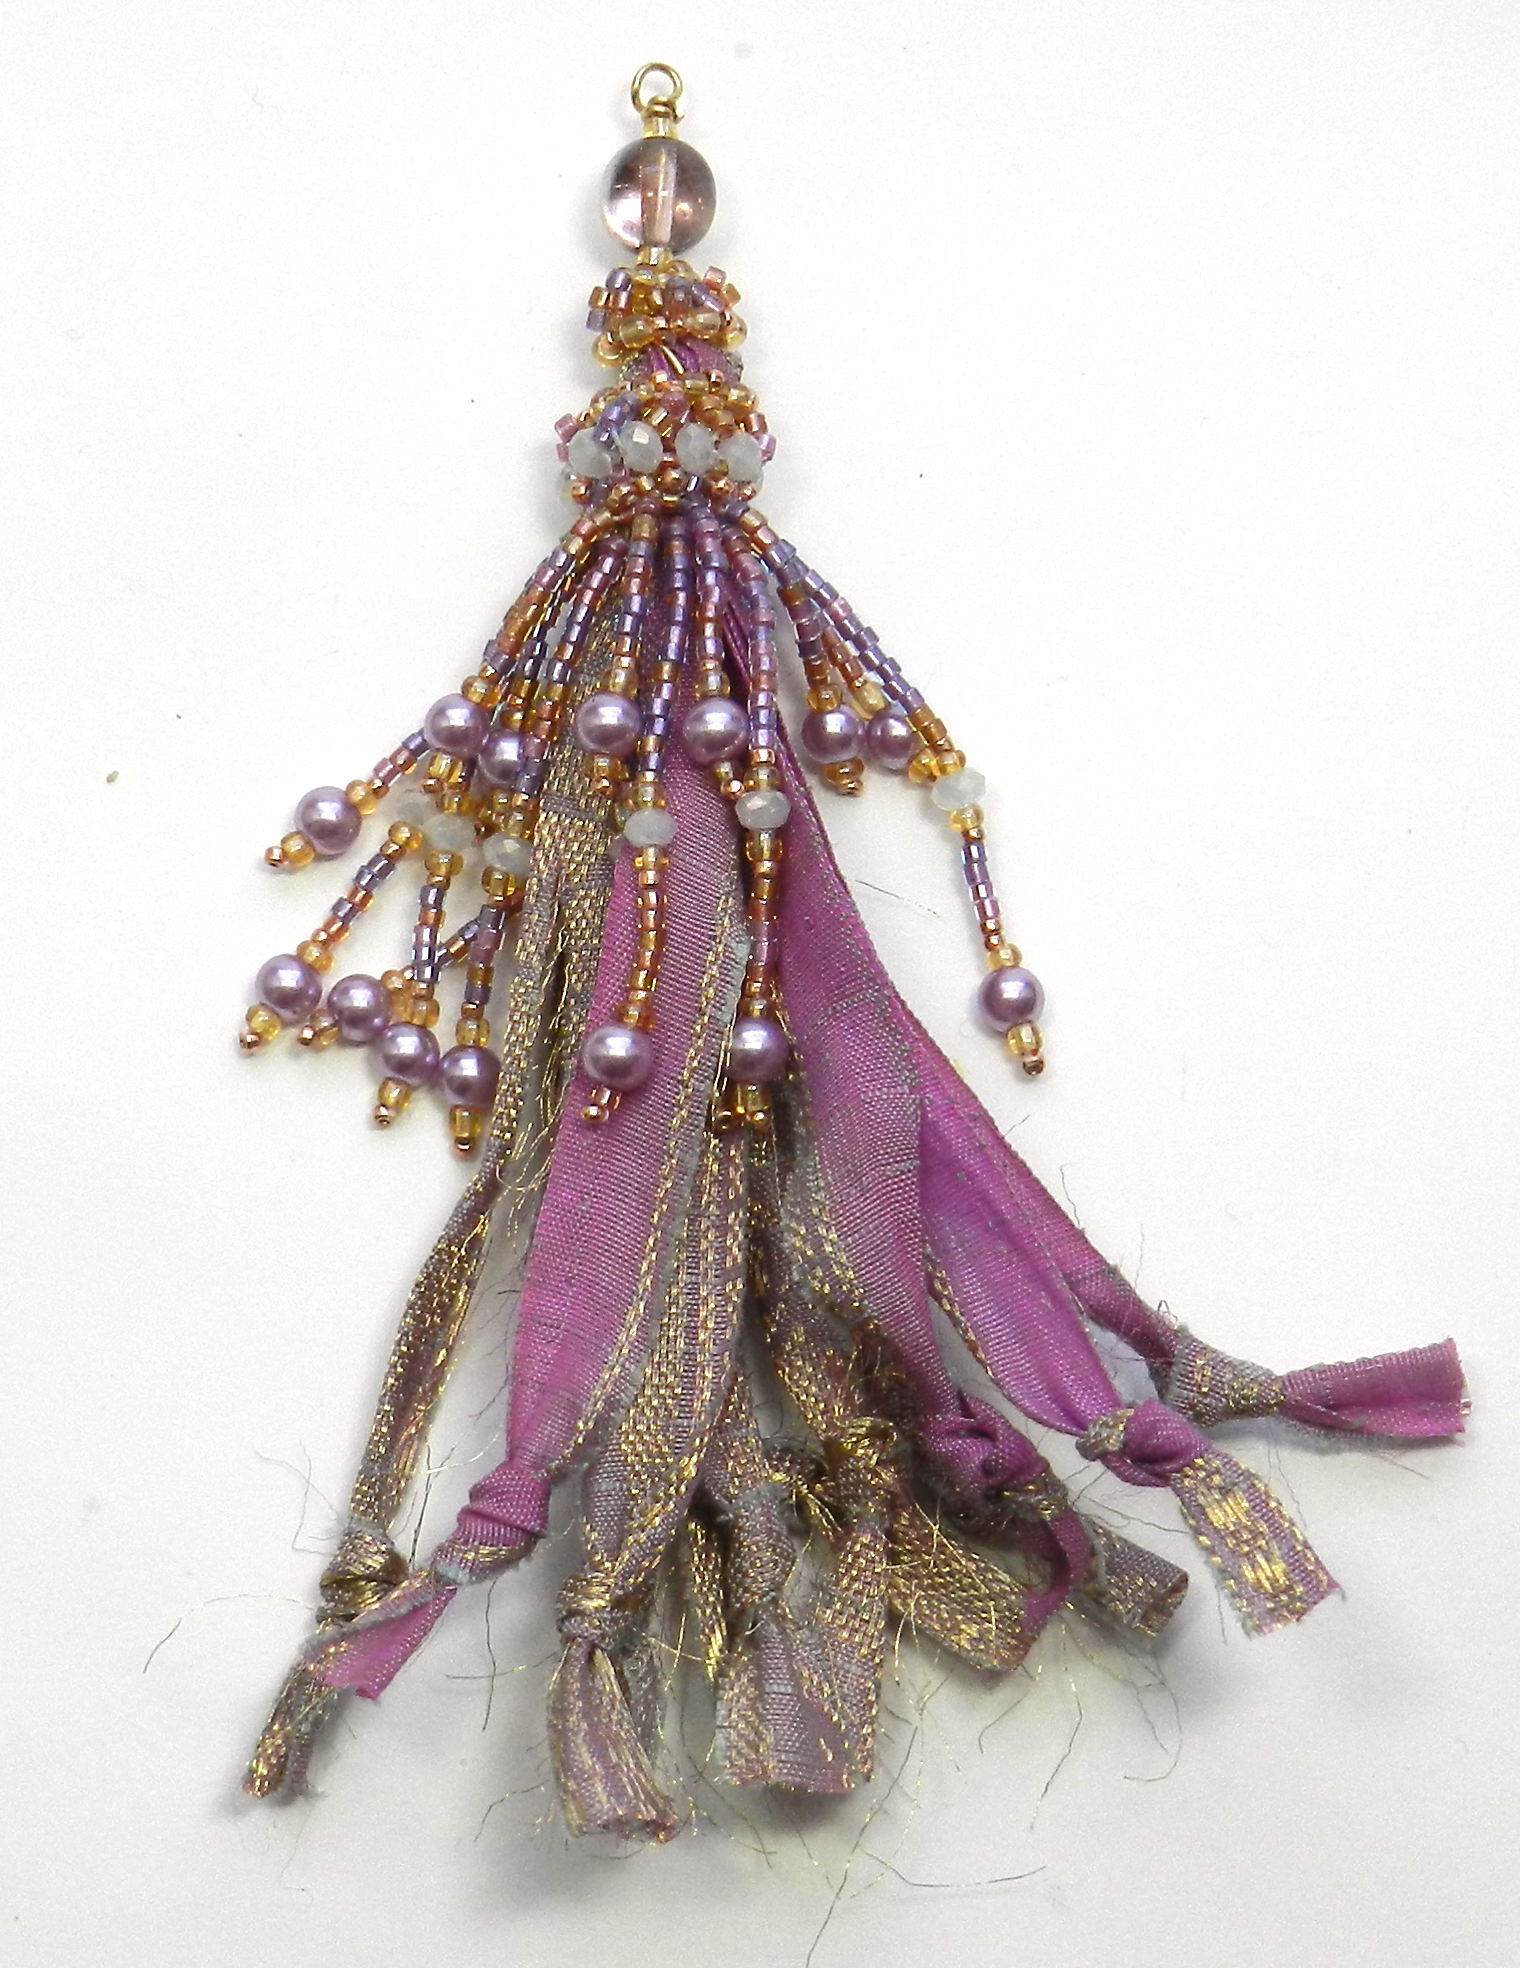
I purchased some beautiful vintage silk sari ribbons recently, and I got two kinds–sari silk chiffon prints, and sari trim with woven metallic threads. Both are beautiful bursts of color and pattern. I spent a few snowy afternoons turning ribbons into tassels with 22g brass wire.
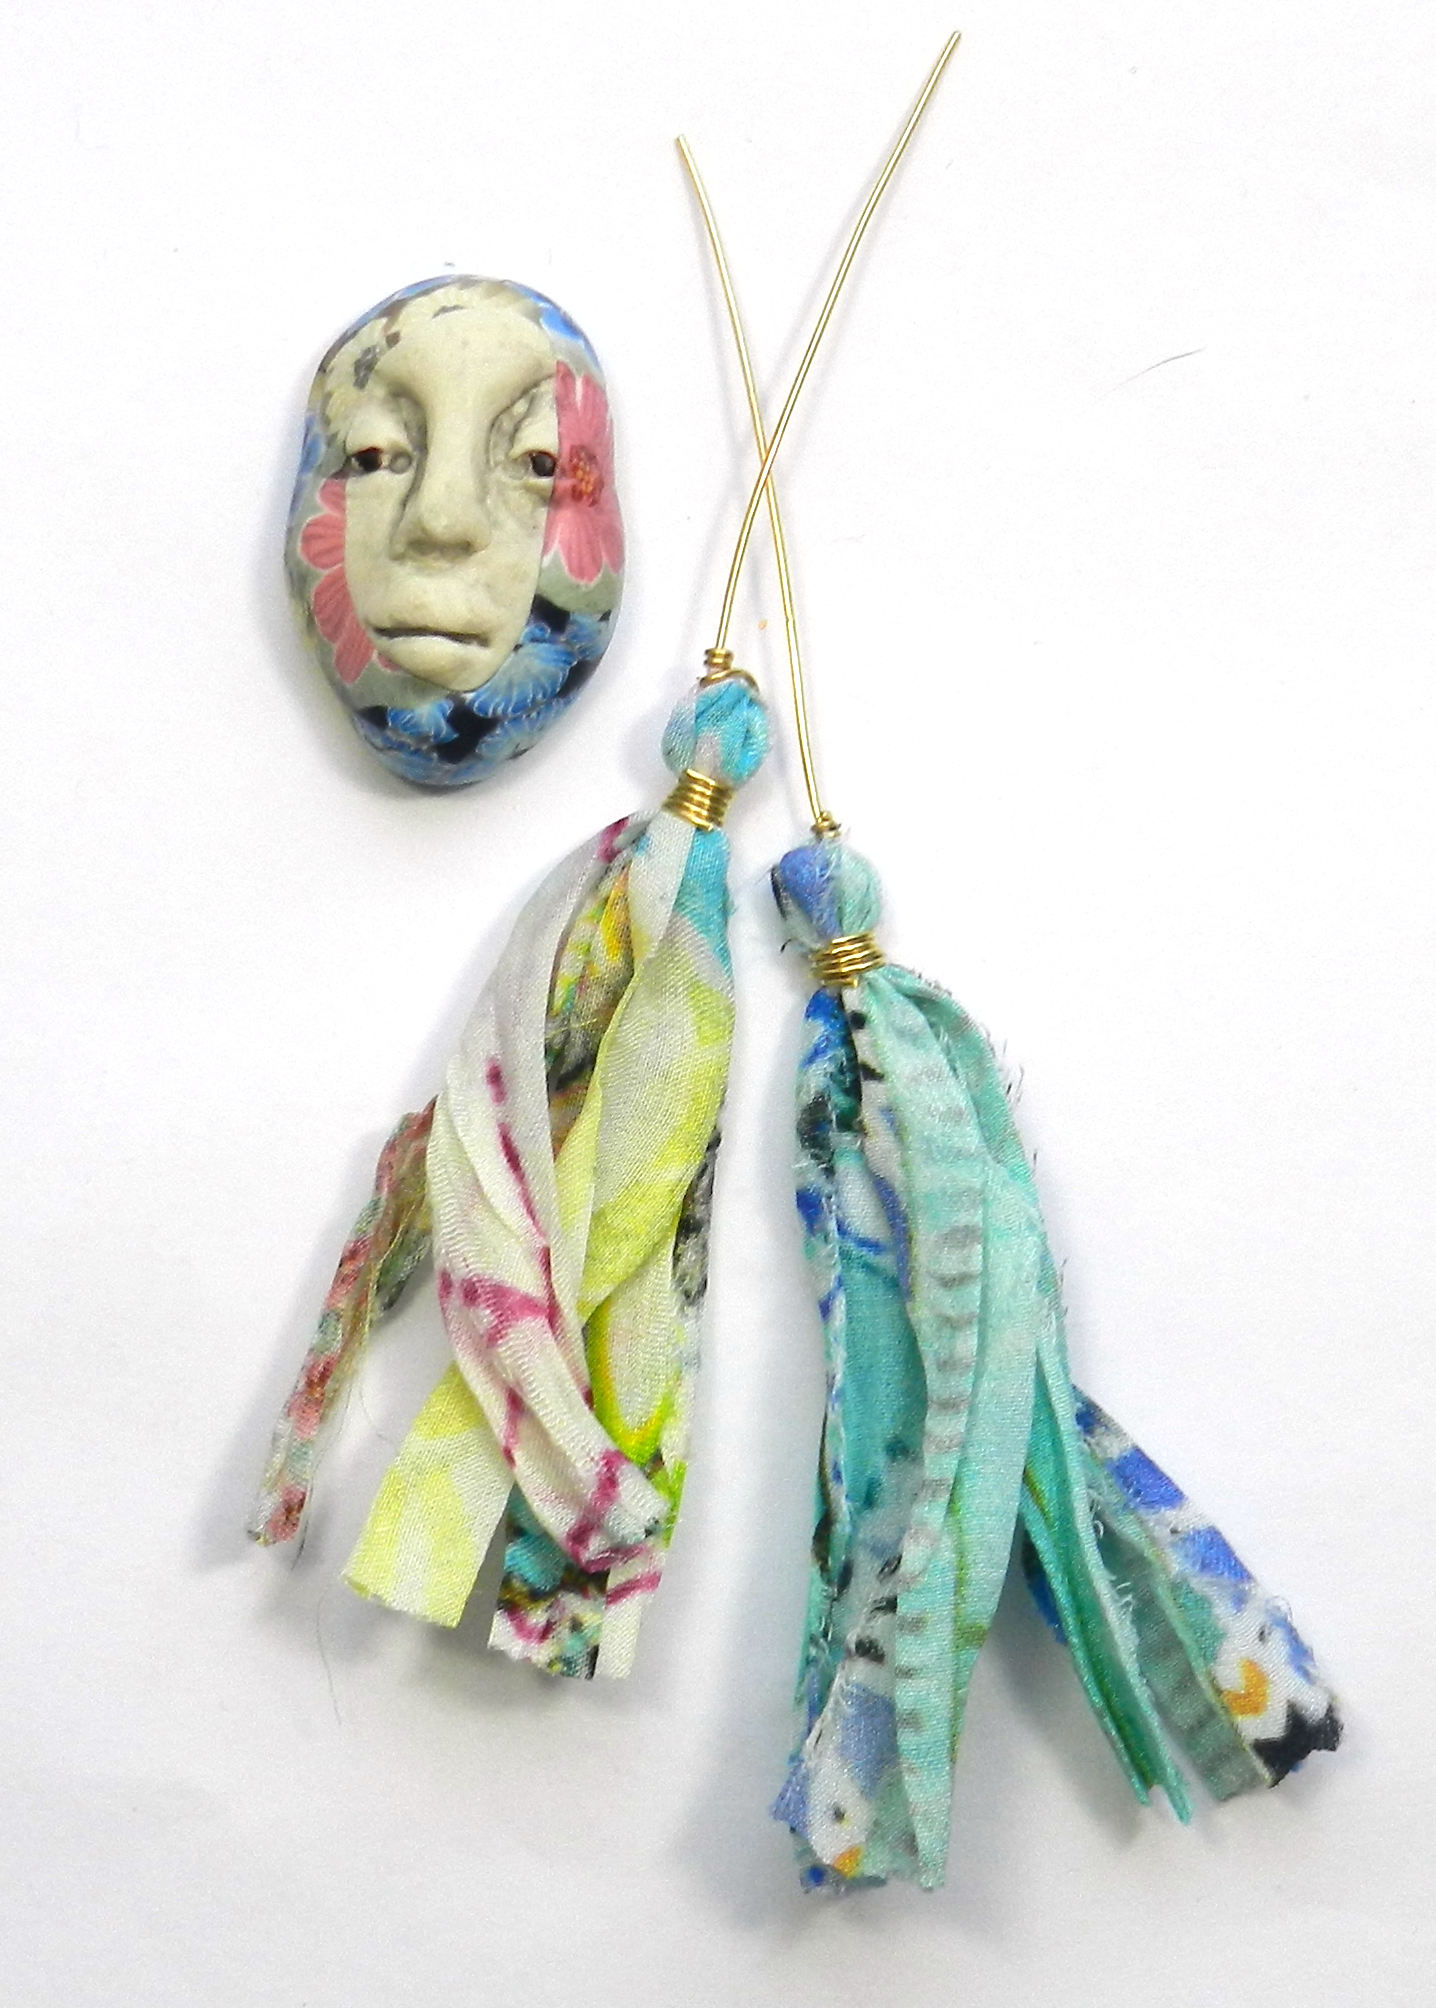
Now I’m having a great time pairing them up with beads for earrings, or with polymer clay faces, destined to be focal elements in bead embroidery, jewelry, collage…
I want to do some bead embroidered pendants next. I love how the colors of the textiles and the polymer clay or ceramics go so well together, and of course, beads will also be involved.
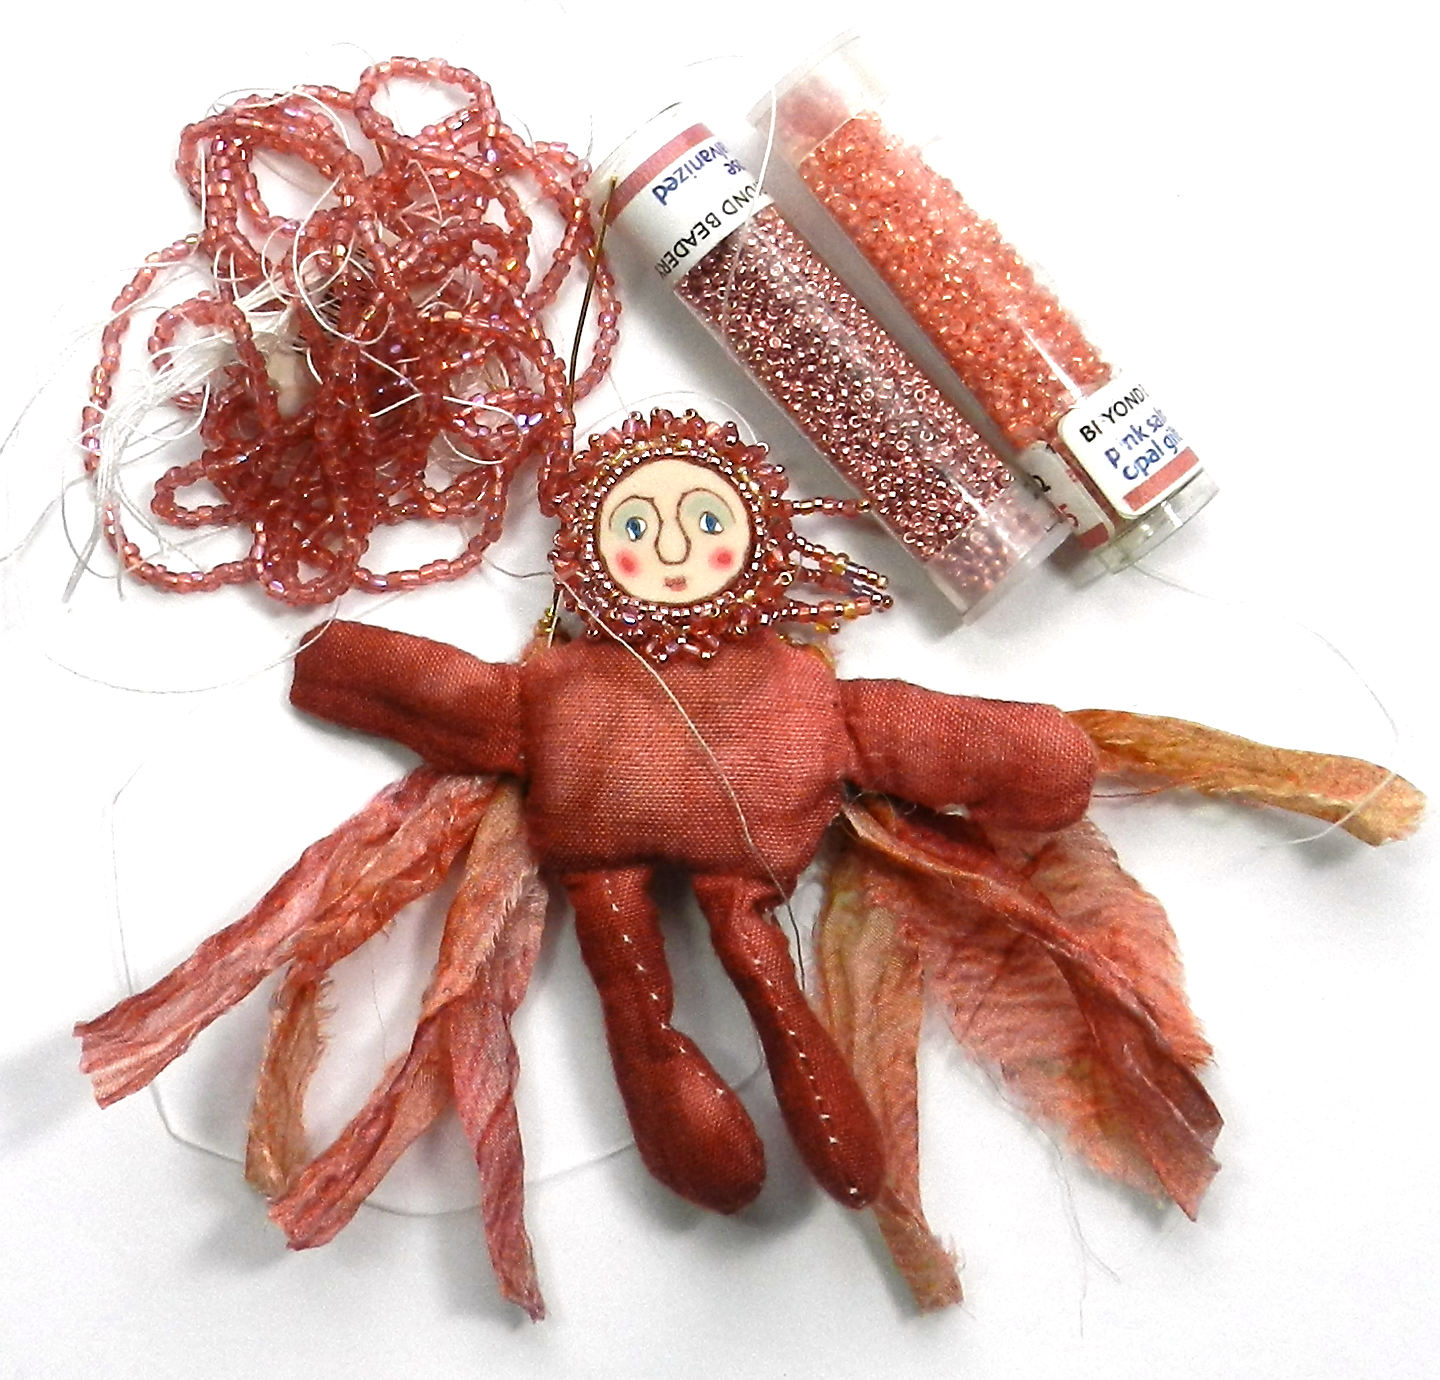
I’ve made some into art dolls, and they are a lot of fun to create! This pink 3 inch hand dyed doll is getting lots more beads, and will have silk chiffon tassels for wings draped down her back.
Nov 19, 2019
 Art Dolls are particularly fun projects for me because I love costuming and dress up, as long as I get to remain in comfy clothes and shoes–so with dolls I can indulge. Making art dolls can be a way of expressing and working though strong feelings, of pleasurably and creatively spending time by yourself or with like minded friends. Some dolls I make from cloth, paper or clay from my own patterns, but I also enjoy staring with a pre-made cloth body and dressing it up. I like the portability of these small projects. You can do a lot in a few hours or continue to add more and develop their style.
I’ve spent many years dyeing natural fibers with Procion MX Series cold water dyes, and built up a lovely cache of cottons, silks, and rayon. So, I put together kits with fabric, lace, ribbons and 3,5,and 8 inch cotton dolls. Then to some I added goodies like sequins, beads, Angelina fibers, dyed feathers, polymer clay or ceramic faces and vintage silk sari trim ribbon. I had a wonderfully colorful time adding ingredients to each kit, and now it is time to share the fun, so art doll kits are going up for sale in my shop here. I’ll be adding more all month!
Shown here is an art doll made from a 5″ art doll kit. I used scissors, a needle and thread, and some E-6000 to affix the polymer clay face to the body. I put a small heavy box on her as a weight as the glue dried to get a good bond. I used everything in the kit except a dozen beads or so. She looked great, but I wanted more..so I added some size 11 gold glass seed beads and size 15 glass purple beads. Much better! She still needs a bit of glitter, some feathers, some paper flowers…but I will come back to her another day. That’s my favorite way to play with dolls! In the meantime, I get to make up samples from the 3 and 8 inch doll kits next. Stay tuned!
-

-
3 and 5 inch dolls
-

-
5 inch doll kit
-

-
front
-
-
back
-

-
with more-front
-

-
with more-back
Mar 20, 2017
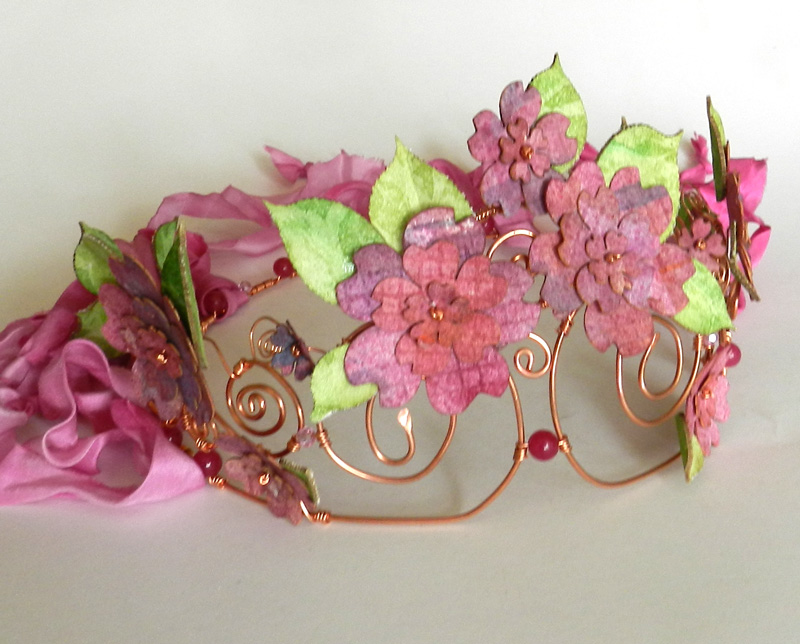

I think everyone would benefit from a having at least one crown. Pageants take up too much time for only one or two crowns, and not everyone is born into families that have a few to pass around. So, making your own is the way to go! I’m hosting a class at Tinkermill to do just that.
It has been such a busy season making things and taking pictures that I have not had much time for posting them here! I’ve been exploring the business side of social media and Facebook, and there is a Creative Connections Facebook page in a beginning state. I’ve found some great groups there with a growing array of artisans displaying their wares to a world wide audience. It’s hard not to spend too much time looking, and so I’ve been at the metals workbench, the dye pots and the laser cutter. I believe there are lots of colorful new things coming up this Spring! A little flower fae told me so. I like how she looks, just playing with the bits and pieces I have around on the workbench well enough to think it would be fun to host an after noon of making these little cuties too. I’ll have to add that to the calendar for later in April!
I’m marketing jewelry, components and digital downloads through several online outlets, galleries and bead stores. I’m also enjoying the luxury of big tables, lights, and cool tools at Tinkermill in Longmont. I’m teaching a wide roster of classes there each month, and I’m about to add some new ones.
Right now I’m enjoying an infusion of color and flowers for Spring. I Iove being able to bring all sorts of different elements together, like making a spring princess crown of copper coils, carnelians, and hand dyed ribbons, which would be at home in celebrations long ago and far away—and then decorating it with flowers made from handpainted watercolor paper cut with a laser beam! Such an artistic luxury to be able to combine drawing and hand coloring with laser precision. Computers and other great tools are a LOT of fun..particularly if you get to add paint, and dyes, and beads…so many projects comic right up!

May 31, 2015
 Some months there is just too much to do–too many projects and not enough time or energy to do them all. Still, that’s a far better problem than being bored, and I can thankfully say that I am never bored. During May of 2015, lots of projects moved along tremendously.
I worked on websites for clients using new templates and sliders, and branched out with a new website of my own that features my dolls and miniatures titled “Its the Little Things.”
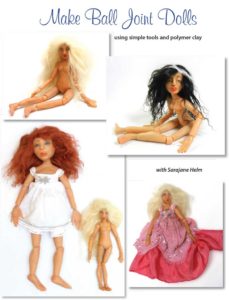
 I put a new cover on the Ball Joint Doll print tutorial .pdf showing all three sizes of the bjd’s made so far. I am also editing the 11 part video tutorial of the same and will be finished with that next week. I am promoting the Polymer Clay Adventure wherein these two tutorials are exclusively available, along with how-to projects from more than 20 other polymer clay artist instructors.
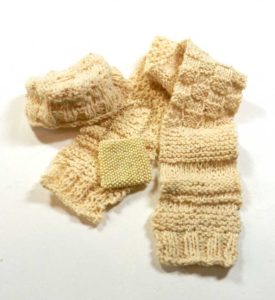
I’m also continuing to find the occasional odd hour or two (often on the bus) to do some knitting. I’ve learned to add beads to the yarn and to reduce and increase stitches. I’ve tried knitting with 4 needles, and made a scarf and hat for my doll Aurora Rose, along with a little beaded purse.. I’m working on a tunic for myself, with beads on the sleeves and front section, and it is about half done, and will likely be just in time for fall, if I keep at it!
 Also coming along is the work to make Creative Connections a Non Profit Organization that will allow me to expand the reach of what I do, bringing classes and mentoring to emerging artists in schools, community groups, and organizations. Stay tuned for more about that this summer!
Jan 12, 2014
 I graduated from Front Range Community College with my Media Graphic Design degree, and I’m going to continue taking ceramics, jewelry, and other art class as I can afford them. We have some GREAT classes and instructors there, and I will stay on as a student or community member of the FRCC Art Club. We are seeking new officers there, as Josh and I are no longer full time students on this campus.
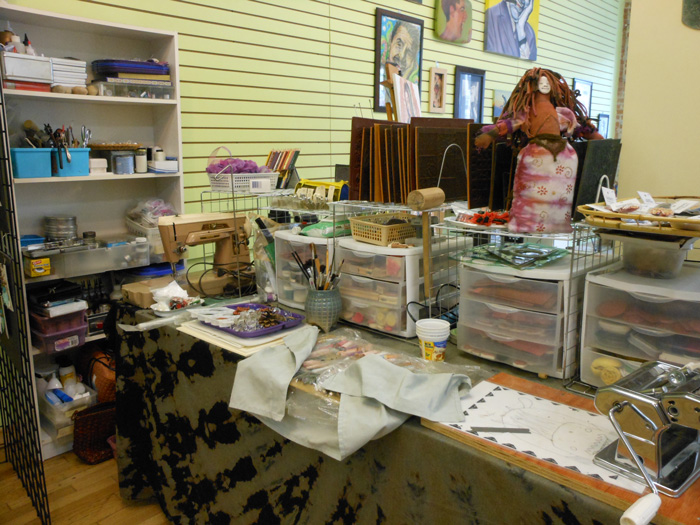
One of the things I’m doing in this new year is new art and instruction in a new studio space. Located at 364 Main Street in Longmont, the Kay Carol & Priscila | Gallery and Working Art Studios is home to 4 artists in residence, instructors, art groups and community organizations who meet there, and a gallery plus meeting/classroom/workshop space. I’m very fortunate to be there, and I have started a website there with a calendar and a page that lists upcoming classes and events.
I’ve already had fun with several Spirit Doll sessions, and here you see the new faces and molds I made during the polymer clay face sculpting class. I’m looking forward to using them with polymer, ceramic, bronze and silver in the upcoming months. They’ll be useful in the upcoming Miniature Mask Swap, and in the month long exhibit of masks and art from my PolyMarket Press books in June. That may sound like a long way off, but as I have so many things to make and write about for upcoming books as well as hundreds of masks to mount into large frames, fabric to paint, jewelry to finish and more, it seems like only a few weeks away. However–now I have a workspace in which to do it!
Please do come see me there during open gallery hours 10:40am-4pm Fridays and Saturdays. Or, book a class with a friend or a group. Individual instruction is available as well–we are dedicated to spreading the creativity around.
Jun 20, 2013
 I’ve made great progress on projects this Spring, and I’m celebrating the Summer Solstice working on more.
I’ve learned a lots recently–from odd count peyote stitch and right angle weave beading to making my first ball jointed doll in polymer clay.
Meet Aurora Rose! I really like how she turned out; not bad for the first try. Of course, I’ve made a few dolls of various sorts before…but I also know that each one gives you experience in new things, and she certainly did.
I rearranged my living room and laundry room to provide more work space and access to all my fabric and my sewing machine. After a good cleaning and oiling, it runs like a champ, and its been doing so since 1960. I just love my heavy old Singer, and wouldn’t trade it for the newer models.
I got patterns for her clothing from Matisse Fashions (Brenda is an incredible seamstress/designer) and found that I remembered how to sew pretty well but will no doubt improve with more practice this summer. Lots to do!
She’s show here in a variation of the pleated chemise and drawers patterns. I didn’t add the waistband, and left it a bit long to be a set of cool cotton pj’s made of fine cotton lawn and embroidered with peach roses and teal green leaves.
Dharma Trading Co. carries cotton lawn and many other wonderful fabrics for use in doll making and clothing too.
See more info and pictures of how Aurora Rose came together here.
May 6, 2013
 We’re almost done with Spring Semester and in between studying for finals and doing my homework, I’m working on projects for upcoming books through PolyMarket Press, my burgeoning publishing empire.
I went back to college to learn the programs needed for publishing, and I’m now one Business Math class away from an Associate of Applied Science degree in Media Graphic Design (Print and Publication). I’ve taken a lot of art classes along the way too, which, though they don’t count towards the degree, have been wonderful learning experiences in ceramics, metal work, and watercolor as well as web design and graphic arts.
I’m signed up to finish this degree during summer semester–along with finishing several new printed books and E-books. Some are mine, and some are with other artists and authors. I’m excited to see the growth of skill and projects and the forming connections that strengthen both the work and the workers.
 I’m also getting back to working with polymer clay now that the weather is turning warm again. I’m documenting the progress of dolls for Making Faces, Molds & Forms.
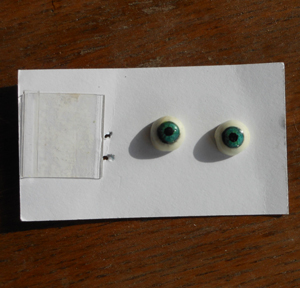
That includes new forays into ball jointed figures and making set-in eyes as well as painting eyes on clay and on fabric.
Here’s a look at a sketch for ball jointed dolls in several scales and a pair of eyes that are part of the 15 inch doll I’ve started. I’ve got the foil armature covered with a layer of paper mache, all ready to cover with polymer as soon as school is out and we are on break. It was easy to work to the right size with a sketch. Thats not something I usually do, but I wanted to give it a try along with with making the ball joints instead of a single pose sculpt.
The eyes are shown on the back of a business card, to give you the scale. They are around 1/2 inch in diameter. I’ll be making lots more too, as I’ve got dolls to make and tutorials to write and shoot.
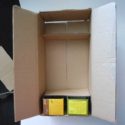
They just HAPPEN to be sizes that go with the projects I’m putting together for Think Inside The Box-–which will feature many projects that transform boxes into beautiful miniatures in several scales and styles!
Here’s the armoire that is part of that doll’s suite. She gets an armoire, a bed, a bedside table, a rug and other decorative details, and a wall.
There will be variations on that in other sizes and styles; but this is a start!
-
-
a frozen food box with 2 tea boxes, with a priority mail box added at the base next
-

-
two layers of paper mache and dowel rod
-

-
ready to line the drawers with paper, add knobs to the doors, and some wire hangers
Nov 11, 2012

I’m home from Houston, after another wonderfully colorful and inspirational Quilt Festival. What fabulous things people can make with fabric and fibers of all kinds!
With an eye towards historical, vintage and cutting edge (literally; there are several booths selling scissors and sharp tools and pointy things of all sorts) textiles and fiber arts, there is so much to be seen at the George R Brown Convention Center that you just can not do it all in one day. It is as large as 9 football fields, with over 1000 vendors–and I was one!–plus amazing exhibits of quilts, textiles from around the world, art dolls and more.
I had a wonderful time and came home inspired, as always, with how to change my booth display ( more grids–they work really well for me, pare things down and keep back-stock), what to make for next time (more of the Painted Face Bags and more polymer clay Victorian Hands, more of my dyed fabric in wearable form that goes with more colorful jewelry!
But that’s next year…. now its time to finish up final projects at school and get little rest over the upcoming holidays. Maybe I’ll have time to learn how to learn to use the kumihimo braiding wheel my friends got for me at the show!
Aug 27, 2012
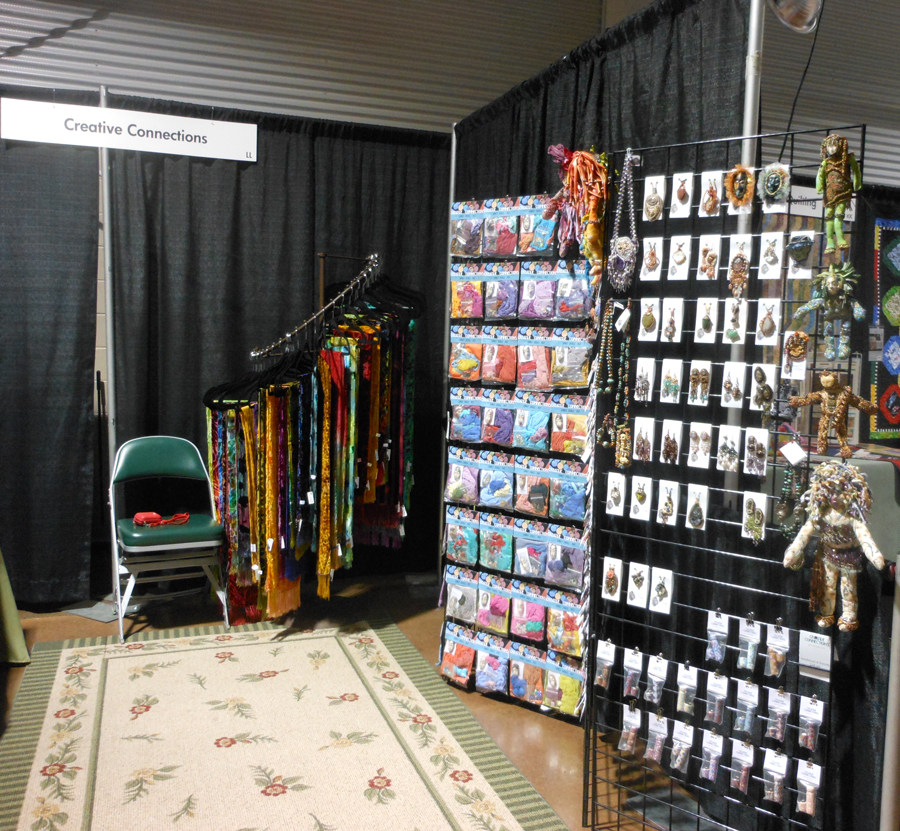
Laura Humenik of Lands Glory Artisan Jewelry and I had a booth at the Rocky Mountain Quilt Festival this year. I saw lots of beautiful quilts while there, and the dolls from the Hoffman challenge too. While sales were slow, it was good to get out and try my new grid display and new ways of presenting things in the booth. It’s also a great way to see what is popular in this area and what I need to make more of before the next upcoming shows. All in all, we were glad for a chance to try and new venue and see how everything looked set up in this configuration! I really do like my new grid displays. This time I have them set up like a folding screen. Here are some pics from the show–click the image to see a larger version.
Aug 5, 2012
 Quilters, beaders, and textile artists are some of the most colorful people I know!
There will be a lot of us–and a lot of color going on–at the Rocky Mountain Quilt Festival coming up this August 17-18-19 in Loveland, Colorado.
Please come see me and Laura Humenik at our booth #LL and see all the hand dyed scarves, ribbons, textiles, and Spirit Doll Kits. Shown here are some three inch tall colorful babes that are hand dyed cotton with polymer clay faces attached, all ready to decorate. Now I have to finish packing them up with sequins, and dyed feathers, ribbons, fabric and other trims! The colors are all a result of our Annual Dyeing Days color marathons.
We’ll have beads, cabochons, buttons, and all sorts of beautiful, colorful wearable art, and art-parts!
Title: Rocky Mountain Quilt Festival
Location: The Ranch | 5280 Arena Circle Loveland, CO 80538 Booth #LL
Link out: Click here
Description:
Fri. August 17, 2012 10 am – 5 pm
Sat. August 18, 2012 10 am – 5 pm
Sun. August 19, 2012 10 am – 4 pm
Start Date: 2012-08-17
End Date: 2012-08-19
Dec 31, 2011
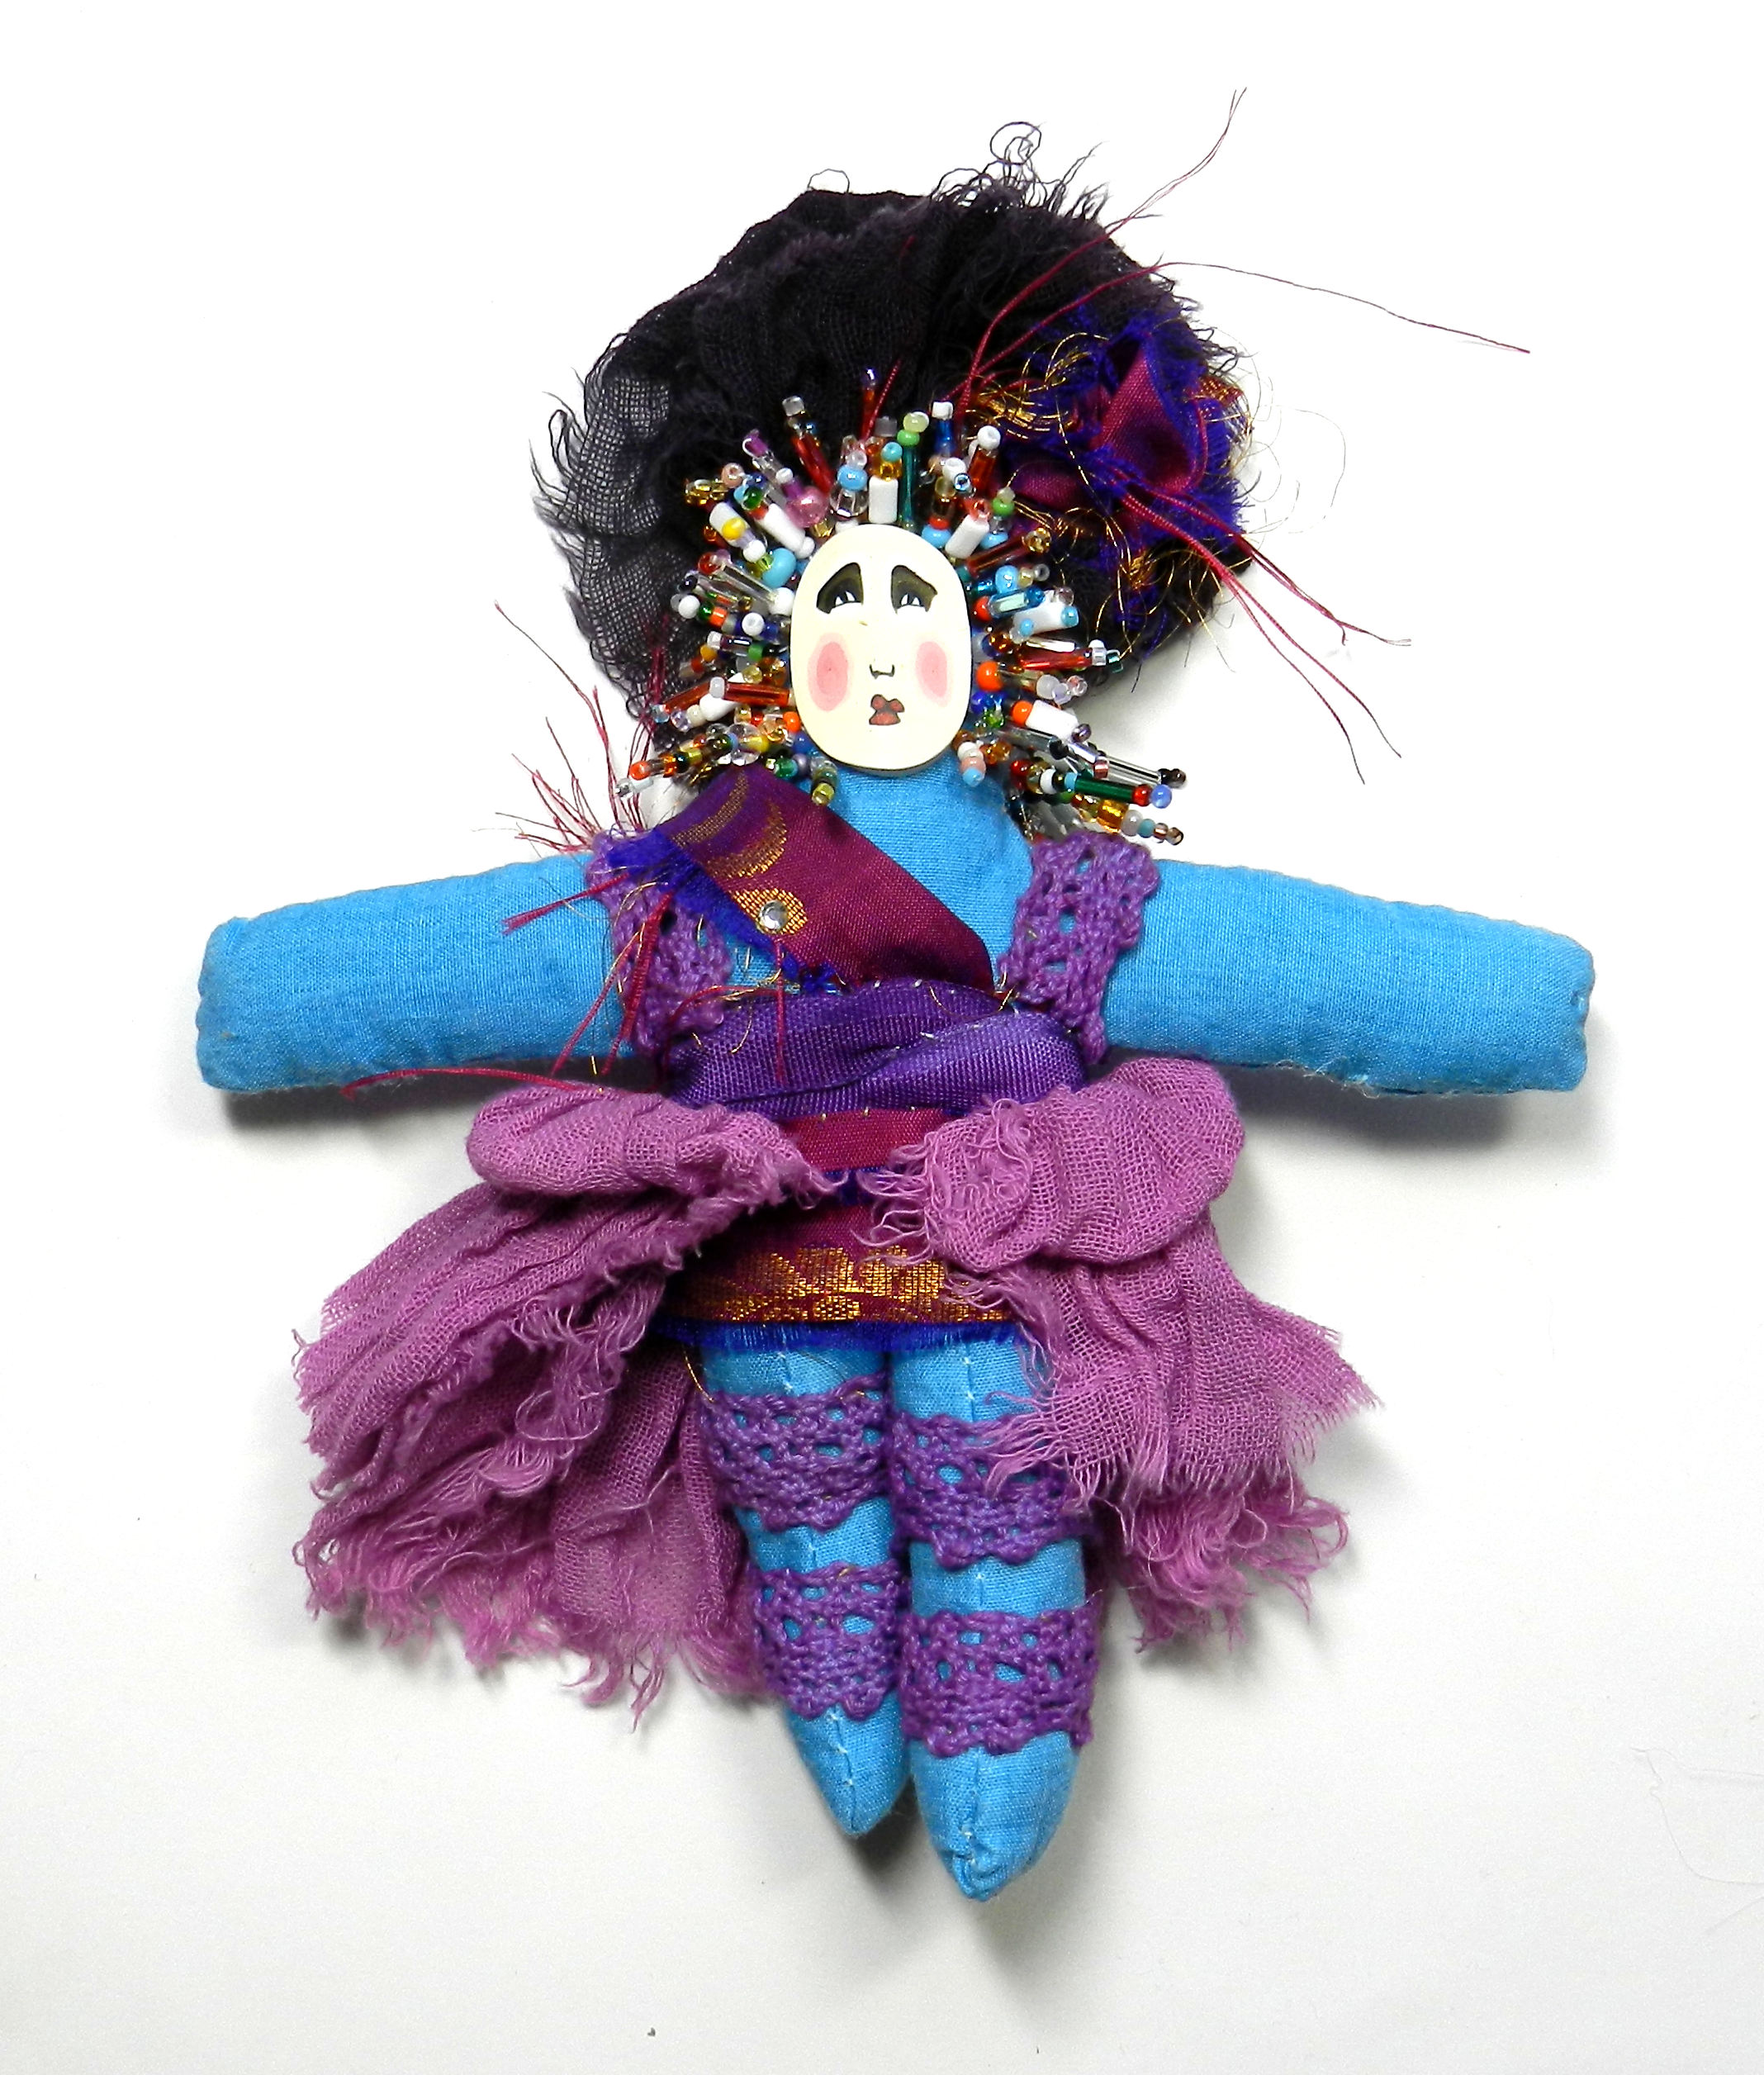
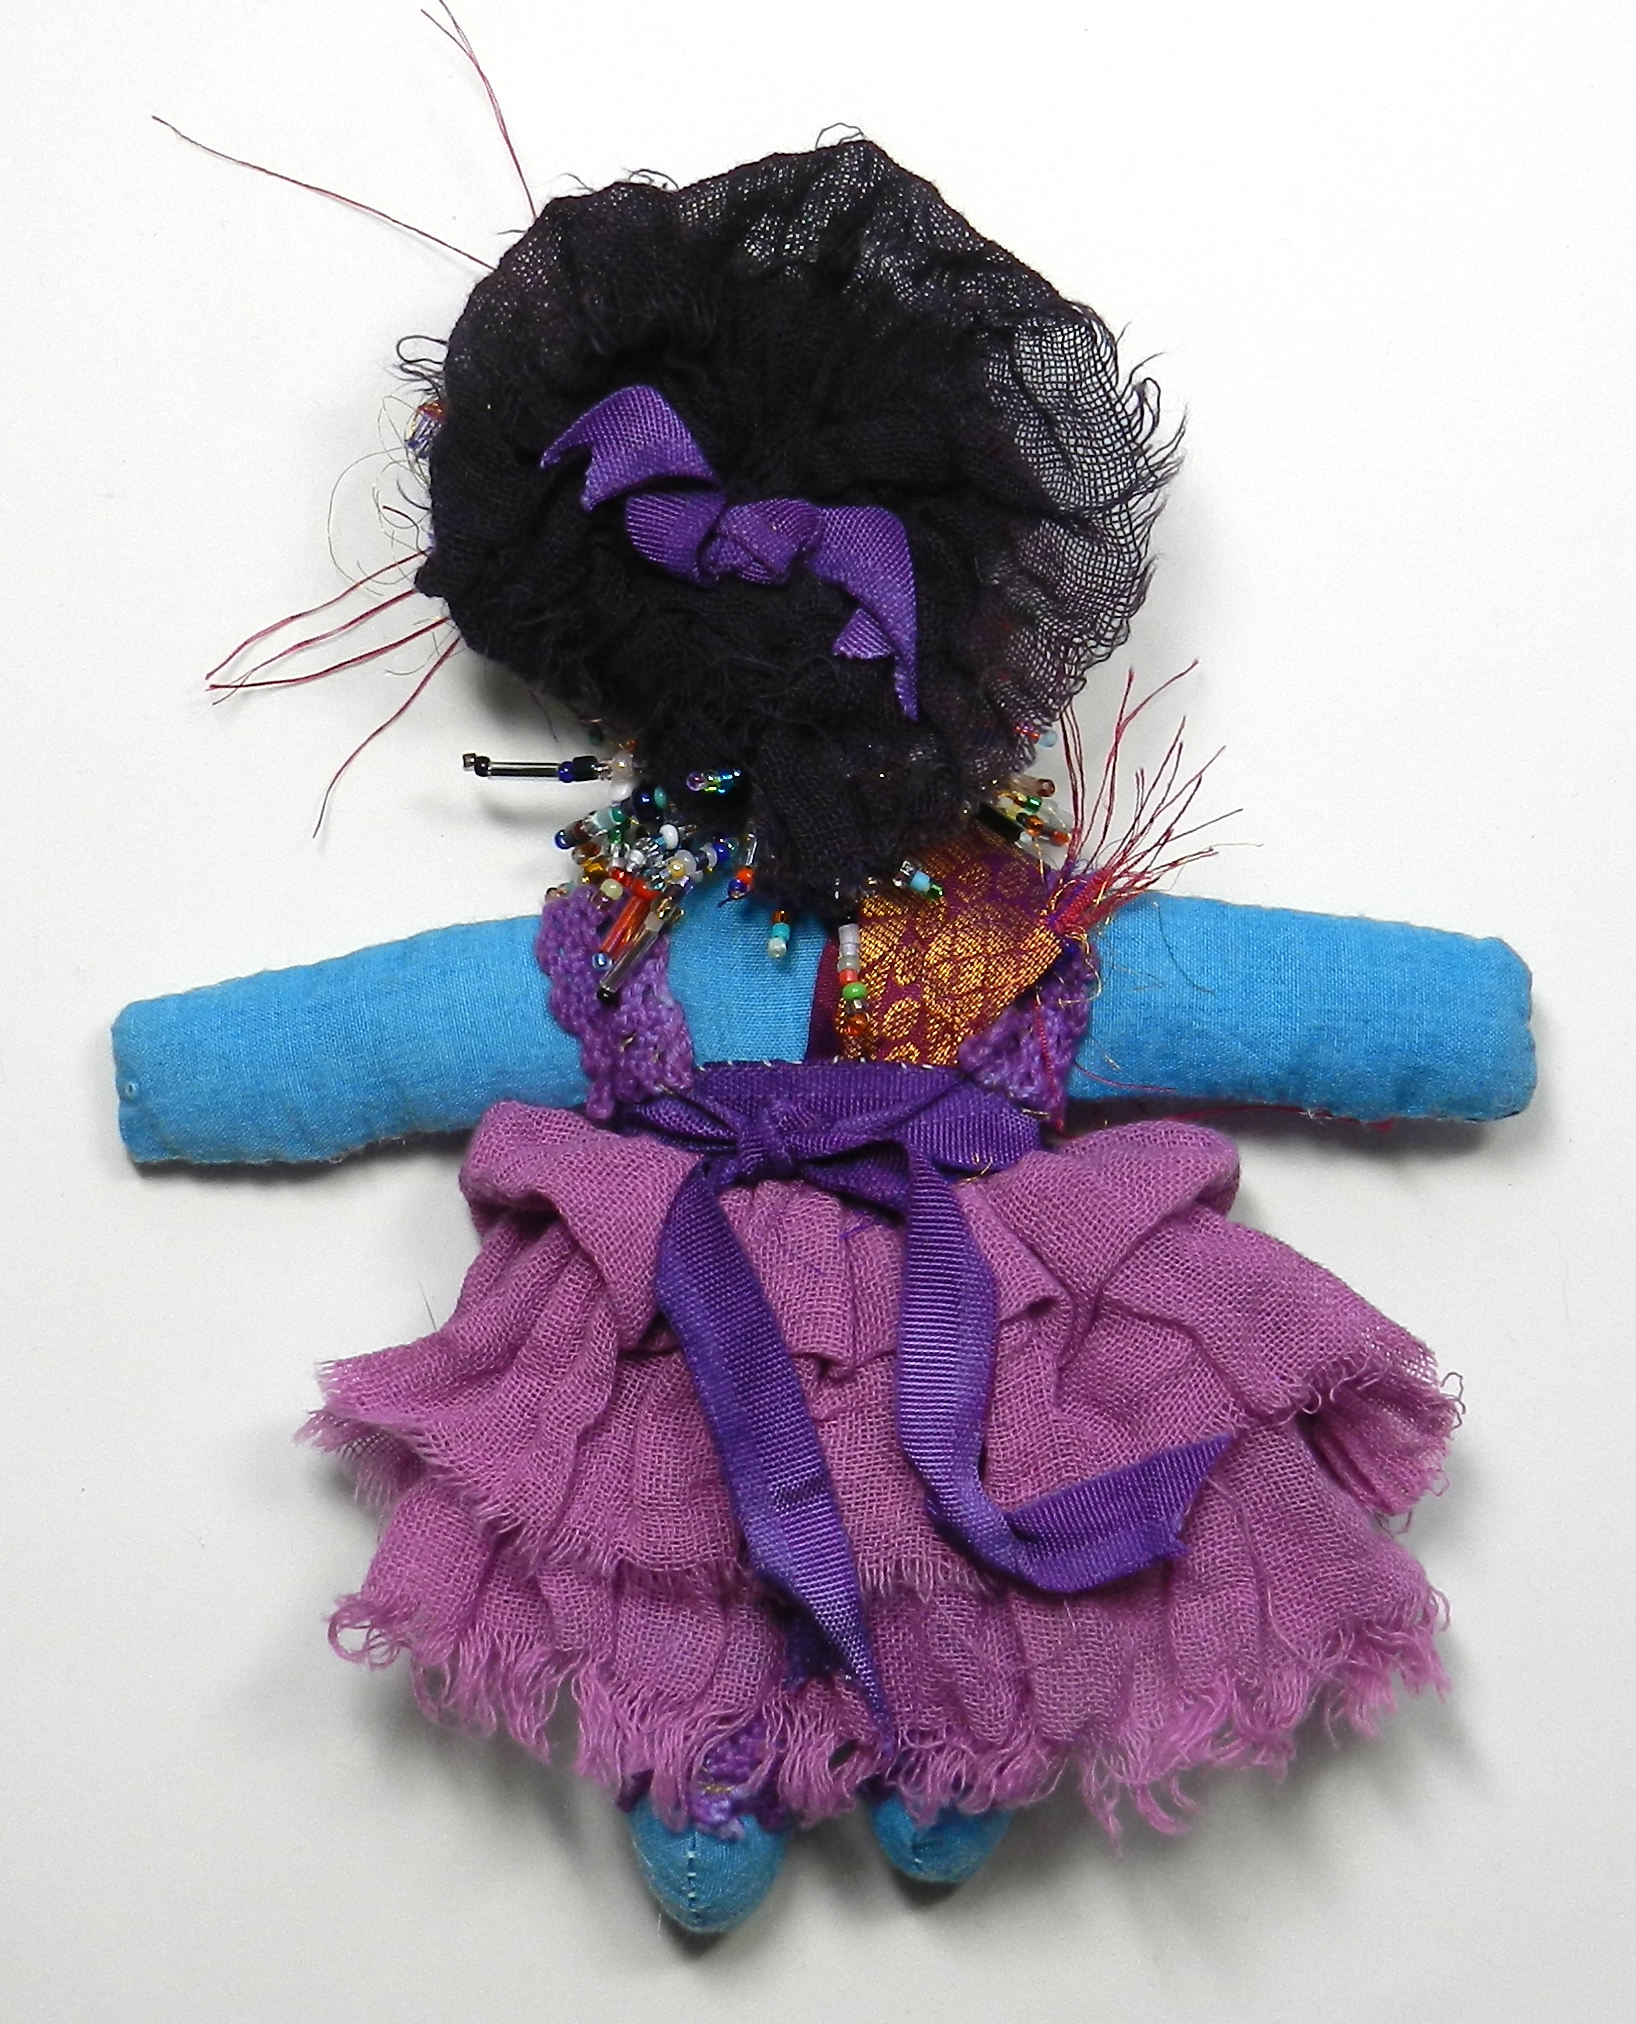
 Not only have I made a start on the pink and purple spirit doll, I’ve also had some great ideas recently about how to combine textiles, metal and clays to do bead enhanced spirit dolls with ceramic and metal bodies. I’m looking forward to getting back to school in the new year to make up examples of what I’ve been seeing in my imagination. A few things finally fell into place with the “how will I do that?” aspects and I look forward to realizing these very soon.
In the meantime, there’s lots to do with making up Spirit Doll Kit Samples and getting the bits and pieces all pulled together for making the new ladies and producing new finished work to get out to stores and galleries.
So much to do–and I do love doing it! Over the semester break I’ve had a chance to rest, see family and friends, read, and to delve into my art supplies to work on old and new projects both.
What a wonderful year of artistic and personal opportunities its been in so many ways…and I’m looking forward to more in 2012!
May we all appreciate and cherish the marvelous parts of our lives, past present and future…with lots more to come!

Dec 23, 2011
 I’m enjoying the break between semesters and taking some time to restock the shelves at my Etsy store. I’ve had a very busy and productive year in 2011, and now it’s time to share some of the results.
I’ve revamped the packaging and I’m putting together more Spirit Doll Kits with ceramic and polymer clay faces that go with dyed cotton doll bodies, fabrics and trims.
In addition, I’m making up the contents of each kind of kit for a sample or two, and taking pictures as I go.
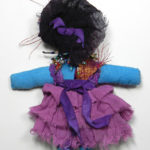
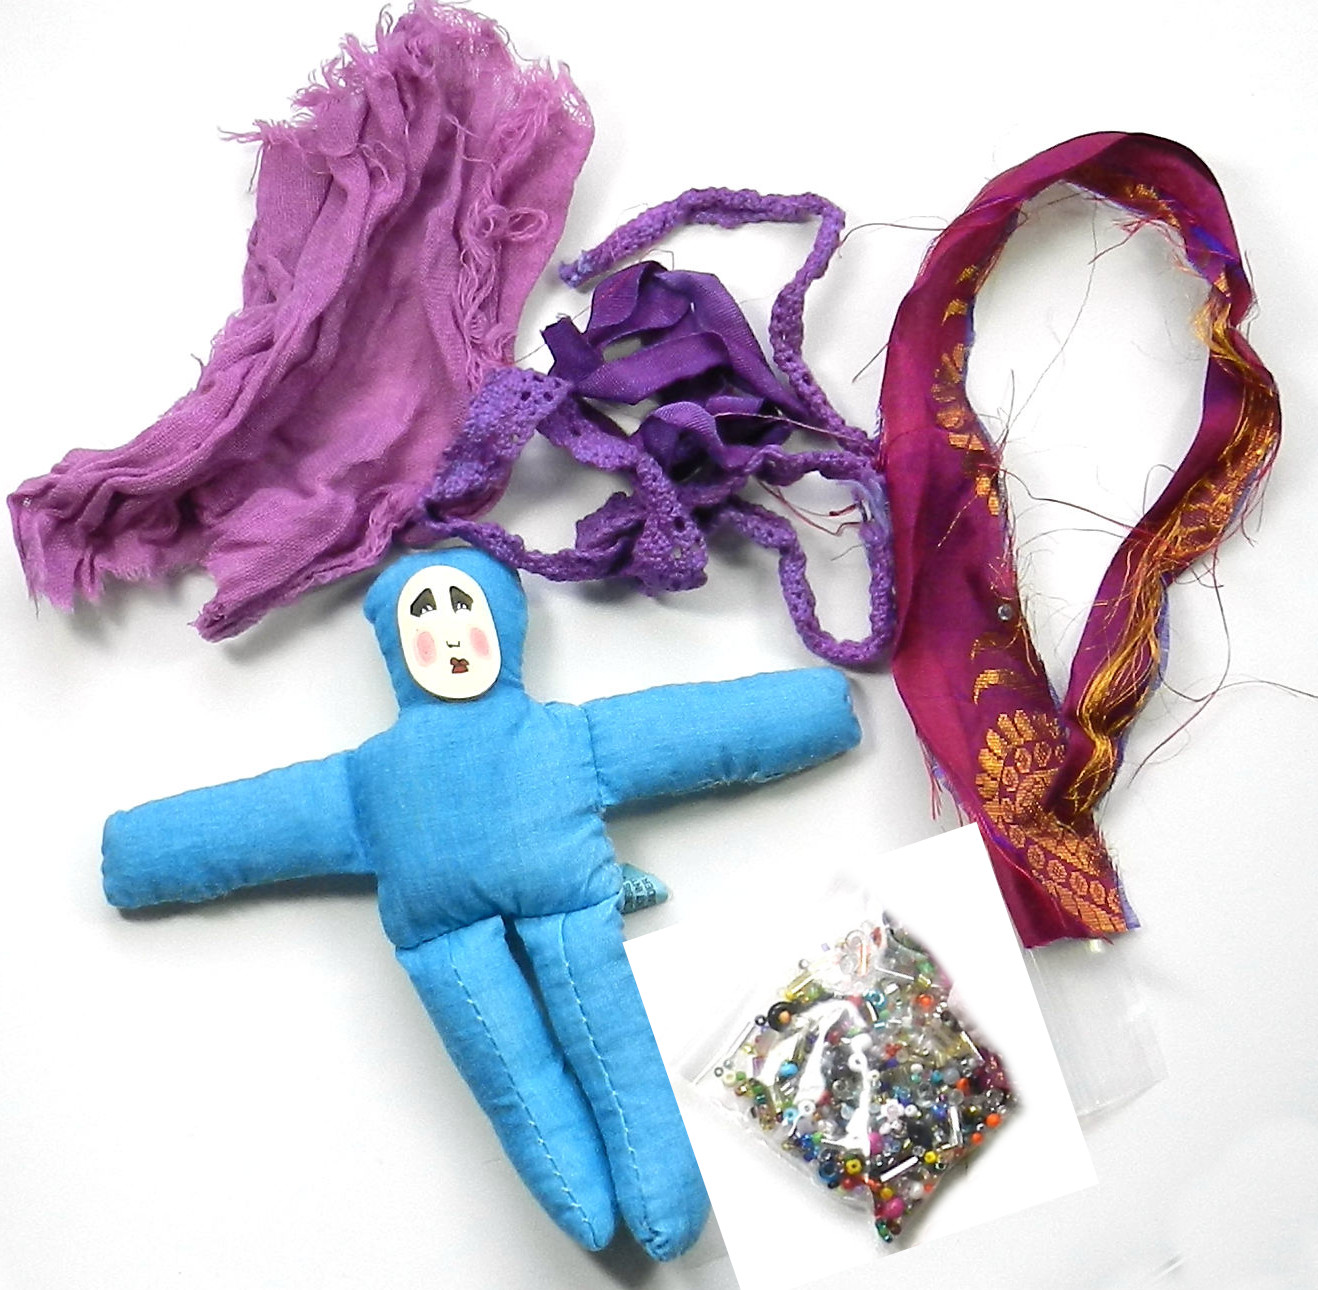
 Here’s a picture of the contents of a Large Spirit Doll Kit. I’m going to spend a few days working on this doll, adding some beads and silk flowers from my stash of stuff, and do a bit of embroidery.
I’ve been wanting to do a little needlework and this is a perfect spot for some! I’ll be taking pictures as I work on the doll, and I’ll post an update after Christmas.
Large Spirit Doll Kits like this one have contents that include:
- one ceramic face, hand drawn and painted with under-glazes and clear glaze, affixed to
- one (premade) 12″ hand dyed cotton doll body,
- one 18″x 22″ (fat quarter) piece tie dyed cotton jersey
- assorted dyed fabrics, trims and embellishments

I also sell the ceramic faces by themselves.
I made a specially shaped cutter from a strip of aluminum, cut each face from a rolled ceramic sheet, then shaped each one with a curve.
After they dried, I sanded each one to get smooth edges and a good surface for drawing the faces.
After the pieces were bisque fired, I drew and colored them all in with painted under glazes and gave each a finishing coat of clear glaze before firing them all again!
The results are colorful “dolled up” ladies all ready to turn into dolls, or wearable art.
Jul 2, 2010
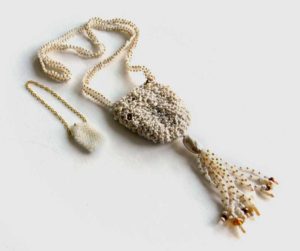
 A summer time face pendant with a flowered babushka head wrap and beaded embroidery shows off luscious fringe in beautiful shades of berries and teal with long crystal twist is a great example of the fun can that come from collaborations. I made the face from polymer clay, and Laura Humenik of LandS Glory Artisan Jewelry did the yummy bead work. She has amazing patience, a wonderful sense of color, and has collected an amazing variety of beads. Her beautiful pieces are wonderful–do take a look at the the LandS Glory gallery page. Laura creates all sorts of things that are better with beads–pendants, necklaces, Spirit Dolls and more plus dyed textiles that showcase more of her love of color!
I’m making lots more polymer faces in the same “babushka” style with lots of different millefiore cane patterns for the headwraps right now, and I will show them off in the next few weeks. Between the silver and bronze metal clays, ceramic clay, and polymer clay, (even painted textile faces!) I’m making hundreds of faces, and each one a bit different. Be sure to check back in the next few weeks to see more!

Jun 20, 2010
 Yesterday my friend Laura of LandS Glory Artisan Jewelry and I set up shop for the day at the Lyons Outdoor Market in the beautiful foothills of the Rocky Mountains here in Colorado. It was a gorgeous day, and we got to see some lovely art, listen to live music and do a few hours of beading on Spirit Dolls. Laura and I both enjoy seed bead embroidery and finding just the right bits and pieces to go into the dolls. There’s no pre-planned design; rather, these pieces start as a collection of bits and pieces and parts and then as they come together, other bits and pieces seem to show up and present themselves, demanding to be used. “As the spirit moves” is the way Laura and I both prefer to work, rather than using any sort of drawings plans or patterns (other than the basic doll body outline pattern that I drafted).
This project got started a few months ago, but is just now really starting to come together. I pulled a few items for this doll that included some green tie dye fabric (click here to see the slide show of textiles from our annual Dyeing Days, beads, a glass cabochon made by my fusing friend Mad Margie that I beaded, and I made a ceramic face and two ceramic buttons for her breast plate.
I cut,sewed and stuffed the body. My least favorite part is stuffing, and sometimes I just use pre-made cotton bodies that I dye, but only for smaller dolls. Its worth the turning and stuffing drudgery to get to use my own textiles… and since we are only talking about less than an hour, I somehow manage to get through it!<g> Then comes the fun part, hours of beading, adding dyed trims and other costume fun.
These dolls come together in several sessions for me, a few hours at a time. Usually as I’m working, I’ll find other pieces to integrate into the piece–like some beautiful teal dyed cheesecloth, or peacock feathers. (they’ll be part of her skirt and head dress, eventually—along with more beads!)
This time, I lost a piece. One of her busty-buttons went away somewhere in my workspace. I’d already sewed one on, so I looked and looked…nowhere to be found. I thought about making a new one to match. I thought about taking the one off and using something different. Then I realized, as I looked at her again and again, that she was just right the way she was, with only one. After all, sometimes these things happen. She’s beautiful anyway, and I choose to see her as just right, not as missing half a pair. How we look at things is just as important as how things look.
She has a sort of Amazonian Dance Hall Warrior style going on, and I love seeing her progress. I’ve got a lot still to do, with adding hair, shoes, sewing on her skirt, and sequins and beads for the other arm and leg. And of course MORE BEADS!! I’ll post another picture of her when she’s finished, and here’s how she’s looking so far.

Apr 9, 2010
 That’s a line from an old Cowsill’s song, an early Family Band that doesn’t get as much nostalagia air time as say, the Osmond or Jackson Family does now that everybody is all grown up. “She was the flower girl–well, I don’t know just why, she simply caught my eye….”
And here’s my own flower girl, a life-size ceramic mask glazed with cone-06 low fire glazes. I might have to do some more of these big masks as they are indeed fun, though pretty heavy compared to the miniature ceramic masks I make more often. And speaking of those, I am now arranging my summer schedule, and THIS year I’m taking the summer off from school to finish photos and editing for my new book “A Collection Of Polymer Clay Masks”. It is on-track for release this Fall. That’ll keep me busy, and I’ve also scheduled a trunk show and classes at Nomad Beads in Boulder where I’ll be selling miniature ceramic and polymer faces, beads, and more! Come see all the goodies on display Mother’s Day weekend, May 8-9 at Nomad Beads, 1909 9th in Boulder Colorado, and say hi; I’ll be there creating beaded Spirit Dolls and jewelry.
May 16, 2009

Whew! What a huge undertaking, and what wonderful, amazing small rewards! I mean small as in “miniature”, or specifically “fits inside a three inch square” (more or less). Several years ago I was invited to take part in a Polymer Clay Miniature Mask Swap by Sherry Bailey. I was in one of the several groups, and sent in my masks. Shortly thereafter I got my box of goodies, and kicked myself all around the room for not having been in every group—there were pictures included and I missed out on some real gems. I vowed never to repeat THAT mistake! And also to be in another mask swap ASAP. I ended up taking over the job and expanding the number of participants (my artistic greed knows little about bounderies or sensible work loads in some areas…)
So for the last few years, there’ve ben annual swaps that attract wonderful artists who ALSO want collections of these minimarvels. When announced, interested parties sign up for one, two, or three groups of ten. The SwapMistress (thats me, in this case) keeps track of who signs up, and fills the groups. We do a total of ten groups of ten people. For each group, the participant sends in ten masks, all signed/with a card and bagged. When they are all here, my husband and I alphabetize the incoming boxes for easier finding, and then start filling up Group Bags by lining up the brown paper lunch bags. Starting with 10 bags marked “A” we check the All Powerful List and take out each participant’s set one at a time–If Mary is in group A, we put one of her masks in each bag, and the same with the other 9 participants. At the end, each person in Group A will get a Group A bag mailed back to them, containing one of their own and one of each of the other 9 people’s masks. Sounds fairly simple, right? It kindof is…except then we do it for B, C, D, E, F, G, H I and J groups. This generally takes a full day–there are a thousand little masks. Then, the next day, my dear sweet hubby and I start packing boxes. If Mary was in Group A, D and F, we pull an A, D and F bag and put it aside for her in a grocery bag marked with her name and the groups (cross checking is pretty important!! ) with the mailing lable and postage she sent. This also takes a day or so…and then there’s the packing and sealing of the boxes, and three hours or so at the Post Office.
I, being the SwapMistress and therefore In Charge, get to violate the “three groups” thing and be in ALL ten groups. This is great because I get to keep one from every person in every group–no more missed gems!! Except of course for the people that make it harder to choose by sending ten that are all different for their sets. Then I still only get to keep one, but I DO have the opportunity to unbag and photograph them all, then rebag before putting them into the group bags. So I say it again—its a huge undertaking, but OH-so-worth-the -effort. I end up making and giving away 100 miniature masks, and getting 100 masks to keep. All are individual works of art showing a vast array of techniques. All have miniature size and polymer clay in common, and “masks” as a theme, but all are astoundingly different interpretations of that theme. I will be photographing the collection that I have gathered over this decade, and putting them in a book, but I’ll share a few of them here on this blog, and you can see some masks from previous years here.
The group of ten Warm and Cool Masks shown above was sent in by Karen Cowles. The two masks below made using the alcohol inks on polymer clay were sent in by Nina Owens. The light was fading and I only had time to take a few pics. I took more the next day, so watch for future posts! You can also see more at other participants’ blogs like these by Laurel Steven and Tonja . Click the pics to see them larger.

Feb 20, 2009

“You are what you love–and not what loves you back”.
That’s so true–and its also part of a line from a song by Jenny Lewis and the Watson Twins from a CD that I really love, “Rabbit Fur Coat”. It is a delightfully witty and beautifully played set of songs. I’ used to love to listen to music and do my homework….Recently I went back to college after a long winter break that lasted 30 some years. I’m enjoying all of my classes, especially learning about Adobe Photoshop and Illustrator. What wonderful tools!! I’m learning a lot of things that I had no clue about in these programs; some of the tools just don’t lend themselves to easy self-discovery. Even reading about them isn’t the same as having someone show you what the tool does and how it works and then practicing it for a while. Oh, the joy of realizing that something you’ve been frustrated at can indeed be done!
Now I am doing something I really love a lot; taking bits and pieces of art that I have and re-contextualizing them in new ways. Collage and mosaics and masks and miniatures and textiles and image manipulation all play a large part of “what do you do?” for me, and its wonderful to be moving into the next layer of “how do you do that?”. School can be really illuminating; and it certainly lights up lots of new creative connections, even in older brains like mine! Using what’s old and making it new again is what creativity is all about. Here’s a recent assignment; a collage that uses Photoshop layers and masks, plus a quote. It features a doll (BonBon Bertie) and her setting that I made with fabric and FIMO polymer clay photographed by Bob Grieser back in 1999, and other images–plus the quote by Jenny Lewis!
You can see more dolls here, and at Aunt Acid’s blog.
Jan 19, 2009

With a CanoScan 8800F scanner in the house for the last month, I’ve been scanning slides and family photos, editing with Adobe Photoshop and making slideshow presentations to burn onto CD’s.
The scanner gives me access to all the slides that always lived in the box at my Grandparents’ house, first cupboard on the left in the living room, top shelf. And if we were good, my sister and I could look at them in the viewer.
Looking at those slides now digitized, thinking of the technology I access now and the technolgy of then–our world (my world) has certainly come a long way since the late 1950’s! And somethings are just the same–I still like to draw. Its just the tools that change, not the joy in the creative connections!
 I’ve done a slideshow for my friend Margie’s family reunion too. (Take a look at her freshly updated glass art webpage here.) Her family brought photos dating back to the 1920’s, and we scanned them right there at the reunion, as well as getting pictures of the event. Later, I put them all on a slideshow cd that she can distribute to the whole family–those that were able to come and those that were not! Its great to be able to better access the past while we still have the memories of those around us available to tell stories about the pictures, and identify the people, times and places.
When I went to school the first time, it was A Very Big Thing to be allowed to learn to use the ELECTRIC typewriter. The mimeograph and ditto machines did not allow for “undo” or editing….
Now I have computers and digital tools available to me, and I am going back to school to learn how to better use them. This will no doubt continue to change how I am able to do my work in the future, and I’m looking forward to it! I’m also looking forward to using slides and pictures of past work and using those new tools to present things in new ways. I’m starting with pictures of Madame & Her Shady Ladies dolls in minature sets that were taken by Bobby Grieser in 1992, before I had my digital camera or computer. Now I can use them! You can see more of them at Aunt Acid’s blog, and there’ll be a page and even a calendar later. I’m looking forward using them alot in this coming year of 2009. Hard to think that we’re more than halfway through that first month already, and so much going on! Here’s a view of one of the ladies. She’s about 8 inches tall, and shown with a paper and epoxy resin fan made by my friend Elaine.

Dec 18, 2008
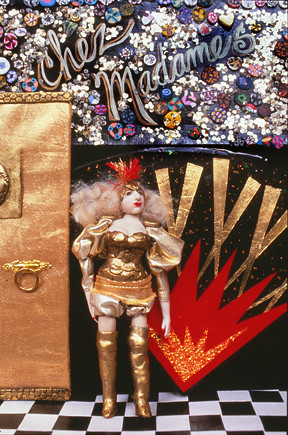
chez Madame’s, originally uploaded by sarajane helm.
A long while back, I made 12 dolls and miniature sets for a photo shoot. Using paper, polymer clay, fabric and whatever was right for the job, I made several different Shady Lady dolls and their environments. Here’s one of the shots! This one is of the petite and buxom bouncer in the Nightclub room. She’s about 9 inches tall. Part of the set is made using an epoxy resin and paper fan made by Elaine Schaeffer.
This is one of the photos taken by Bobby Grieser in 1992. He does wonderful work, and did all the photography in my first two polymer clay books. Unlike my own digital camera work, Bobby’s pictures for me were all done in 35mm film slides. I have several shoe-boxes filled with over a decade’s worth of images. but have had no way to access them for use on the web. Until Now!!!
This year, Santa brought me a new scanner with a slide scanner function, which has been on my list for a long while!!!! (Thank you Santa for making it happen, you know who you are.)
It even came early so that I get to use it in creating some of MY Christmas presents to give in the next week. I’ll be showing off more pics right here too.
Dec 12, 2008
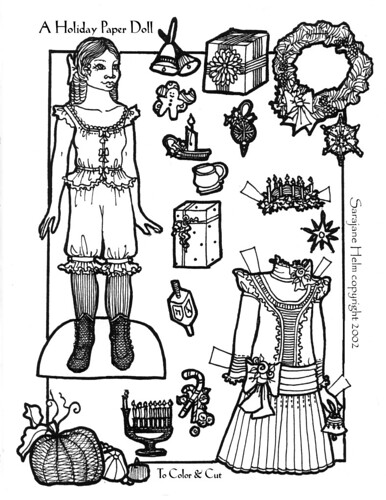
Holiday Paper Doll Page1, originally uploaded by sarajane helm.
Happy Holidays!
In the spirit of the seasons of giving thanks and more, I’m posting this two page set of paper dolls that I drew at full resolution size–please print them out and have fun coloring, or give a set to someone who will! This Victorian Era young miss has a party dress and accessories for celebrating all sorts of holidays including Thanksgiving, Santa Lucia Day, Christmas, Hanukkah, and Soltice. Ring those bells!
I remember when I was younger, and the best presents of the holiday season were art supplies, and the time and freedom to use them. Fresh sheets of white paper, a new box of crayons with LOTS of colors–freshly sharpened colored pencils….those are wonderful things still! Although these days I’m learning to draw with my Wacom digital pen mouse and color with tools in Adobe Photoshop, I still have a fascination with a fresh sheet of plain white bristol board, a sharp pencil, a micro fine tipped ink pen..and then the fun of coloring in the results of my drawings with inks or paints. The computer is a wonderful art supply. But there’s just something about drawing and coloring on a cold winter afternoon when you don’t have to be someplace else like school, or work. Creative play brings about some of the warmest holiday memories still!
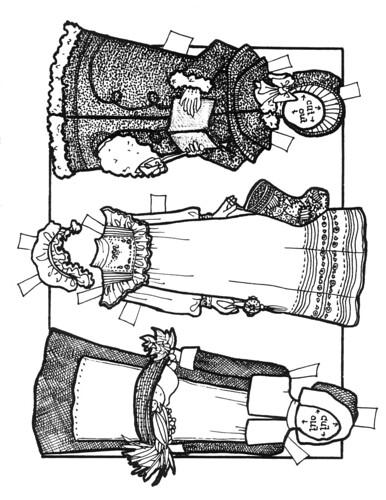
HolidayPaper Doll Page 2, originally uploaded by sarajane helm.
Here’s the second page of this Holiday paper doll set, with a wooly and warm coat and bonnet ready for Yuletide Caroling, a nightgown and cap complete with Christmas stocking ready to hang by the fire, and a seviceable Pilgrim’s gown and bonnet with a basket of harvest fare.
If you’d like to see more please visit Polymarket Press or my etsy store.
Blessings to all in the upcoming year!
Oct 6, 2008
 oh, I do love the time of year when summer is over, winter isnt here yet—and the fall weather starts to make inroads into the garden. There are wonderful holidays at this time, including Halloween, when I’ll be in Houston Texas at the International Quilt Festival again with Judith Skinner, taking lots of new beads, jewelry, faces, and other items made from polymer clay, plus spirit doll kits and more.
The Day Of The Dead gets celebrated around here for more than just one day, as do many holidays. This year my polymer-clay-headed spokesmodel Aunt Acid is taking a turn displaying her flowers and skulls decked out in DOTD finery and seated with her dogs in the front window of Nomad Designs, a fabulous bead bazaar in Boulder Colorado where you can find all sorts of exotic things.
Aug 17, 2008
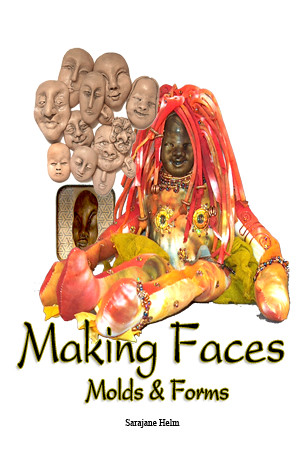
Book Cover–Making Faces Molds & Forms, originally uploaded by sarajane helm.
This is the front cover of my newest book–“Making Faces Molds & Forms”
It is a how-to guide to sculpting faces from polymer clay and using 2part RTV silicones to make molds; and thats just a start! Then I show how to use the molds to make many different faces, and use them in doll making, altered art, collage, jewelry, and more.
This book will debut in late October 2008, in time for the International Quilt Festival in Houston Texas.
(Its ALMOST finished!!)
Jul 25, 2008

I just returned from the Tougaloo College Summer Art Colony in Jackson Mississippi. This year was #12 for this week long celebration of art. Its also the second time that I’ve been there as an instructor. Our class made masks, spirit dolls, icons and boxes, beads and more…all with polymer clay. Click here to read more about it and follow the links to see what we made!
The mask shown above is a full sized domino style mask. We also made a lot of miniature masks, making the original sculpt and then creating silicone molds using Amazing Mold Putty by Alumilite. The bacground in the banner is a digital picture of the night sky with full moon as sseen from campus. The picture didnt come out all that well–but parts of it are beautiful, and as instructor Carmen Hathaway (Digital Dreams) tells her students, the original photograph is just the starting point. I would have eagerly taken her class–or any of the other classes given by VERY talented instructors. Seeing what other artists do, and speaking openly with them about making and marketing art is tremendously inspiring and helpful. I had a wonderful time at the Artists Colony, and I encourage everyone to spend some time this summer viewing the work of other artists and making more of your own!
Jun 6, 2008

We’ve had rain all the first part of this week, and we needed the moisture. It is beautiful in a sunny way today, and we’re starting into the annual dyeing days! Today is prep day–I’ll be mixing dyes, and getting them into the bottles. I just ran off the sheets of labels for the plastic bottles. This year we have:
#03 Golden Yellow
#05 Soft Orange
#8A Pagoda Red
#09 Scarlet
#13 Fuchsia Red
#14A Hot Pink
#15 Amethyst
#18A UltraViolet
#19 Plum
#19A Lilac
#21 Teal Blue
#23 Cerulean Blue
#25 Turquoise
#27 Midnight Blue
#28A AquaMarine
#37 Bronze
#44 BetterBlack
#45 Jungle Red
#47 Chartreuse
#50 JadeGreen
#60 Lavender
#62 PeacockBlue
#64 Orchid
#96 Lapis
#97 Citrus Yellow
#105 Pewter
#111 Black Cherry
#112 Periwinkle
#113 GoldenBrown
#115 Eggplant
#118 Yucca
#312 Strongest Red
#510 Basic Brown
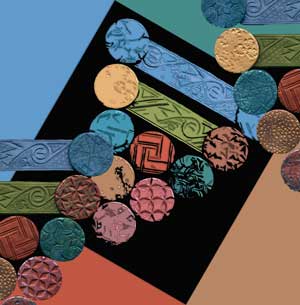
 We use Procion MX series coldwater fiber reactive dyes. We’ve found that labeling the bottles after mixing them up makes it easier to tell what’s what, when you have lots of colors. We also have bagged swatches (that’s the picture at top) so that we know how the color is going to come out, mostly.
Another good tip I’ll share with you is to mix your dyes with water and then pour through a coffee filter into the bottle, that way those pesky little red or turquoise spots are not a problem.
 This year I’m dyeing lots more pieces of turned wood, because I LOVE how last years batch turned out. No ribbons this year–I did a lot of them last year.
They went into the current crop of Spirit Doll Kits along with the cotton and silk fabrics, and polymer clay faces. I’m selling them on Etsy.comwhich is an on-line site presenting handmade and vintage items. I’ll be adding lots more items in the upcoming weeks as I clean out the studio and help fund upcoming shows and projects.

I’ll also be dyeing some t shirt dresses and shorts for my own summertime wardrobe, and backdrop and curtain fabric that will be used in the Aunt Acid Show. They WERE beige muslin–how drab!! They were great when I did out door shows and needed backdrops that did not compete with the displays. But for this particular show, we can take LOTS of color. I’ve been gluing mosaic set pices, and things are coming along splendidly in a visual sense. Now for another big dose of color, and we’ll be onward into the Summer of More Love…and we happen to love art and music and humor, so I’d say these good times to “Be Happening”.
Speaking of summer time fun, I’ll be teaching a week long seminar on using dyed fabrics and polymer clays to make spirit dolls, icons, and masks this summer at Tougaloo College Summer Art Colony. July in Mississippi is time for some HOT ART!!

May 13, 2008
 For every scintillating moment of a fabulous show, there are hundreds and sometimes thousands of hours of creative work that go into making it happen. “My Dad has a barn–my Mom has some costumes in the attic…lets put on a show!”. Mickey Rooney and Judy Garland knew how much went into each shining moment, no matter how easy they made it look in the final cut. Lighting, sets, costumes, hair and makeup, choreography and music, and many more special skill sets and jobs come into play. Things progress from the design phase, where many choices are tried out and refined until the designer has a pretty good idea of what to do to make it all real. Then the production phase takes over, and things have to be flexible in the process of making the designs come to life. Intricate work takes a great deal of time and effort. But oh, my…it really is worth it. At first glance, you’d never know what all goes into making up the event you see on stage. Things start out as ideas, progress to sketches and more specific designs, and with a great deal of attention to detail on the parts of many people , things get done.
Lately we’ve been working on lots of things that tie up together in creative connections. We’re making mosaic tiled tables, set pieces for our upcoming Internet puppet show extravaganza, “The Aunt Acid Show“, encrusted instruments, even a sequined soap box or two. Costumes and props, stage and set construction are all progressing, and Aunt Acid herself is all pulled together and ready for her fittings and her closeups!

This is the design sketch for the show’s set pieces.
Just wait till you see how THAT turns out!
With a show debut date of July 4th, we’ve got a
tremendous amount to do…
Check in again soon and see how its all coming along!
May 2, 2008
 I’ve been working for months now on getting ready for “The Aunt Acid Show” and it’ll be a lot more work to come before we air the first episode. We’re writing the segments, the music, creating the sets, the costumes and props…even the star and supporting cast.
Aunt Acid is a puppet, a performing artiste, a political humorist and a spokesmodel. She’s taken a while to come together , but the progress has been fun, and documented along the way. Her head is polymer clay over papier mache, and now I’ve added the sections pertaining to her body and her hands. These are NOT pc, but rather fabric over wire armature.
Does using two colors of polar fleece for the skin mean she’s bipolar? hmmm….. maybe!
The final stitches are in place, and as soon as she’s had time for her manicure (gotta make the nails!) makeup, and hair she’ll be ready for the photographers.
head http://auntacid.com/originalsyn.html
body http://auntacid.com/auntiebody.html
hands http://auntacid.com/handsoff.html
Feb 27, 2008
 I’ve been having fun playing with face masks, dolls, and beads. All the cotton jersey that I’ve previously dyed has been cut into fat quarters for making into doll bodies and spirit doll kits. I’ve got some premade bodies that were dyed as well, and I’ve put together dozens of kits. Now I’m ready to make more sample versions so people can see what can be done with the kits. Here’s the start of one floral doll. She still needs lots of beads though! It is important to remember that spirit dolls take several sessions to really come together.
 It all takes a long time….but eventually it’ll all be organized together into a how-to book and a lovely display of dolls, kits, and polymer clay faces. This book comes AFTER the new “The Art Of Polymer Clay Masks” in its release date.
 I’m working on the text and pictures at the same time. It’s making for a very busy winter, when you also factor in my “Day Job” building web pages for other artists, musicians, and local businesses.


